
Microsoft Power Apps makes it possible to build structured business applications without writing code. In this tutorial, we’ll create a Project Management Model‑driven App that allows teams to track projects, assign tasks, and monitor progress using Dataverse.
This app will demonstrate how to:
- Create Dataverse tables
- Define relationships between tables
- Build a Model‑driven App
- Customise forms and views
- Use Dataverse to support structured business processes
By the end, you’ll have a working Project Management app that you can extend with automation, dashboards, and approvals in future blogs.
What we are building
We’ll create two related Dataverse tables:
1. Project (Parent table)
Stores high‑level project information such as project name, owner, dates, and status.
2. Project Task (Child table)
Stores individual tasks that belong to a project, including assigned user, due date, and task status.
This allows us to:
- View all tasks inside a project
- Track progress
- Assign work to team members
- Build a structured Model‑driven App interface
Data Model Overview
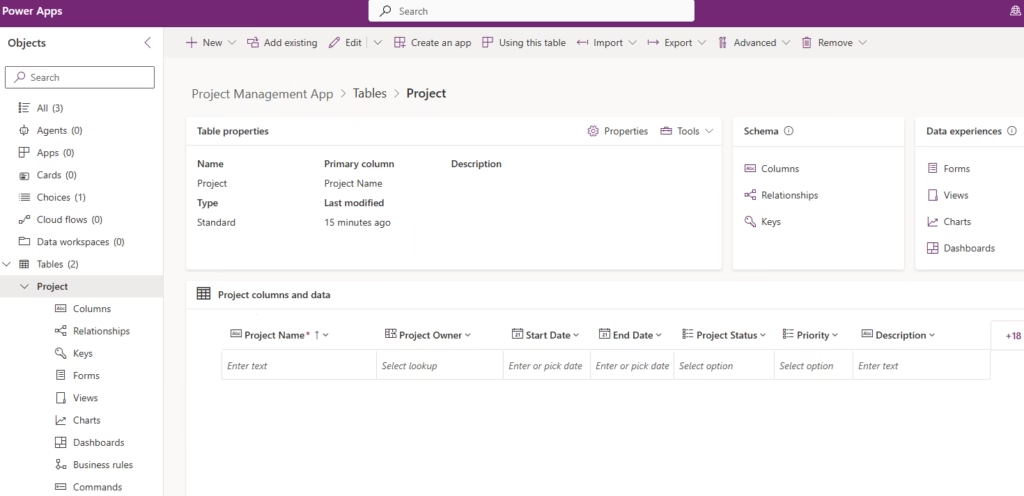
Project Table
- Table Name: Project
- Primary Column: Project Name (Text)
| Column Name | Data Type | Purpose |
|---|---|---|
| Project Name | Text | Primary project identifier |
| Project Owner | Lookup (User) | Owner of the project |
| Start Date | Date Only | Project start date |
| End Date | Date Only | Project end date |
| Project Status | Choice | Not Started, In Progress, On Hold, Completed |
| Priority | Choice | Low, Medium, High |
| Description | Multiline Text | Project summary |
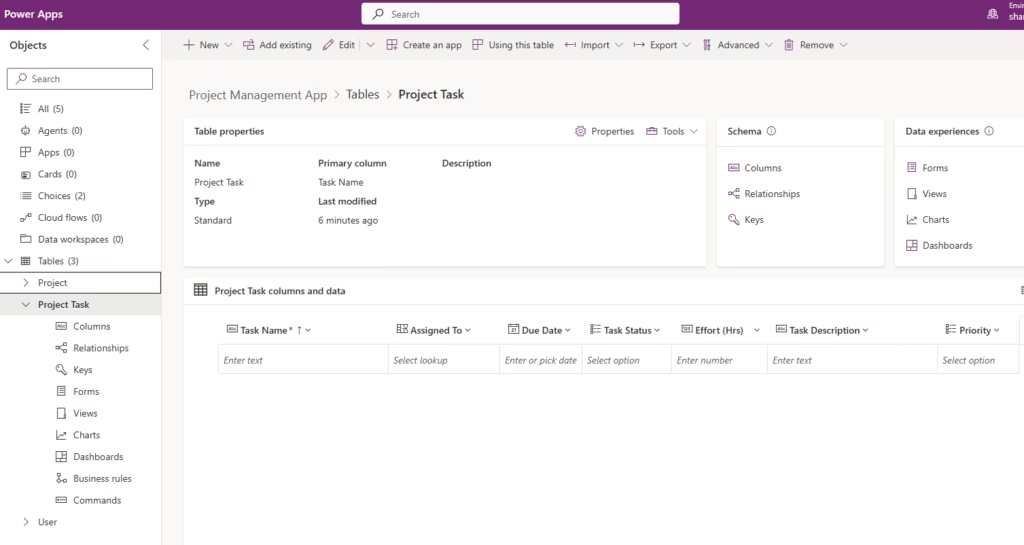
Project Task Table
- Table Name: Project Task
- Primary Column: Task Name (Text)
| Column Name | Data Type | Purpose |
|---|---|---|
| Task Name | Text | Primary task identifier |
| Project | Lookup (Project) | Links task to its parent project |
| Assigned To | Lookup (User) | User responsible for the task |
| Due Date | Date Only | Task deadline |
| Task Status | Choice | Not Started, In Progress, Blocked, Completed |
| Effort (Hours) | Whole Number | Estimated effort |
| Task Description | Multiline Text | Task details |
| Priority | Choice | Low, Medium, High |
Create a Solution
Before creating tables or apps, we’ll create a Solution to keep everything organised.
Open Power Apps Maker Portal
- Go to: https://make.powerapps.com
- Ensure you are in the correct environment (top right).
Create a New Solution
- Select Solutions from the left menu.
- Click + New solution.
- Enter the details:
- Display Name: Project Management App
- Publisher: Choose an existing one or create a new one
- Click Create.
Your solution is now ready to hold all components for this app.
Create the Project and Project Task tables
Create a New Table
- Open your Project Management App solution.
- Select + New → Table.
- Enter:
- Display Name: Project
- Primary Column: Project Name
- Click Save.
Add Columns
Add the following columns:
- Project Owner → Lookup (User)
- Start Date → Date Only
- End Date → Date Only
- Project Status → Choice (Not Started, In Progress, On Hold, Completed)
- Priority → Choice (Low, Medium, High)
- Description → Multiline Text
Create the next Table
- In the same solution, click + New → Table.
- Enter:
- Display Name: Project Task
- Primary Column: Task Name
- Click Save.
Add Columns
Add the following columns:
- Project → Lookup (Project)
- Assigned To → Lookup (User)
- Due Date → Date Only
- Task Status → Choice (Not Started, In Progress, Blocked, Completed)
- Effort (Hours) → Whole Number
- Task Description → Multiline Text
- Priority → Choice (Low, Medium, High)
This lookup column creates the one‑to‑many relationship between Project and Project Task
Build the Model‑driven App
Create the Model‑driven App
- Open your Project Management App solution.
- Click + New → App → Model‑driven app.
- A panel opens on the right. Enter:
- Name: Project Management App
- Description: A model-driven app to manage projects and project tasks.
- Click Create.
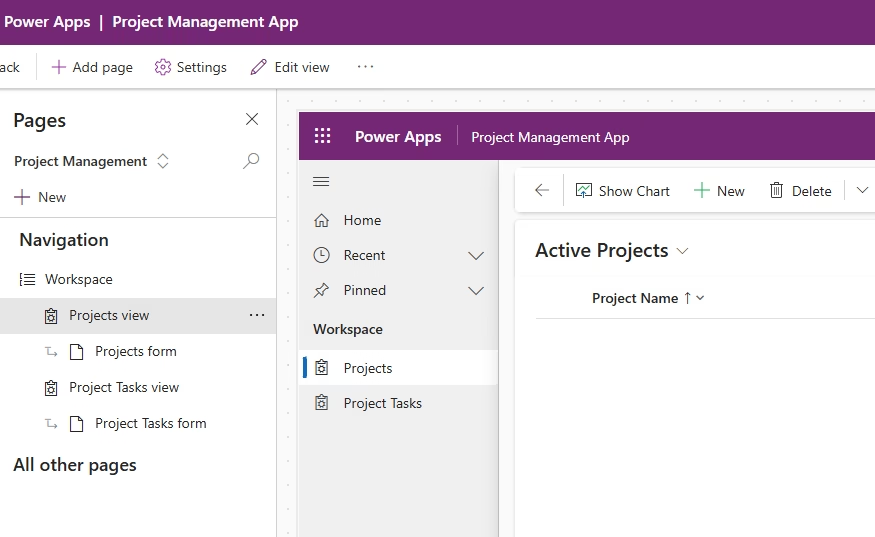
This opens the App Designer
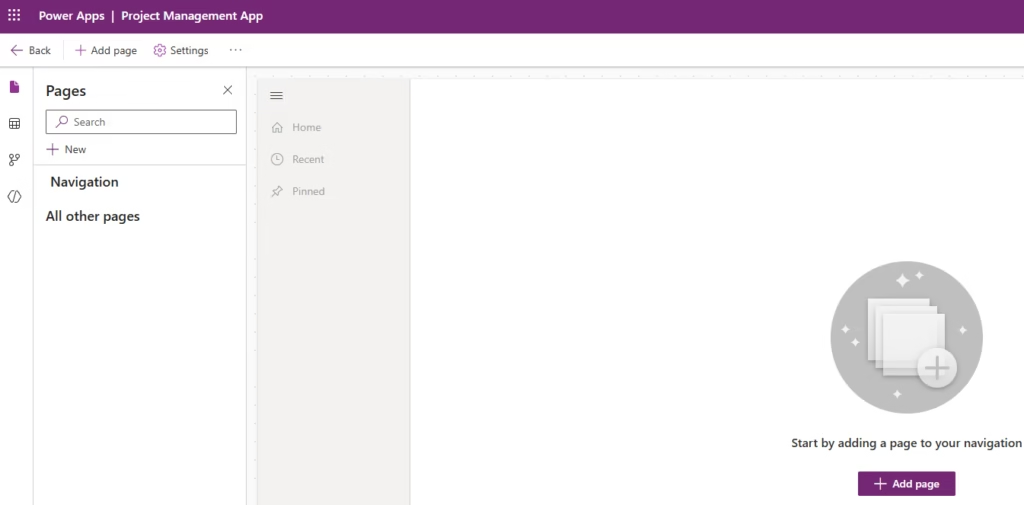
Add the Project and Project Task tables
- In the App Designer, click + Add page.
- Choose Dataverse table.
- Select the Project table.
- Repeat the process to add the Project Task table.
Customise the Forms for Project and Project Task tables
The Project table includes a default Main form, which users interact with when creating or editing projects.
- Go to your Solution.
- Open the Project table.
- Select Forms.
- Open Project – Main.
Customise the form by:
- Arranging fields in a logical layout
- Adding required fields
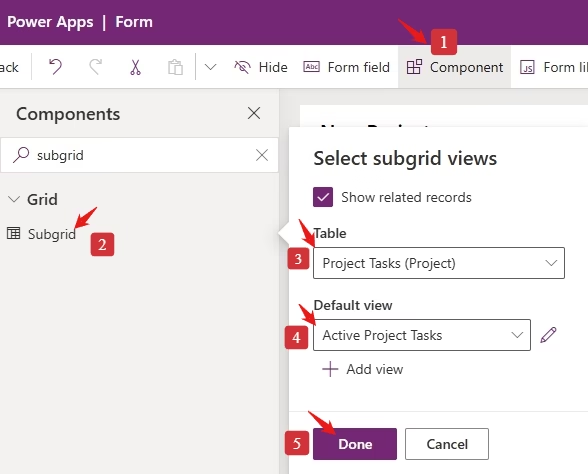
Add a Subgrid to show related Project Tasks
- Click + Component → Subgrid.
- Configure:
- Label: Project Tasks
- Table: Project Task
- Default View: Active Project Tasks
- Show Related Records: Yes (only related records)
- Click Done, then Save and Publish.
Customise the Project Task Main Form
Open the Project Task – Main form and add all required fields in a clear, logical layout. Save and publish the form.
Customise Views
Model-driven apps use views to display lists of records. The default views usually show only the primary column, which isn’t sufficient for project tracking.
- Open the Project table in your solution.
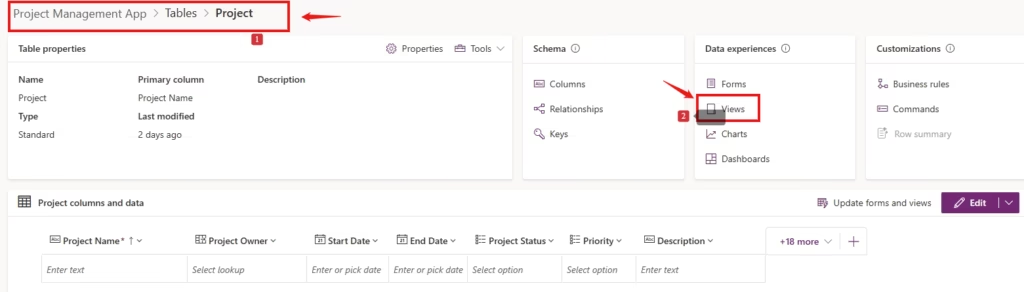
- Go to Views and open Active Projects.
- Add the required columns.
- Arrange them logically.
- Save and Publish.
Update Project Task Views
Repeat the same steps for the Active Project Tasks view, adding relevant fields for task tracking.
Save and Publish the App
Once all tables, forms, and views are configured, Save and Publish the Model-driven App. Your Project Management app is now ready for use and can be extended with automation, dashboards, and reporting.
Test the App
With the tables, forms, and views in place, run the Project Management App to verify that everything works as expected.
Play the app from the App Designer or from your solution. From the left navigation, open Projects, create a new project record, and save it. Open the project you created and use the Project Tasks subgrid to add a task related to that project.
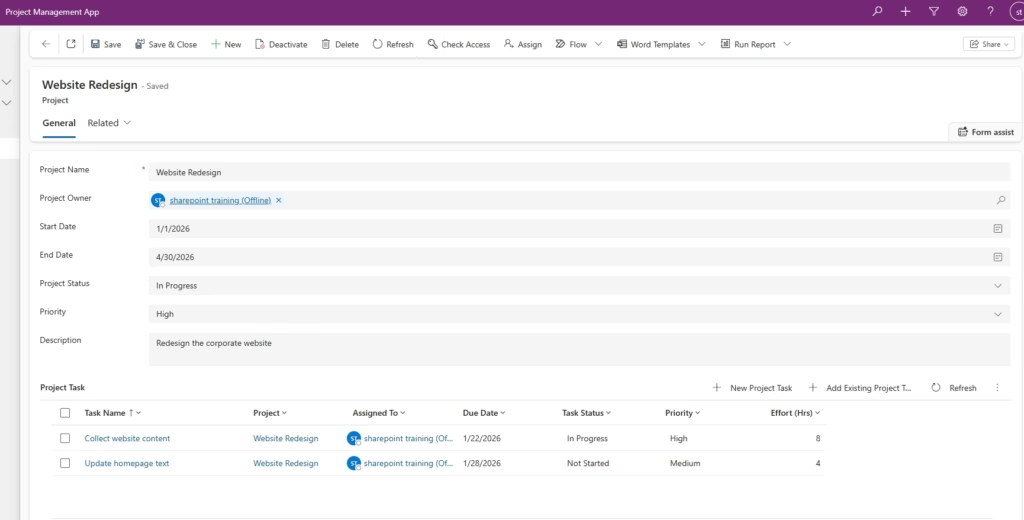
Confirm that the task appears in the subgrid and that it is linked to the correct project. Also check that the Projects and Project Tasks views display the fields you configured.
If the records save correctly and the relationships behave as expected, your Model‑driven App is working successfully.
Conclusion
In this tutorial, you built a complete Project Management Model‑driven App using Dataverse. You created the Project and Project Task tables, defined their relationship, customised the forms and views, added a subgrid to display related tasks, and tested the app to ensure everything works as expected.
This solution now gives you a structured way to manage projects and their associated tasks directly inside Power Apps. It’s a solid foundation that you can continue to enhance with automation, dashboards, business rules, and approvals as your needs grow.