
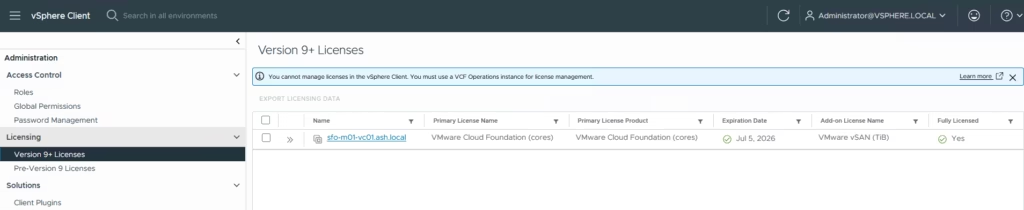
A fresh VCF 9 deployment runs in 90‑day evaluation mode. You must register and license the environment before the evaluation expires. You must use a VCF Operations instance for license management
VCF 9.1 uses a streamlined single licensing model compared to previous releases so instead of juggling multiple product keys for vCenter, ESXi, NSX, vSAN, and other components, everything now rolls up into a single subscription license. This simplifies deployment, compliance, and ongoing lifecycle management—especially for environments that span multiple workload domains.
Licenses are managed through VCF Business Services (VCFBS) portal (Broadcom cloud portal) & VCF Operations (inside your environment) and for Disconnected Mode (Dark Sites), license updates are required every 180 days
What happens if you miss the reporting window?
Hosts enter an expired state. Workloads cannot be powered on until licensing is updated.
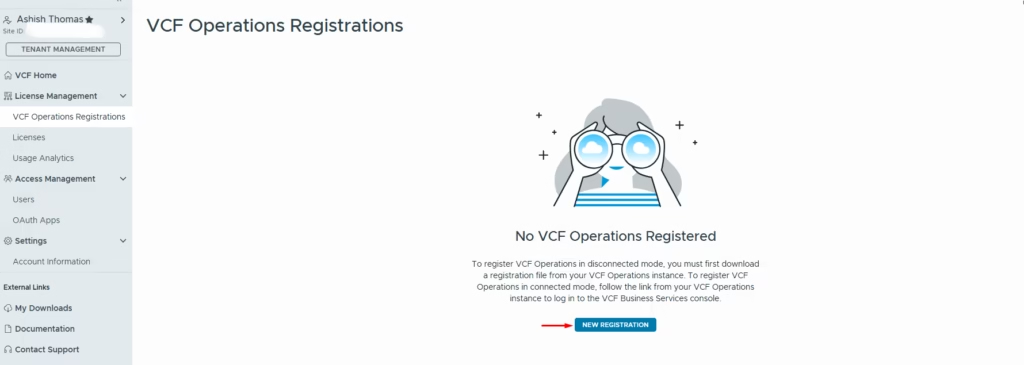
Registering VCF Operations (Disconnected Mode)
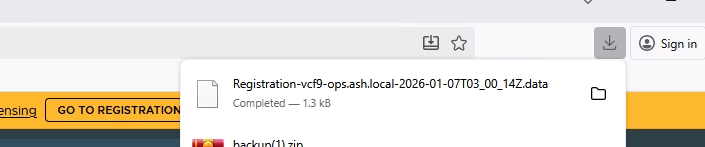
Navigate to: Ops → License Management → Registration and Download the registration file from your VCF Operations instance
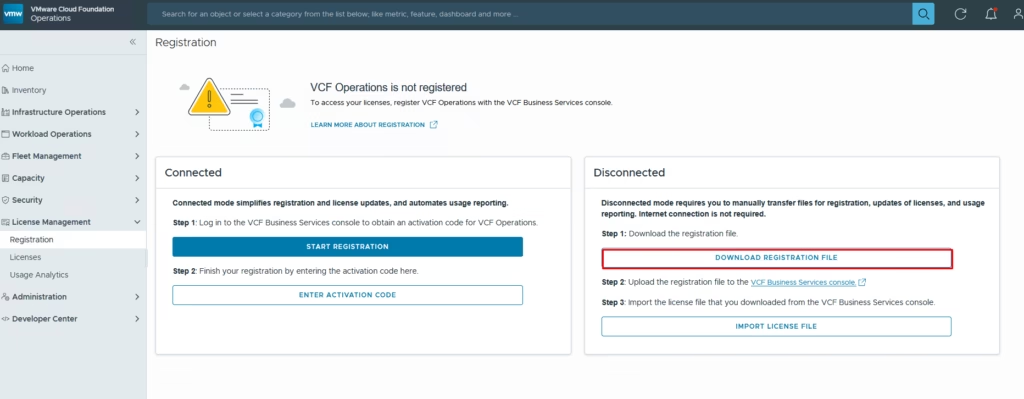
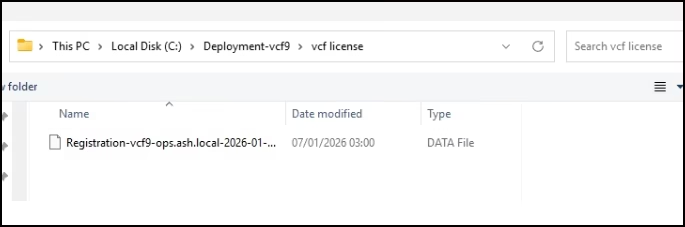
Copy the file to your desktop which has internet access
Log in to the Broadcom VCF business portal https://vcf.broadcom.com/vcf/clm .
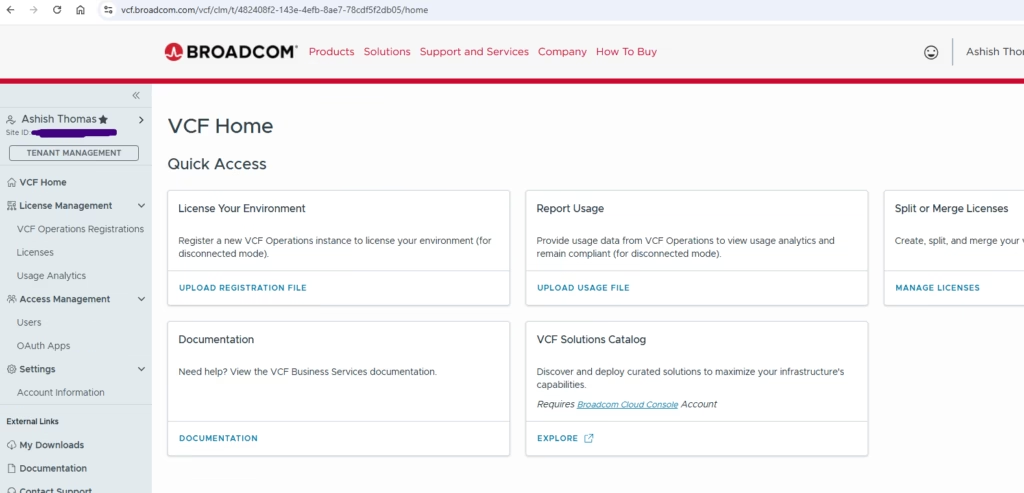
Select the correct Site ID and open the Licenses section. VMUG Advantage licenses also appear here if you’re entitled.
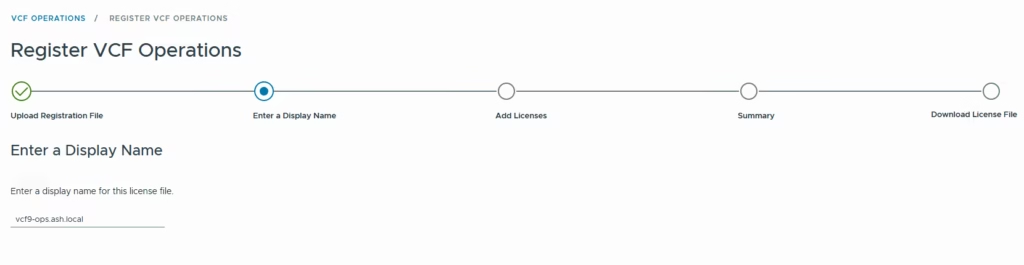
Click on New registration
Upload the registration file you downloaded from VCF Operations

Name your VCF Operations instance
Allocate licenses > Choose how many cores you want to allocate to this environment.
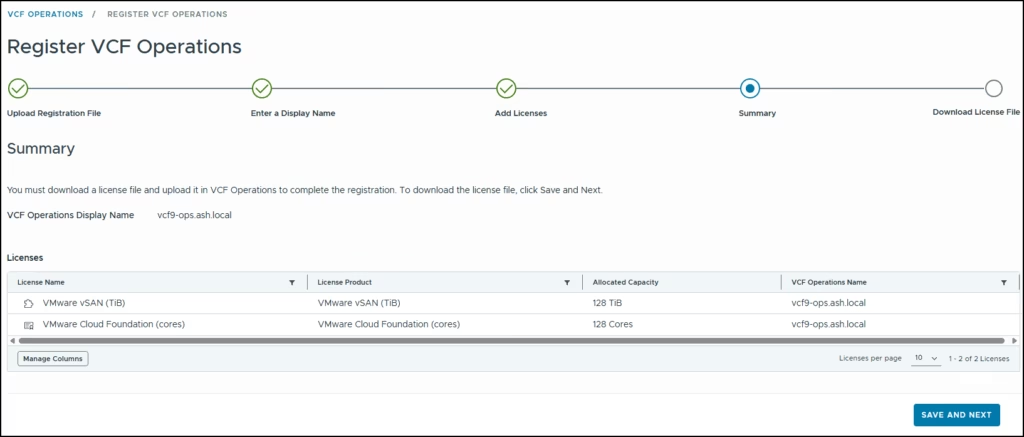
Download the generated license file
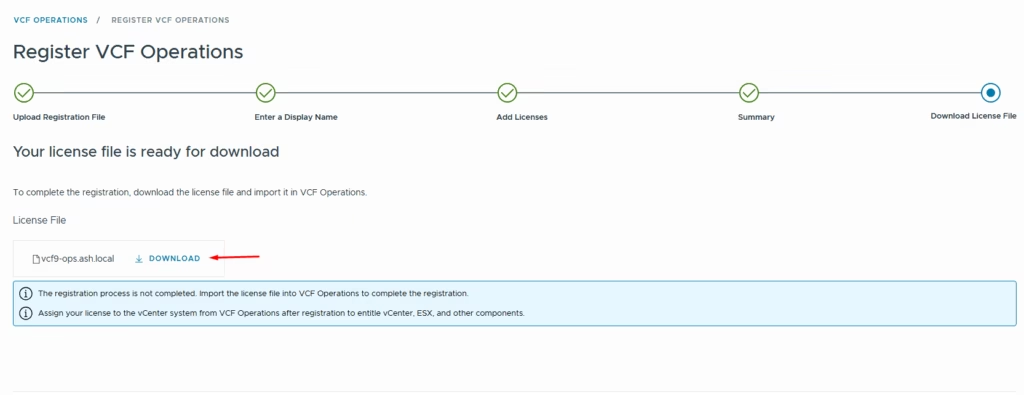
The registration file now need to be imported back into our vcf operations console
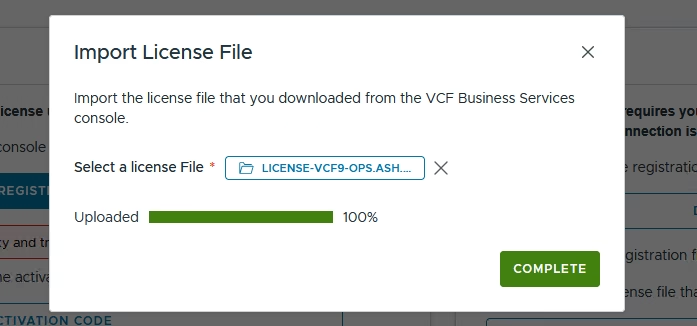
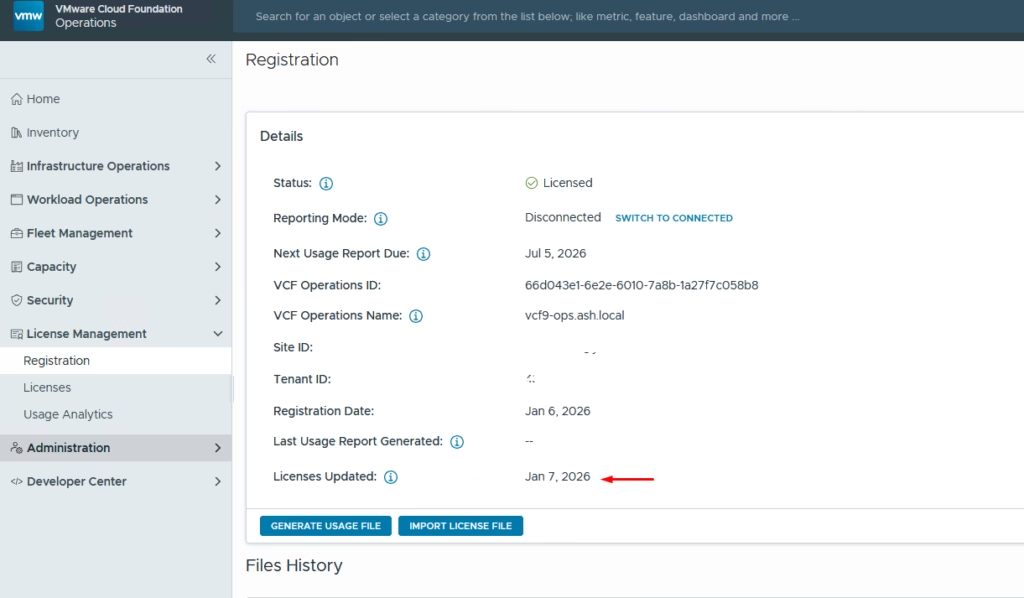
Login to vcf operations, go to license management > registration and click on import the license file
Import the license file into VCF Operations
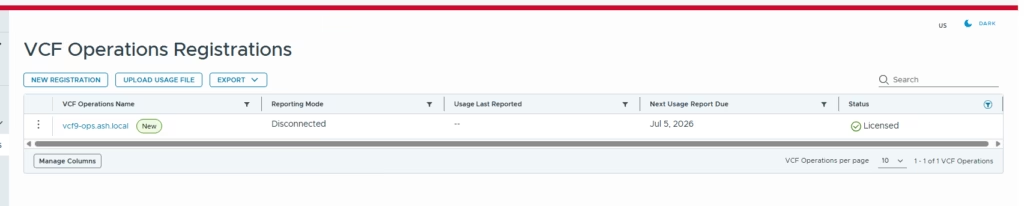
Once imported, VCF Operations will show its registered
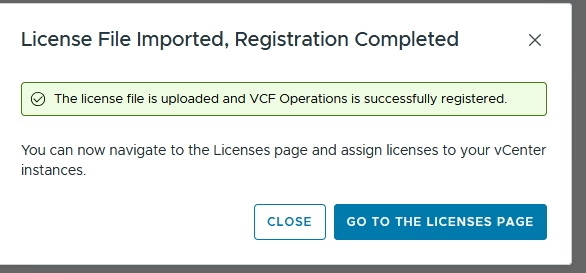
Once imported, VCF Operations will show:
- Status: Licensed
- Mode: Disconnected
- Next usage date: (your 180‑day deadline)
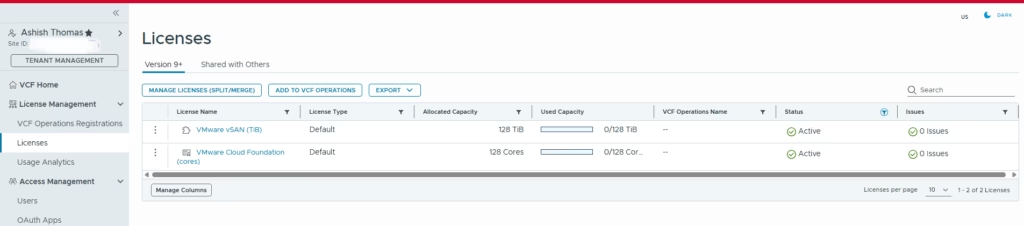
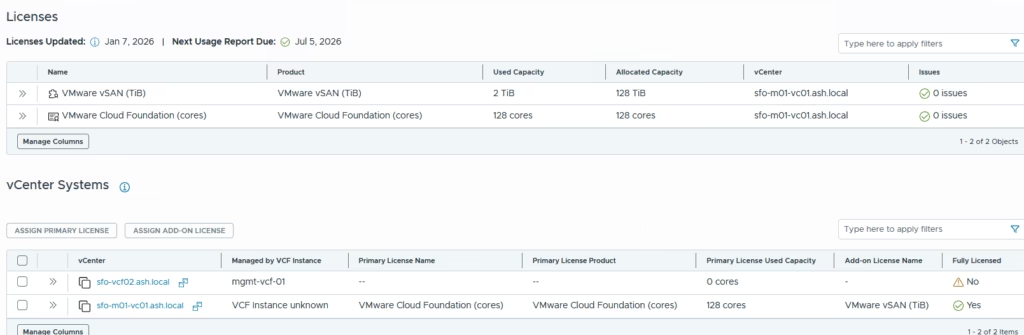
Applying Licenses to vCenter and vSAN
With VCF Operations registered, you can now assign licenses to vCenter.
Go to Licenses → Assign Primary License , Select your VCenter Server
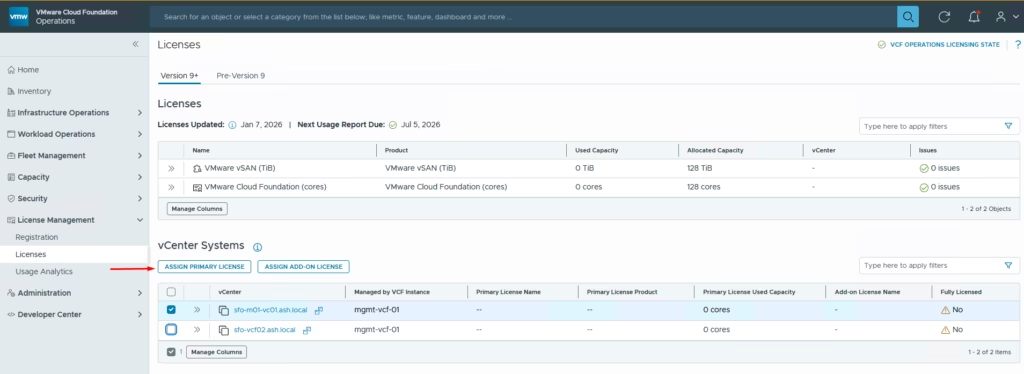
Assign license and apply it to vCenter
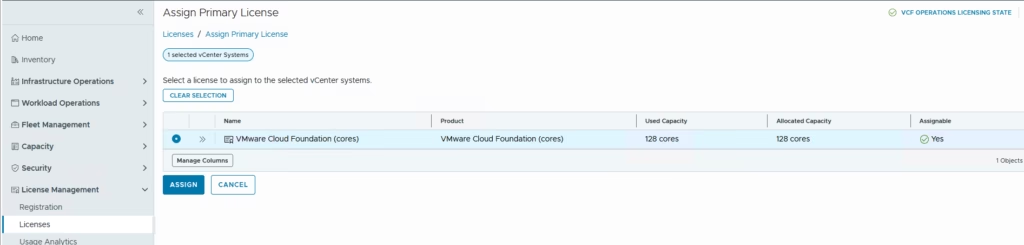
vCenter shows its now fully licensed.
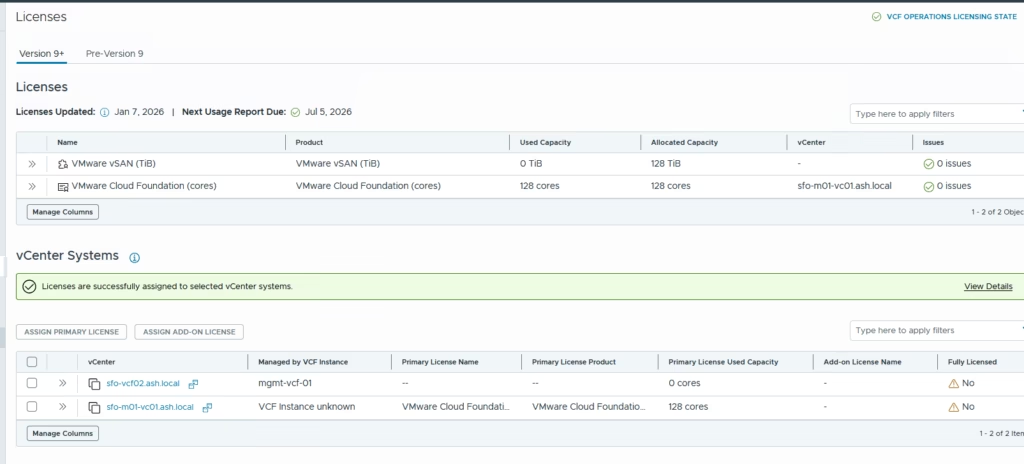
We now need to assign vSAN license as well to it
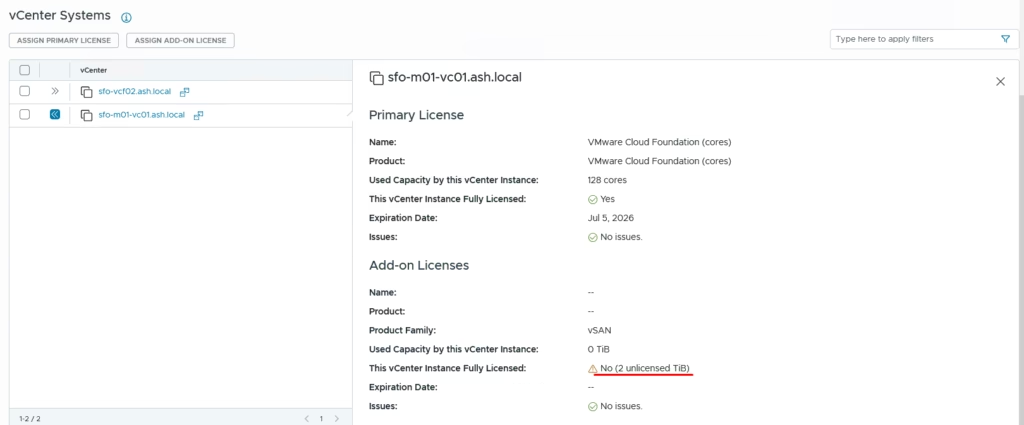
To apply the vSAN add‑on license, back in the license list:
- Select your vCenter instance
- Click Add‑on License
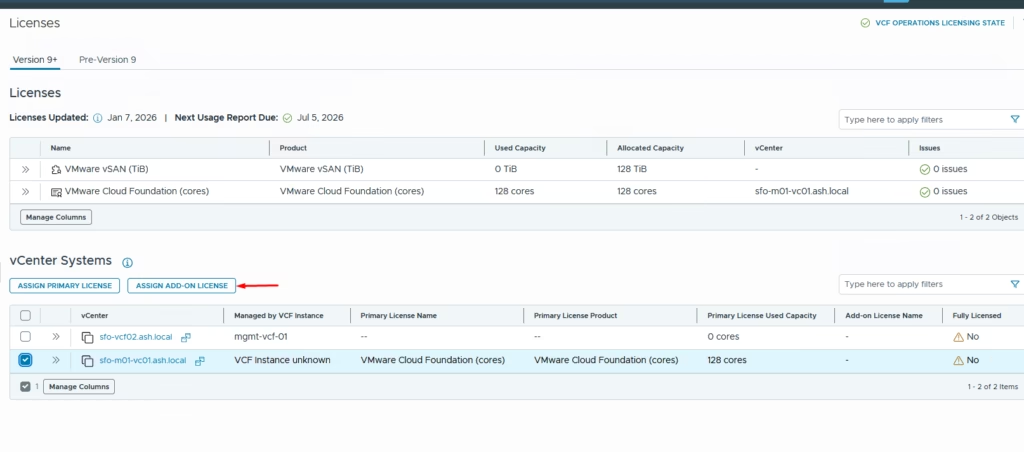
- Choose the vSAN license
- Apply it

Once done, vCenter will show:
- Primary license: Active
- Add‑on license: Active
- Used capacity: Updated based on your core count
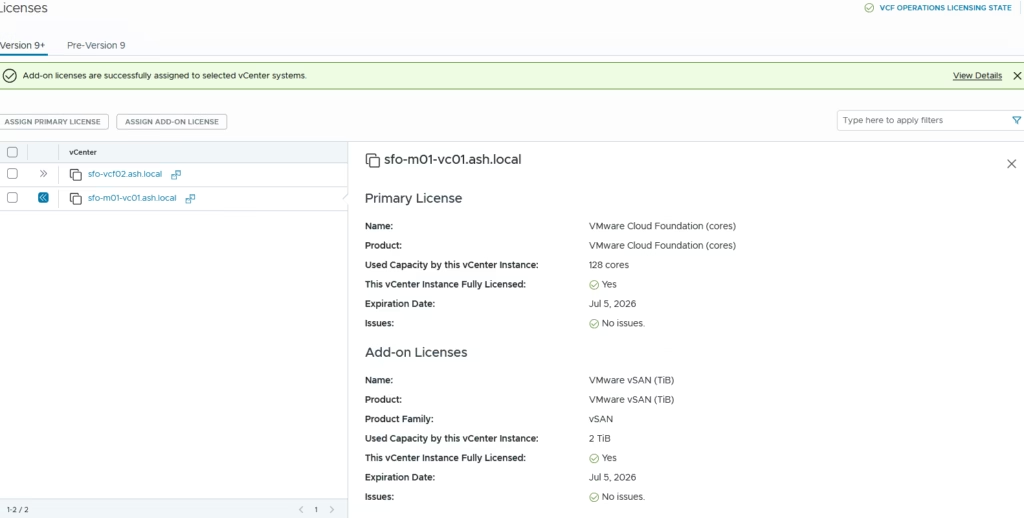
Your entire VCF 9 environment is now fully licensed.
Login to the vCenter to validate
VCF 9’s licensing model is far simpler than previous versions, but the core‑based calculation and 180‑day reporting cycle are important to understand—especially for disconnected environments. Once VCF Operations is registered and licenses are applied to vCenter, the rest of the stack is automatically covered.
If you’re running a home lab or VMUG Advantage setup, the process is identical—just with VMUG subscription licenses.