
Power Pages is a modern, low code platform that allows you to build secure websites that connect directly to your business data. It is part of the Microsoft Power Platform and is designed for scenarios where you want to share information with customers, partners or internal users in a simple and controlled way.
Many organisations already store important information in SharePoint lists, and a common question is whether this data can be displayed on a Power Pages site. The answer is yes. Power Pages can use SharePoint list data through something called a Dataverse virtual table. This approach lets you keep your data in SharePoint while still presenting it on a website without moving or duplicating anything.
This blog explains what Power Pages is, how Dataverse fits into the picture and the exact steps to connect a SharePoint list to your site.
Power Pages
Power Pages is a tool for building websites that connect to your business data. It gives you a visual way to design pages and control how users interact with your information.
Some of the things it lets you do include:
- Build pages, forms and lists that show your data
- Control who can see or change that data
- Customise the look and feel of your site
- Connect to Dataverse tables to show or edit data.
What is Dataverse?
Microsoft Dataverse is the data platform used across the Power Platform. It provides tables, relationships, security roles, views, forms and business logic. Power Pages relies on Dataverse because it needs a structured and secure way to handle data.
A Dataverse virtual table is a table inside Dataverse that does not store data itself. Instead, it connects to an external source and reads the data in real time.
In this scenario:
- Your data stays in SharePoint
- Dataverse creates a virtual table that represents the SharePoint list
- Power Pages uses that virtual table to display the data on your site
This means you do not need to migrate or copy anything. You simply connect and use it.
Connect the SharePoint List to Power Pages
Open your Power Pages site
Open Power Pages and select the site where you want to display your Event Registrations (SharePoint List) data. Go to Data, then Tables.
Add data from an external source
Select Data and choose + New table from external data. When the list of sources appears, select SharePoint.
Power Automate will open automatically. Sign in with your SharePoint account and approve the connection. Once the connection is confirmed, Power Pages will return you to the setup screen. Select the SharePoint site that contains your Event Registrations list, then choose the list.
Power Pages will show a screen where you can map each SharePoint column to a Dataverse field type. When you finish mapping the fields, select Finish.
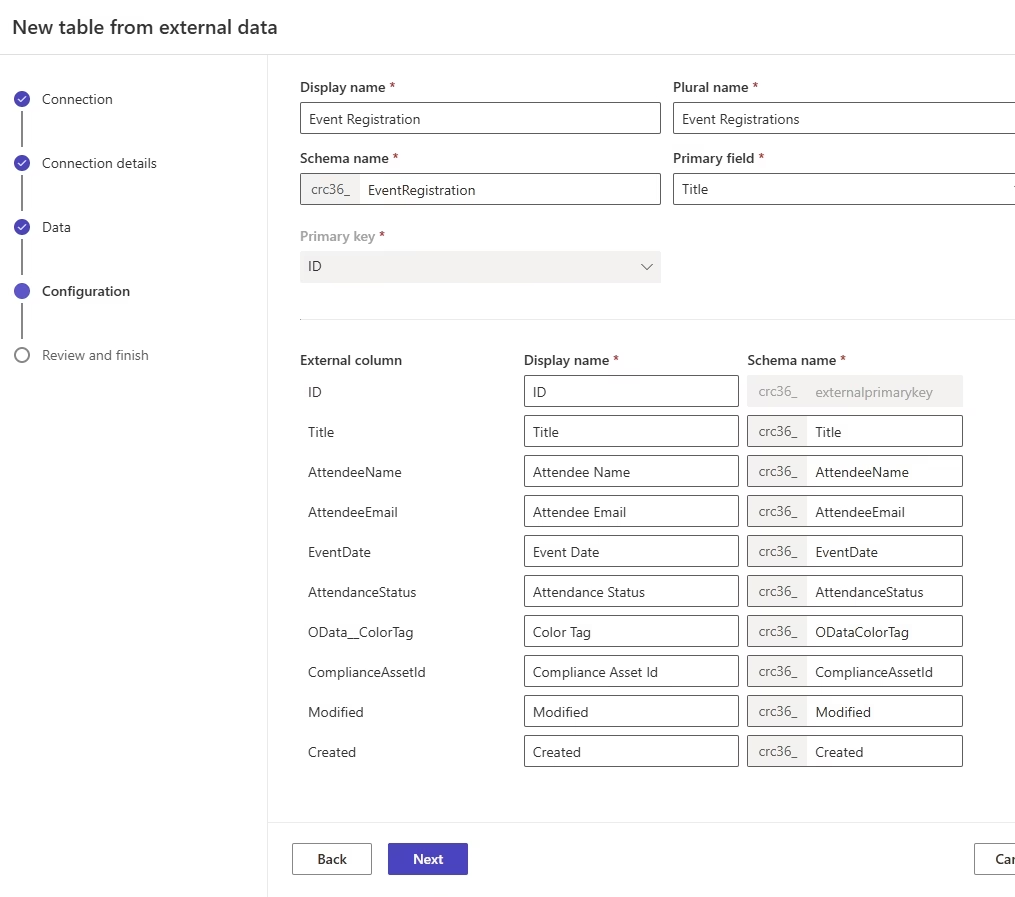
Power Pages will now generate a Dataverse virtual table that mirrors your Event Registrations list. Your data remains in SharePoint. Dataverse simply provides a structured way for Power Pages to access it.
Any changes in SharePoint will reflect in Power Pages, and vice versa (depending on connector capabilities).
Add the Event Registrations data to your page
Go to Pages and open the page where you want the list to appear.
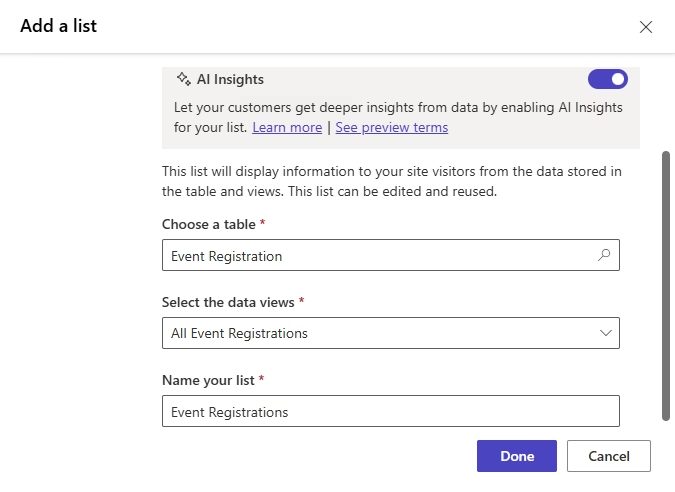
Select Add component and choose List.
When the data source options appear, choose virtual table created from your Event Registrations list.
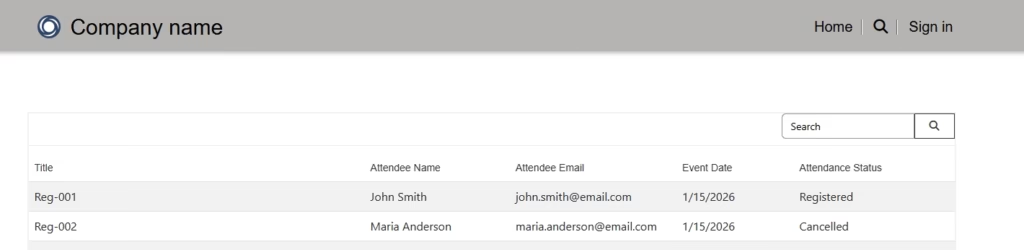
Power Pages will generate a table view that displays your SharePoint data.
Set Table Permissions
Without table permissions, your list may appear empty to visitors.
Power Pages uses Dataverse table permissions to control who can see or interact with data.
To set permissions:
- In the Pages, click on the List component
- Select Permissions from the toolbar
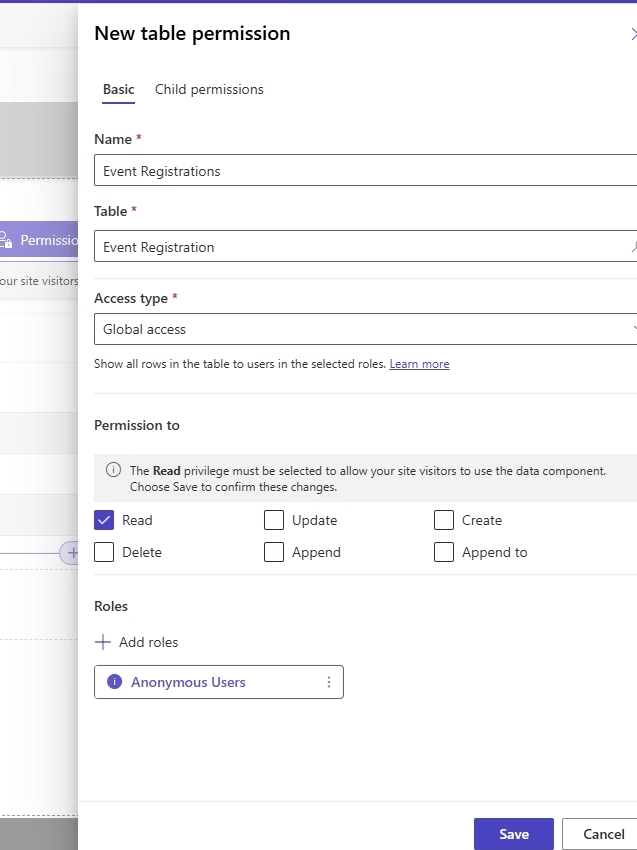
- Click New permission
- Name: Event Registrations
- Table: Event Registrations (virtual table)
- Access type: Global access
- Permission: Tick Read
- Roles: Select Anonymous Users if the page is public
Click Save.
When setting up table permissions, you must choose an access type. This defines which records the permission applies to.
Here’s a quick summary:
- Global access – Applies to all records in the table. Use this for public lists.
- Contact access – Applies only to records linked to the signed-in user’s contact record.
- Account access – Applies only to records linked to the user’s organisation.
- Self access – Applies only to records created by the signed-in user.
Edit the View to choose which columns appear
The default view usually shows only the Title column. To display the correct fields, you must edit the view.
To do this:
- Click the List component.
- On the toolbar above the list, select Edit views.
- Open the view you want to modify.
- Add the columns you want to show.
- Arrange the columns in the order you prefer.
- Click Save and publish
Style the list
Use the design tools to adjust layout, colors, fonts and spacing.
Sync and Preview the site
Click Sync to update all the changes and Select Preview.
This lets you confirm that:
- The correct columns appear
- The Event Registrations data is visible
- Permissions are working
Summary
Connecting a SharePoint list to Power Pages using a Dataverse is a practical way to reuse data you already have. It keeps your information in SharePoint while giving you a clean and secure way to present it on a website.
The Event Registrations example shows how simple the process can be. Once the connection is set up, you can build pages, add lists, edit views, rename headers, style your site, set permissions and preview your changes before publishing.