
Many teams receive documents through email like invoices, resumes, or reports. Downloading each file and uploading it to SharePoint manually can be time consuming and repetitive. With Power Automate, you can create a flow that saves only the files you require, directly to SharePoint. This reduces manual effort, helps avoid mistakes, and keeps your document library organized.
This guide walks you through creating a simple cloud flow that saves PDF attachments from your emails into a SharePoint library.
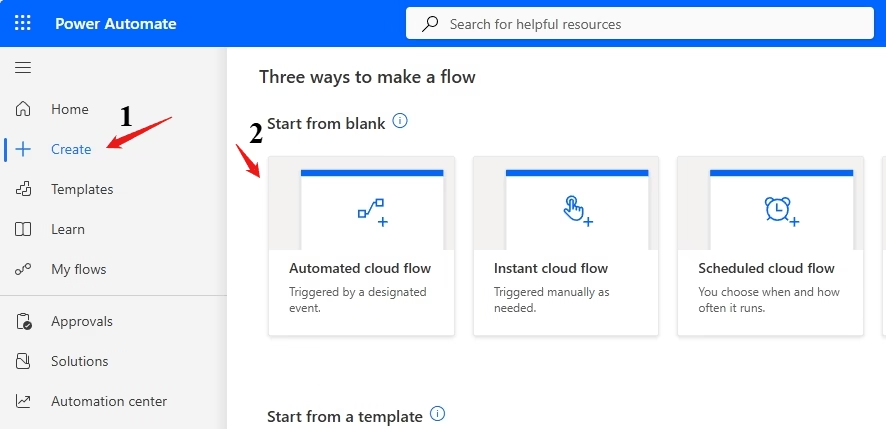
Create an Automated Cloud Flow
Go to Power Automate and click Create, then choose Automated Cloud Flow.
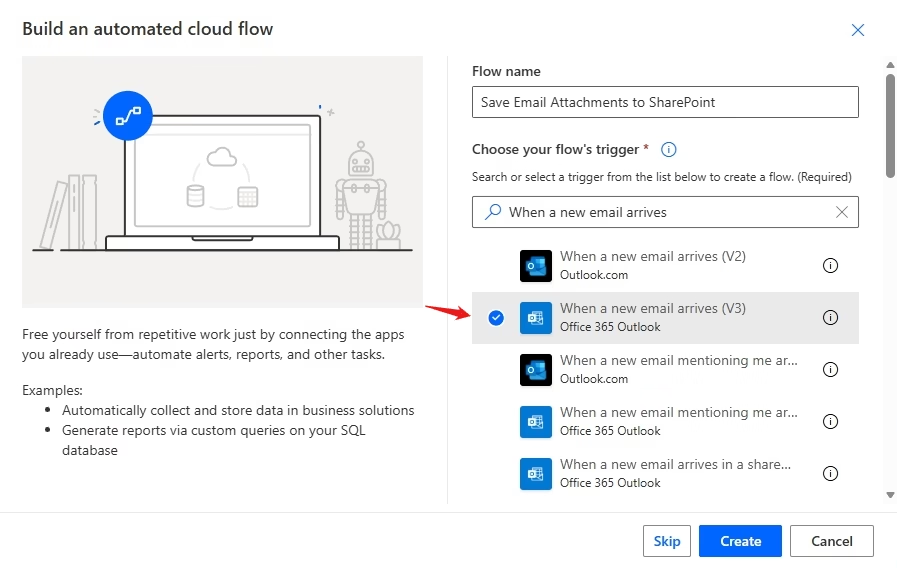
Give your flow a name such as Save Email Attachments to SharePoint. For the trigger, search for When a new email arrives (V3) and select it. Click Create.
Configure the Email Trigger
A trigger is the event that starts the flow. In this case, the flow starts whenever a new email arrives in your mailbox.
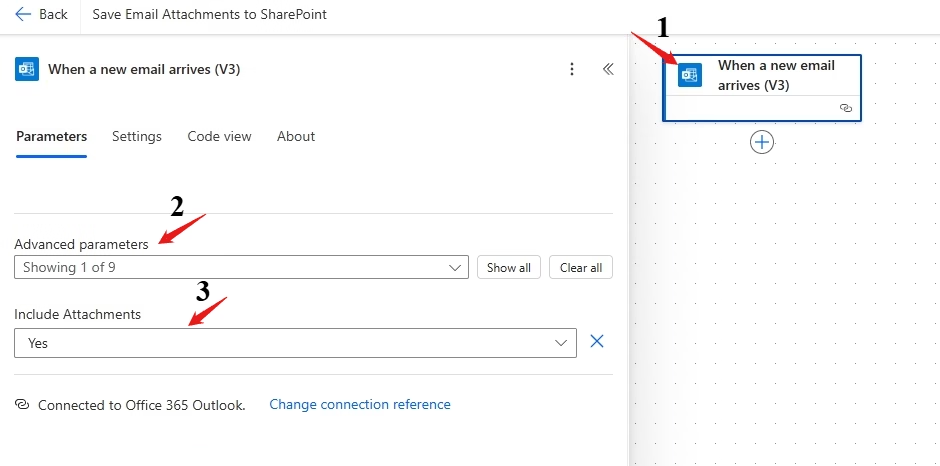
To configure the email trigger, click on the ‘When a new email arrives (V3)‘ trigger, and select Include Attachments from the list of Advanced parameters. Choose Yes for Include Attachments.
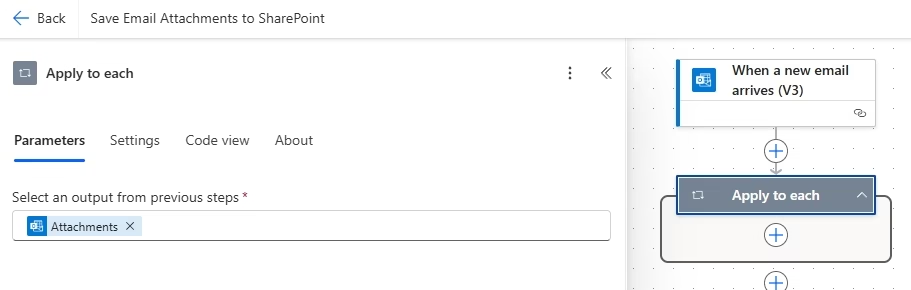
Add an Apply to Each Loop
Click + New step to add an action, then search for Apply to each under Control.
In the field Select an output from previous steps, choose Attachments from the dynamic content.
This loop processes each attachment individually, even if an email contains multiple files
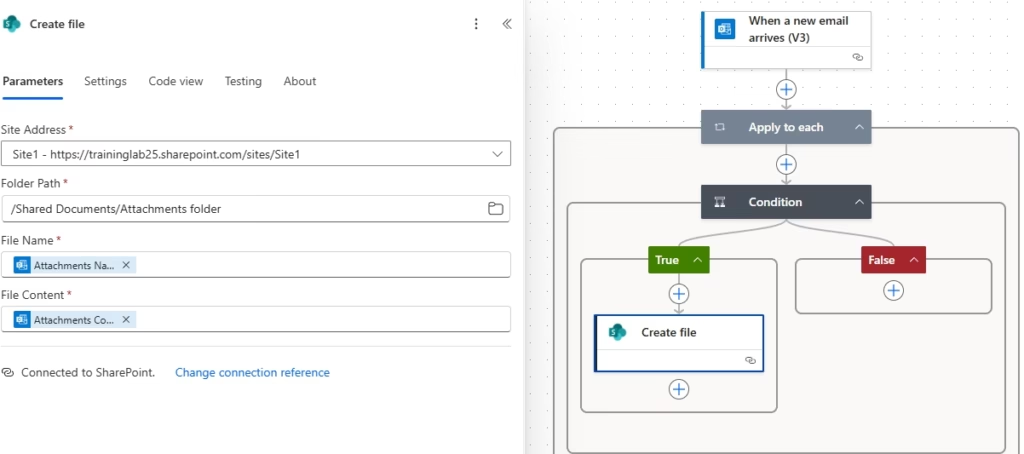
Add a Condition to Filter Files
Click + New step under the Apply to each action and select Condition. Configure the condition so that the Attachment Name ends with ‘.pdf‘.
This ensures the flow continues only when the attachment is a PDF.

Configure the True Branch to Save PDFs to SharePoint
If True, add the Create file (SharePoint) action so that the PDF gets saved into your chosen folder and if False, you can leave this empty (meaning non‑PDFs are ignored) or add other actions (e.g., save files to a different folder, send a notification, etc.).
Inside the True branch of the condition, add the Create file (SharePoint) action.
- Set Site Address to your SharePoint site.
- Set Folder Path to the library/folder where you want attachments saved.
- For File Name, choose Attachments Name from dynamic content.
- For File Content, choose Attachments Content from dynamic content.
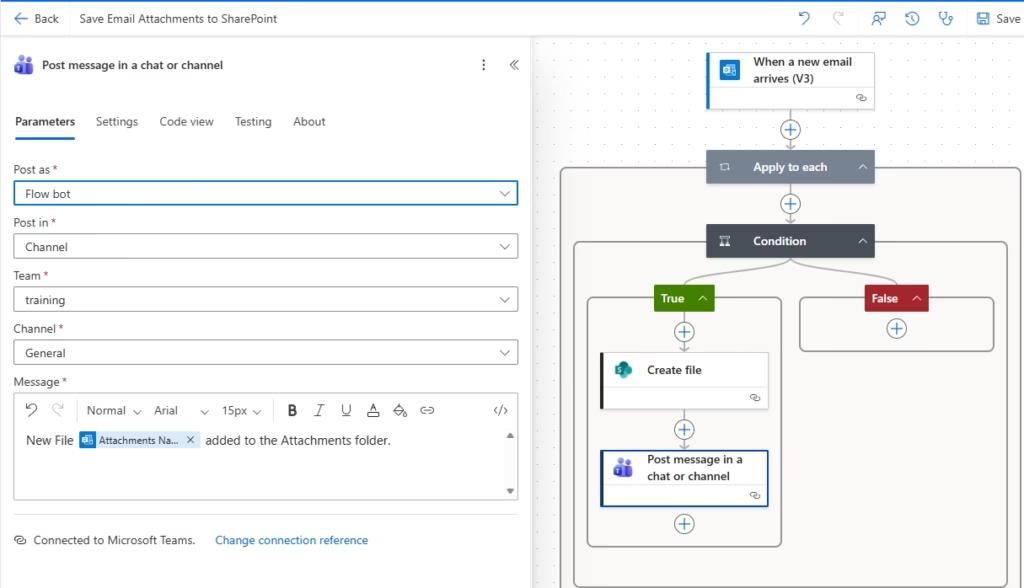
Notify Your Team in Microsoft Teams
To keep the team updated, add a Post a message in a chat or channel action from Microsoft Teams right after the SharePoint step.
Choose your Team and Channel, then include a message using dynamic content (like the attachment name,etc).
This way, every time a PDF is saved, your team gets an instant notification in Teams.
Test the Flow
Save and test the flow.
Send an email to yourself with a PDF attachment. The file will appear in the SharePoint library, and a notification should appear in your Teams channel.
With just a few steps, you’ve automated a repetitive task and reduced the chance of human error. Your SharePoint library stays organised, your team stays informed, and you save valuable time.