
IDS/IPS acts in spotting lateral movements, tracking traffic in dashboards, and giving policy insights to fine‑tune your defences. Intrusion Detection Systems (IDS) and Intrusion Prevention Systems (IPS) always are scanning for suspicious activity, ready to alert you or step in to stop trouble before it spreads.
What is IDS?
It quietly monitors network or system activities, scanning for anything out of the ordinary or known attack patterns. IDS works behind the scenes, alerting your security team when something seems off, but it doesn’t jump in to block the threat itself.
- Role: Detects suspicious activity
- Action: Alerts your security team
- Limitation: Does not block threats directly
What is IPS?
An Intrusion Prevention System (IPS) takes things a step further. It’s not just watching—it’s ready to act. IPS can block or mitigate threats in real-time, stopping attacks before they reach their target.
- Role: Detects and blocks malicious activity in real time
- Action: Stops attacks before they reach their target
- Strength: Automated prevention without waiting for human intervention
Key Differences Between IDS and IPS
| Feature | IDS | IPS |
|---|---|---|
| Operation Mode | Passive (detects and alerts) | Active (detects and blocks) |
| Traffic Handling | Monitors a copy of traffic | Inline, inspects and controls traffic |
| Response | Alerts administrators | Blocks or mitigates threats automatically |
| Use Case | Monitoring and alerting | Real-time threat prevention |
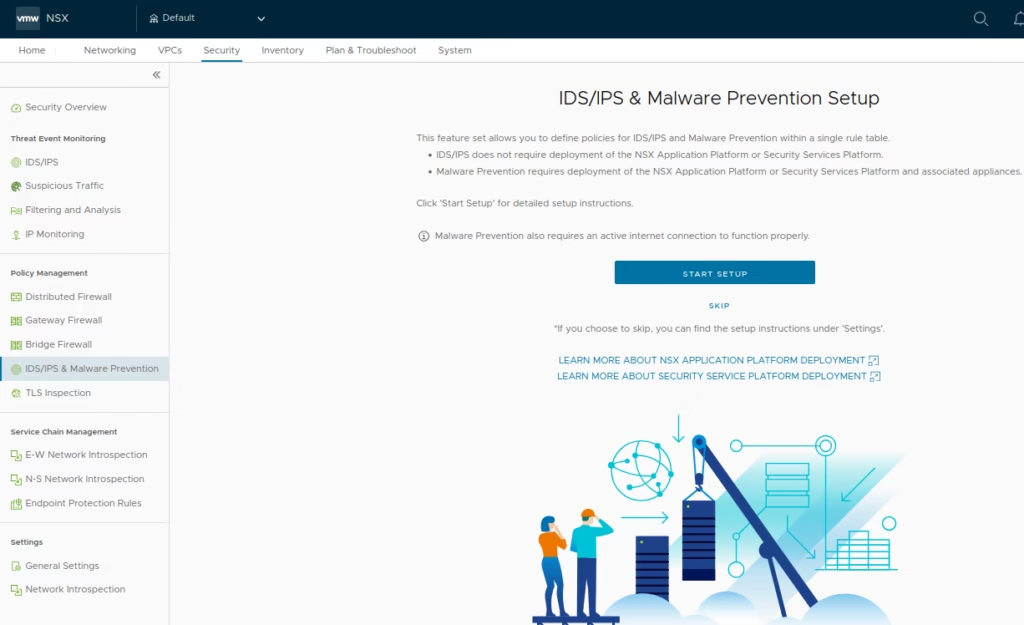
Setting Up IDS/IPS in NSX
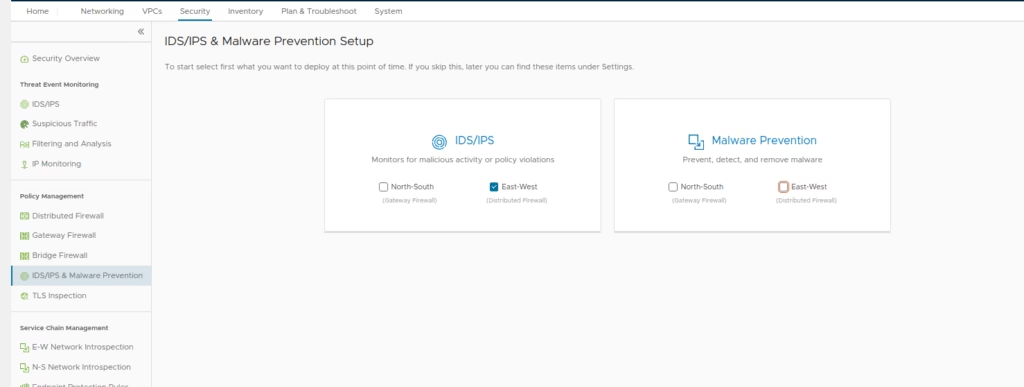
Navigate to Security Tab > Go to IDS/IPS & Malware Protection
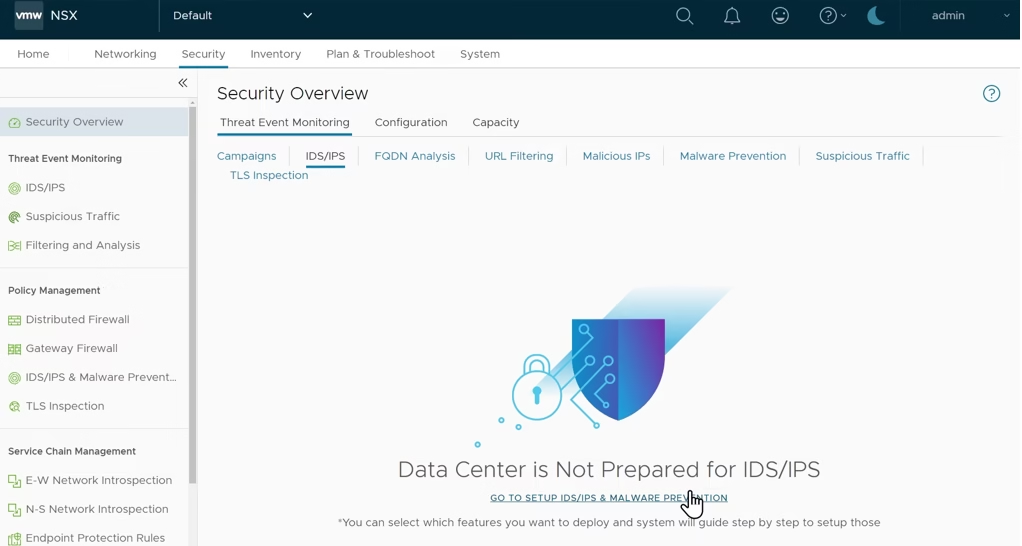
Click Start Setup Wizard
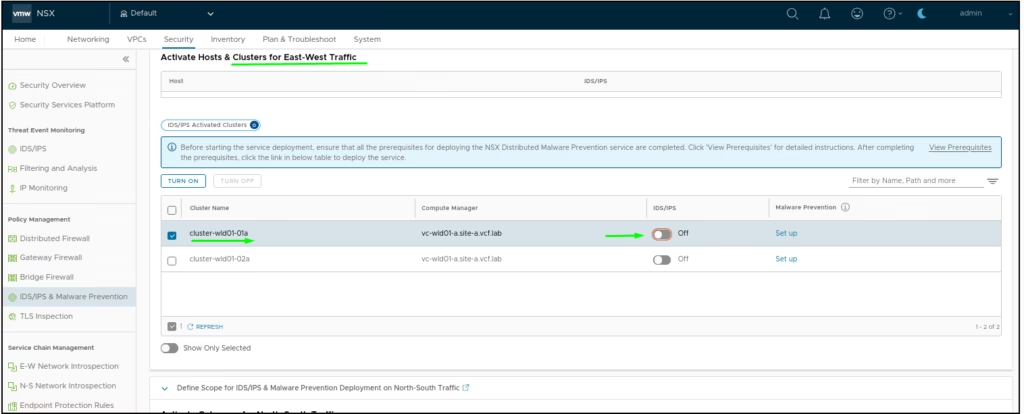
Enabling IDS/IPS on Distributed Firewall
Select where IDS/IPS services will run (e.g., Distributed Firewall)
If no direct internet connection, configure NSX Proxies
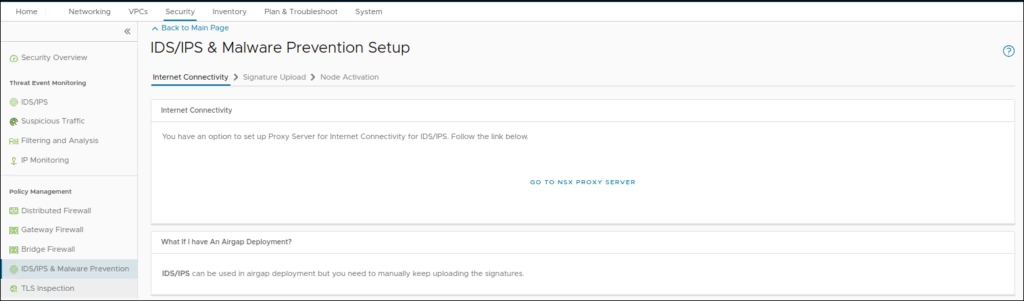
Sync or manually upload the signature set

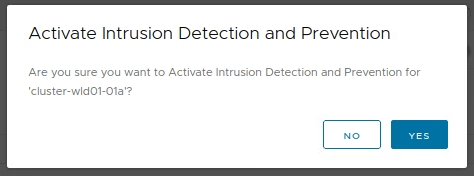
Activate IDS/IPS
Under Malware Prevention, click Yes to activate
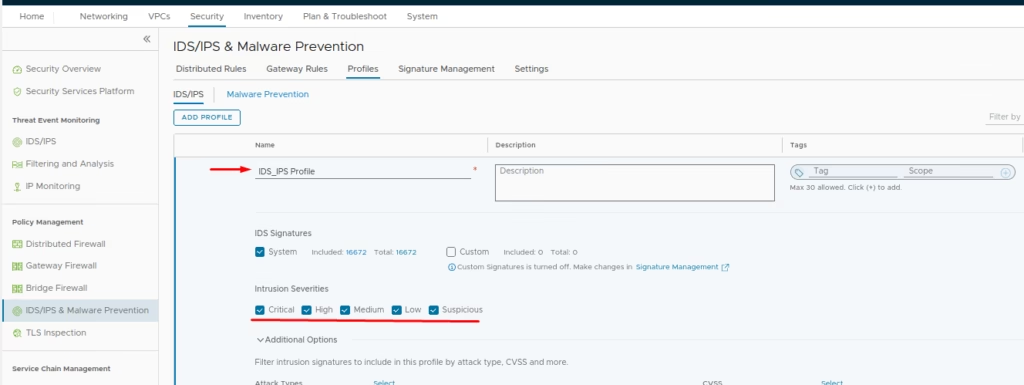
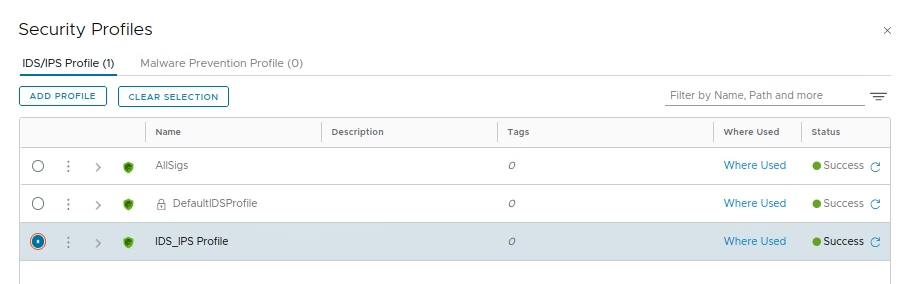
To create IDS Profile to contain all our signatures, we create a IDS Profile
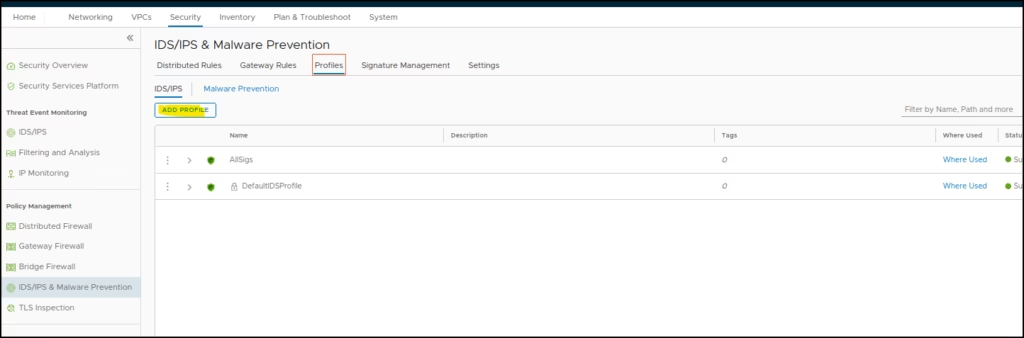
Go to Profiles > Add IDS Profile > Name the profile and select intrusion severities
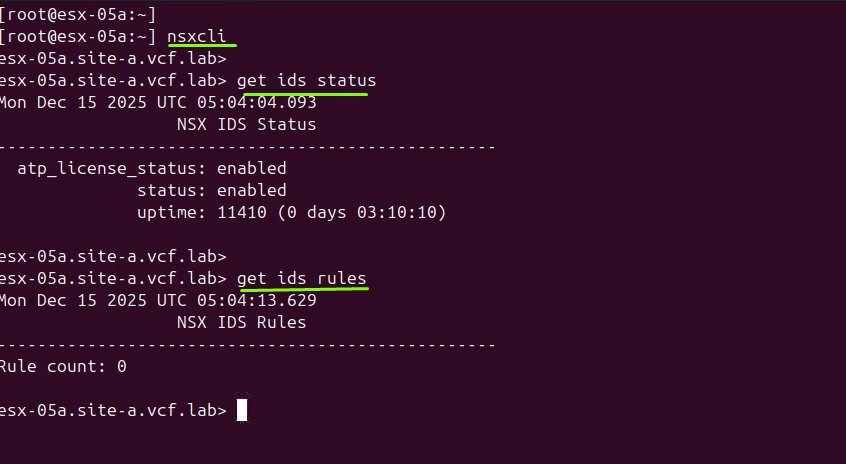
The rules are now ready

Prior to applying the rule lets do a quick test from cli to see how it shows it up now
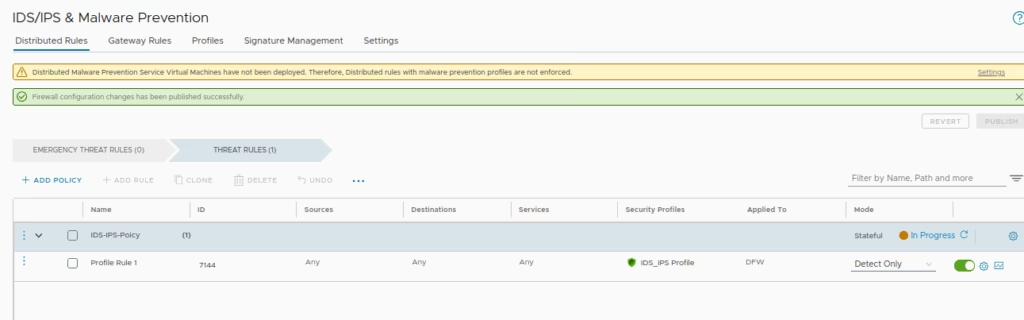
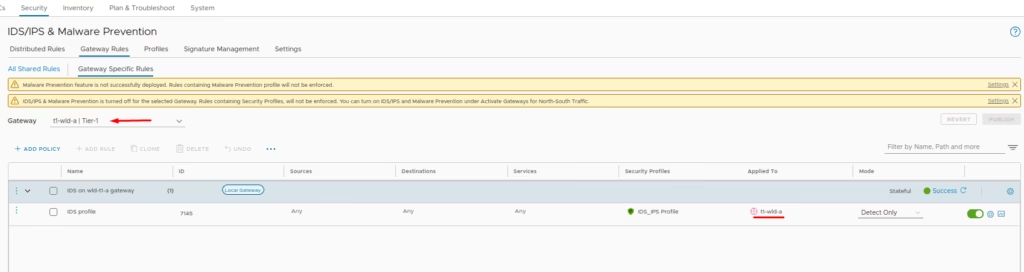
Under IDS/IPS & Malware Protection > Add Policy
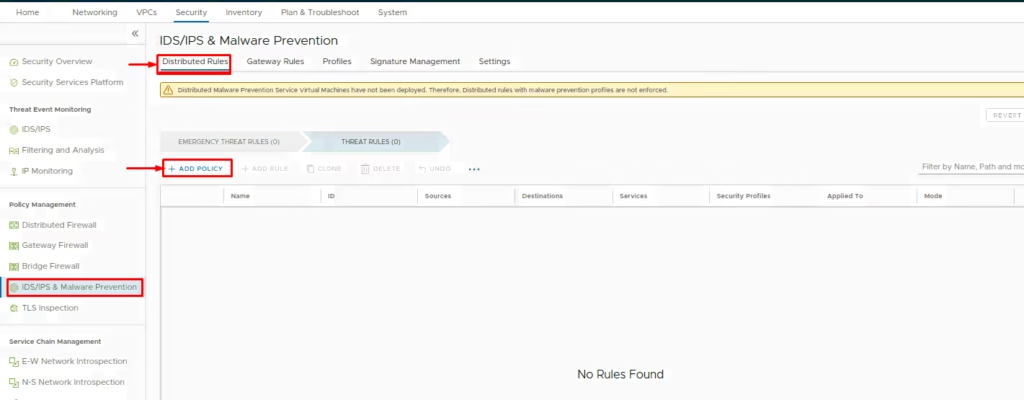
Name it (e.g., IDS-IPS-Policy)
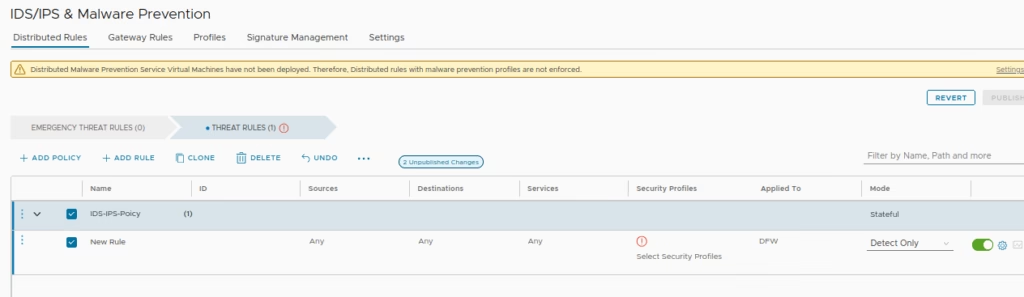
Add a rule and attach the IDS profile we created earlier
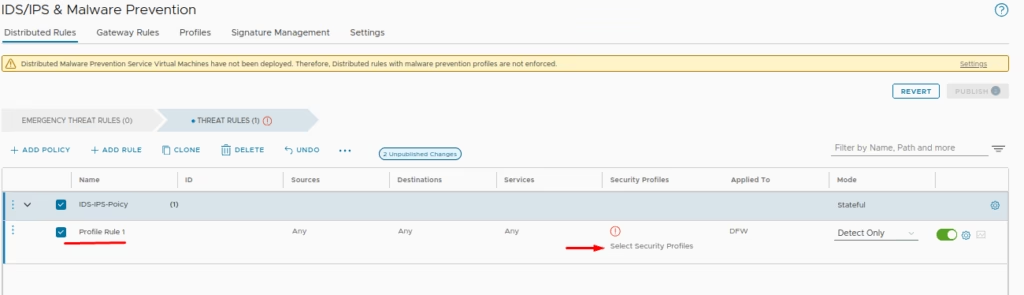
Choose the security profile
Set mode to Detect Only for initial testing
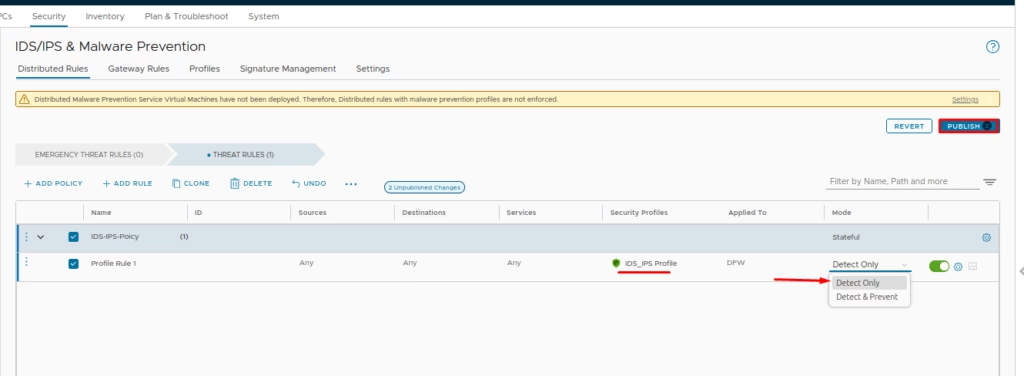
Click Publish to apply rules
Run IDS rules command to confirm application

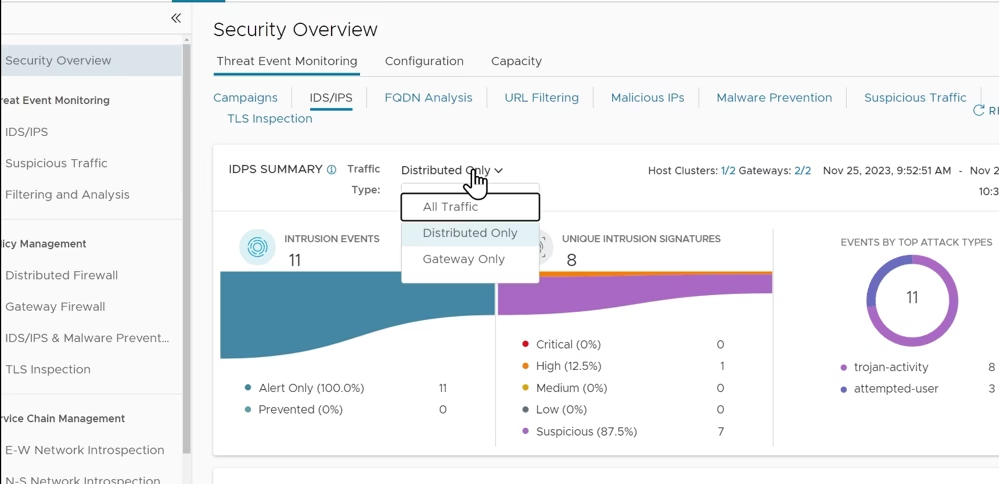
Check Security Overview → set traffic type to Distributed
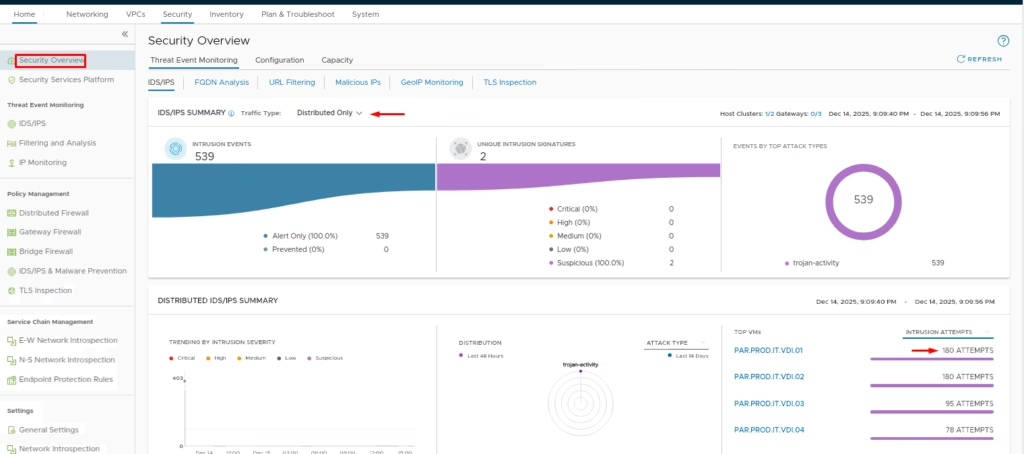
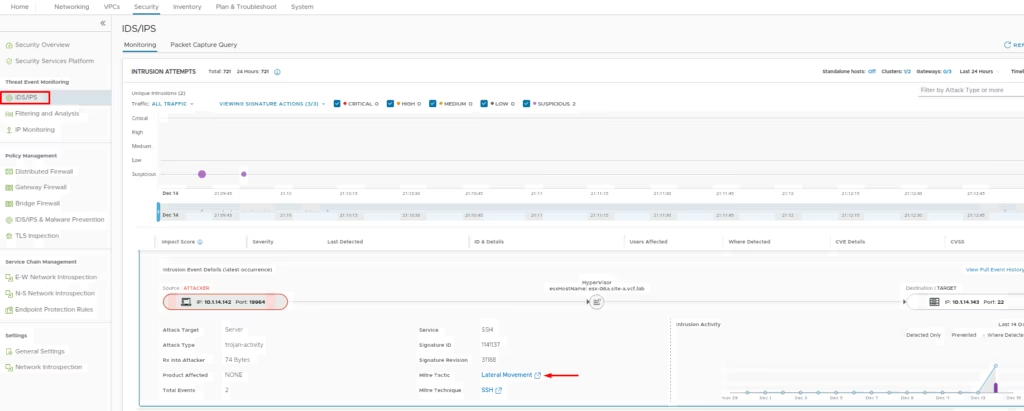
Monitor Threat Event Monitoring > IDS/IPS for intrusion attempts
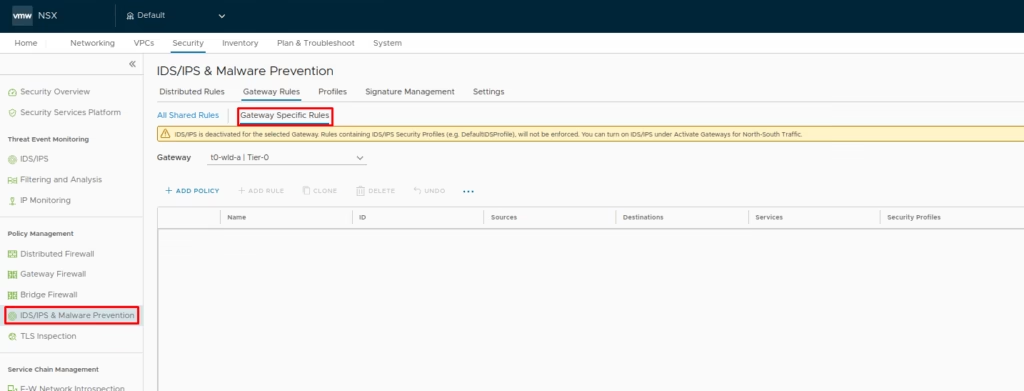
Enabling IDS/IPS on Gateways
For gateway-level protection: Go to Policy Management > Gateway Firewall
Choose the option to enable Identity Firewall
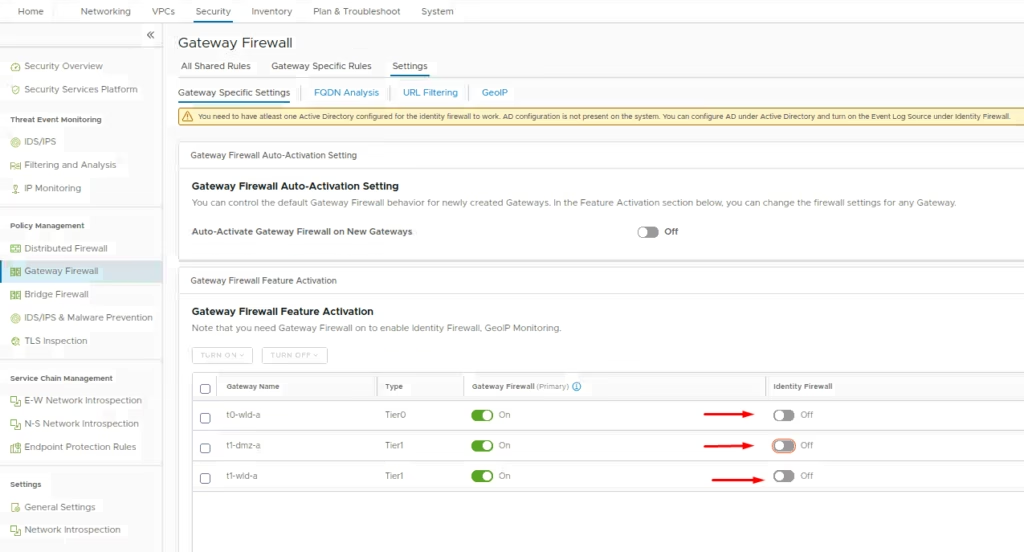
Enable the Identity Firewall

Select the gateway, add policy, and create rules (similar to distributed firewall setup)
Monitor gateway intrusion attempts via Security Overview
Once configured, IDS/IPS provides threat event monitoring to detect lateral movements, a security overview dashboard to track distributed and gateway traffic, and policy insights to validate rules and refine prevention strategies