

Here’s a summary of the steps to change the SCSI ID of a shared cluster volume mapped as Raw Device Mapping (RDM) in VMware vSphere.
- Backup Share and NTFS Permissions
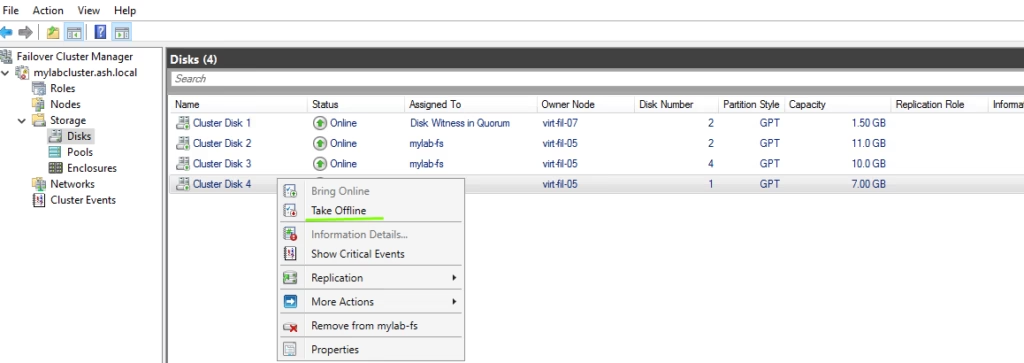
- Take the disk offline in the Failover Cluster Manager which makes the volume as Available Storage.
- Remove the disk from Cluster Shared Volumes.
- Remove the disk from cluster
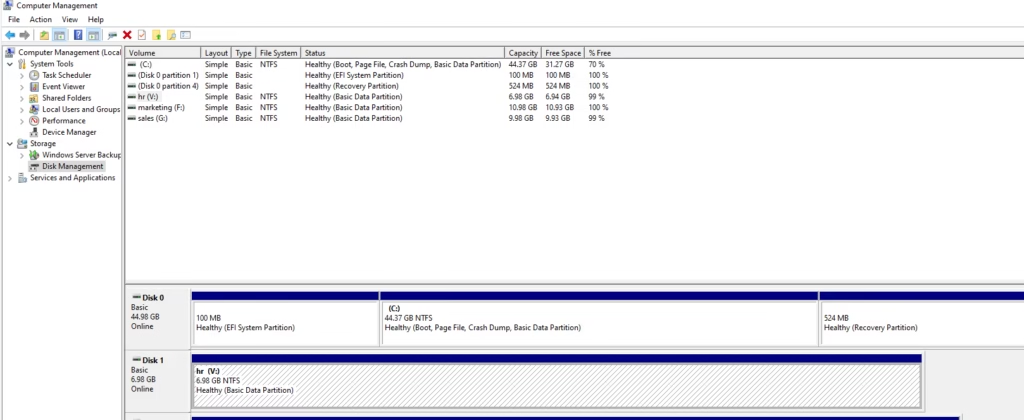
- Offline the disk from disk manager
- Remove the RDM mappings for the disk in vCenter.
- Set the lun to round robin on each ESXi host.
- Map the RDM back to the primary VM, ensuring the correct SCSI controller and disk ID.
- Add the RDM disk to the secondary VM using the existing hard disk option.
- Add the disk back to the cluster configuration in Cluster Manager.
- Restore File Share and NTFS Permissions
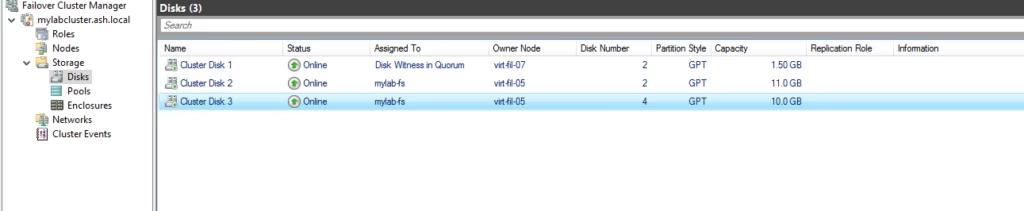
The scenario here is that my HR drive happens to be mapped as RDM, however, it is incorrectly mapped with wrong SCSI bus and disk identifier making the disk not suitable for clustering so this would sometime cause blue screen on the OS during cluster failover events.

In the Failover Cluster Manager, click on “Storage and Disks” to see the cluster shared volumes. Choose the disk you wish to take offline.
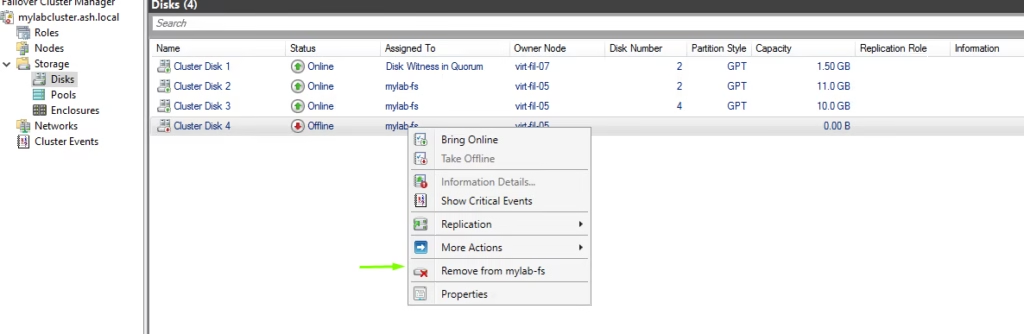
The disk is now offline; however, it is still part of the cluster.

Right-click the disk and select “Remove from Cluster Shared Volumes”. Confirm the removal when prompted. The disk will become unavailable to the cluster itself after this step, but the data isn’t deleted; it is simply no longer shared.
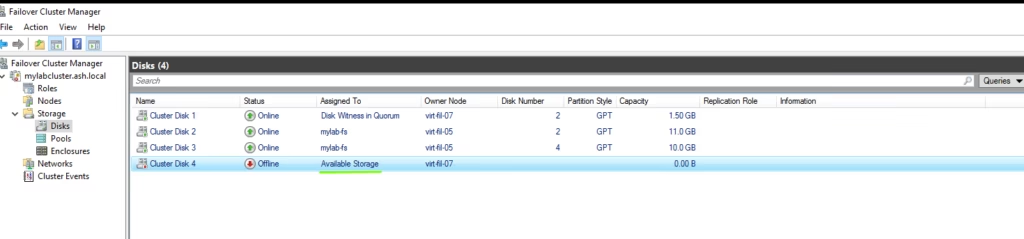
The disk is now back as Available Storage. This means it will be available to only one server at a time. In this case, it is connected to file-07 as per this example.
To remove the disk fully from the cluster, follow these steps:
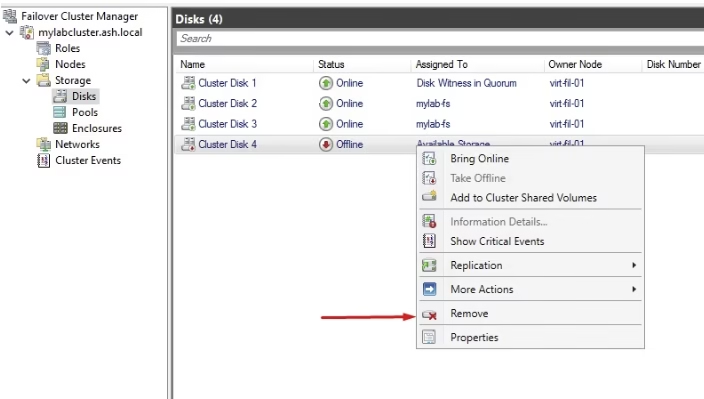
The disk is now removed from our cluster
We will just offline this disk now to remove the disk from our VM
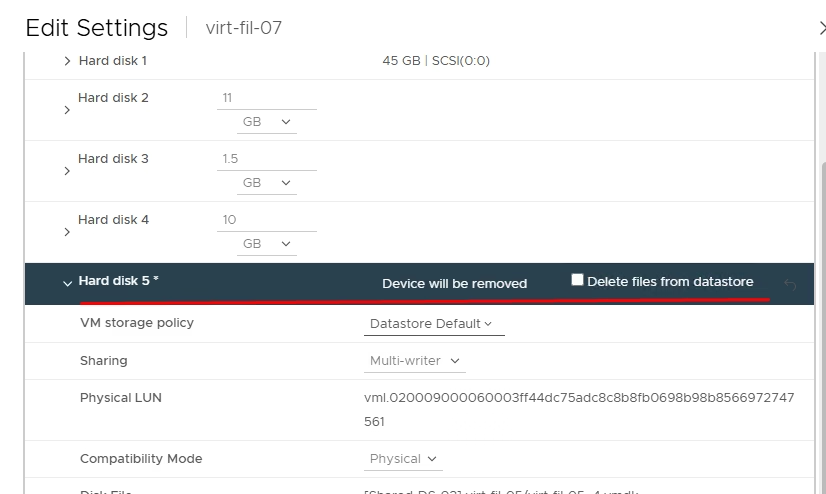
Log back into our vCenter and remove all the RDM mappings for the disk. On the secondary node, remove the disk pointers.
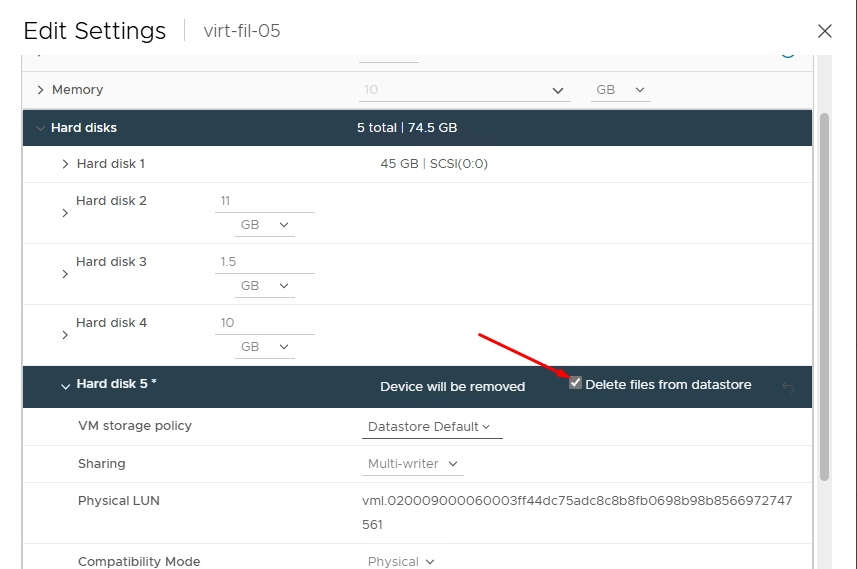
We will now also remove all the RDM mappings for the disk from our primary. This time, we choose the option of deleting files from the datastore.
As the RDM attachments are gone, we will need to ensure we set the LUN back to round robin on each ESXi host. By default, this comes as fixed.

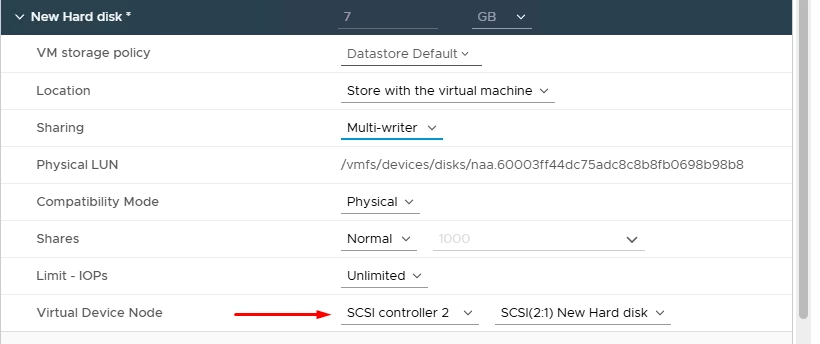
Once it is set to round robin, we can map the RDM back to our primary VM.
Choose the correct SCSI controller.
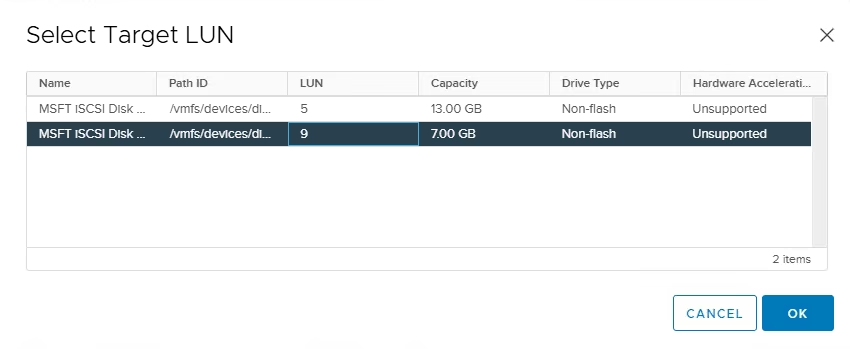
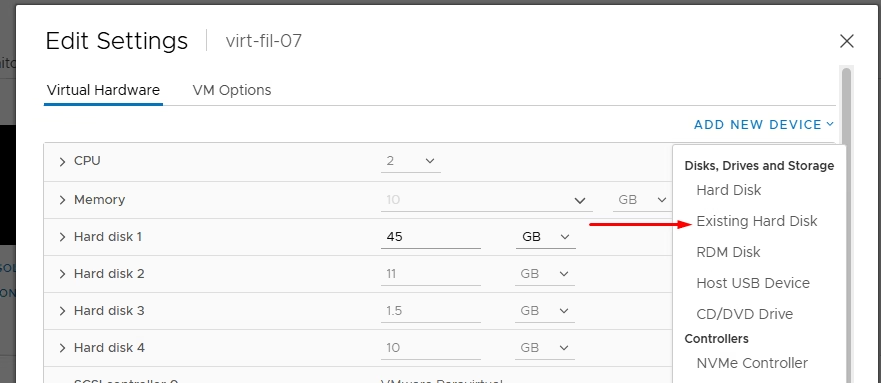
On the secondary VM, we will pick the option of existing hard disk and map the RDM pointer we added.
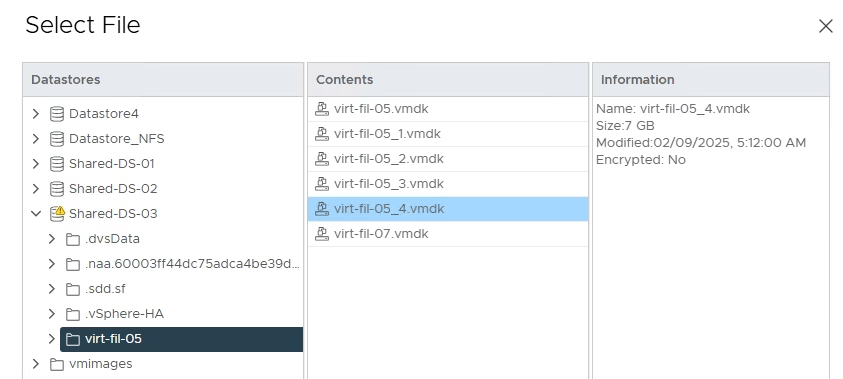
Choose the RDM disk file.
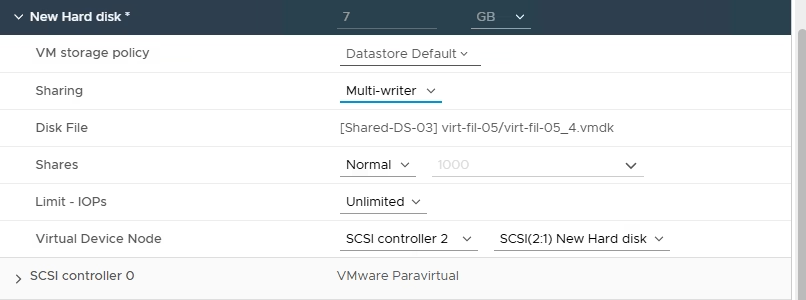
Ensure you choose the correct SCSI controller and disk ID.
Online the disk in Computer Manager.
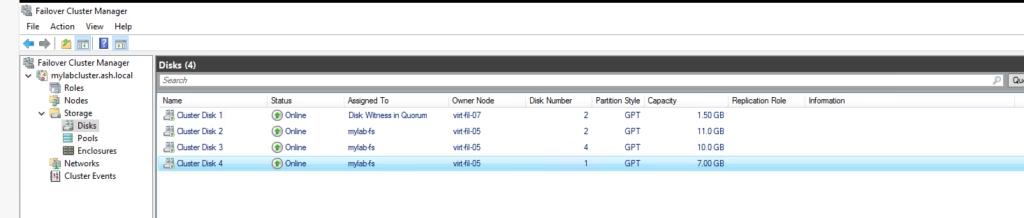
In the Cluster Manager, go to the Disks section. Choose “Add Disks” to add the disk back to the cluster configuration.
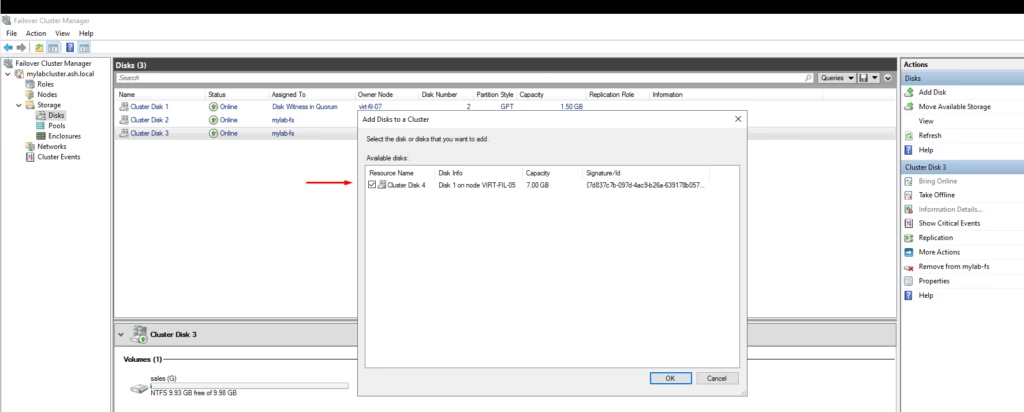
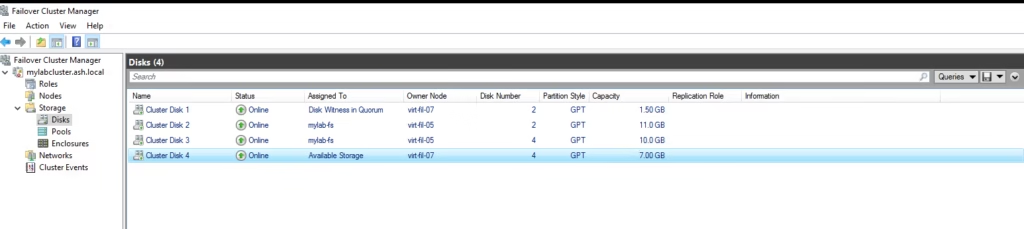
The disk has been added back and is shown as Available Storage.
To admit the disk back to our file server cluster configuration, go to Roles > Add Storage.
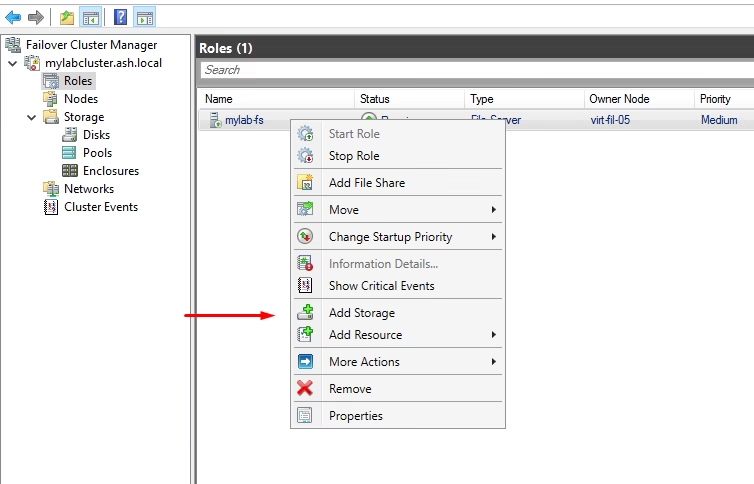
Choose the disk
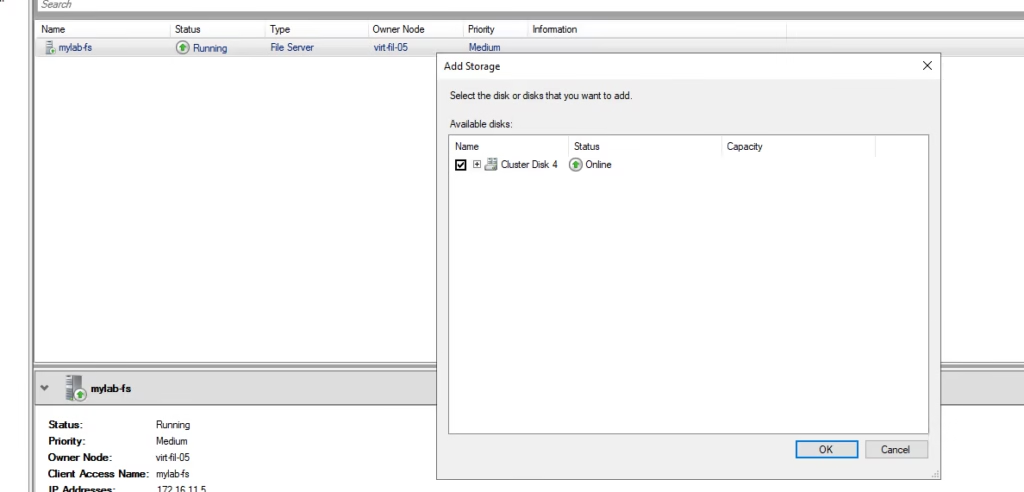
The disk is now added to our file server cluster
Shares are now visible
Ensuring Permissions Are Preserved When Removing and Reattaching an RDM Disk in a Microsoft Failover Cluster
When working with a Microsoft Failover Cluster, handling an RDM (Raw Device Mapping) disk requires careful steps to avoid permission issues upon reattachment. If you’re removing an RDM drive to correct its SCSI ID and later reattaching it, you must ensure that both share and NTFS permissions remain intact. Here’s how you can achieve this.
Backing Up Share and NTFS Permissions
Before removing the disk, it’s essential to back up both share and NTFS permissions. Share permissions are stored in the Windows registry, while NTFS permissions can be backed up using the icacls command. Start by exporting the registry key that holds share permissions. Open Registry Editor and navigate to HKEY_LOCAL_MACHINE\SYSTEM\CurrentControlSet\Services\LanmanServer\Shares. Right-click on the Shares key, select Export, and save it as SharePermissions.reg.
For NTFS permissions, run the following command in Command Prompt:
icacls X:\ /save C:\PermissionsBackup.txt /t /c
Replace X:\ with the drive letter of the RDM disk.
Removing the RDM Disk from the Cluster
With permissions backed up, proceed with removing the disk. Open Failover Cluster Manager, navigate to Storage, and remove the disk from Cluster Shared Volumes. Next, right-click the disk again and choose Remove from Cluster. Once it’s removed from the cluster, take it offline in Disk Management and remove the RDM mapping from VMware if applicable.
Reattaching the RDM Disk
After making the necessary SCSI ID corrections, reattach the RDM disk. Add the disk back in VMware and rescan disks on the Windows server. Open Disk Management and bring the disk online. Then, use Failover Cluster Manager to add the disk back to the cluster and ensure that it’s properly recognized.
Restoring Share and NTFS Permissions
With the disk reattached, restore the previously saved permissions. For NTFS permissions, use the command:
icacls X:\ /restore C:\PermissionsBackup.txt
To restore share permissions, double-click SharePermissions.reg to merge it back into the registry. Restart the Server service by running:
Restart-Service LanmanServer -Force
Final Verification
Finally, verify that the permissions are correctly restored. Run icacls X:\ to check NTFS permissions and use net share to confirm the shared folders. Test access from clients to ensure everything is functioning as expected.
By following these steps, you can safely remove and reattach an RDM disk without losing crucial permissions, ensuring minimal disruption to your cluster environment.