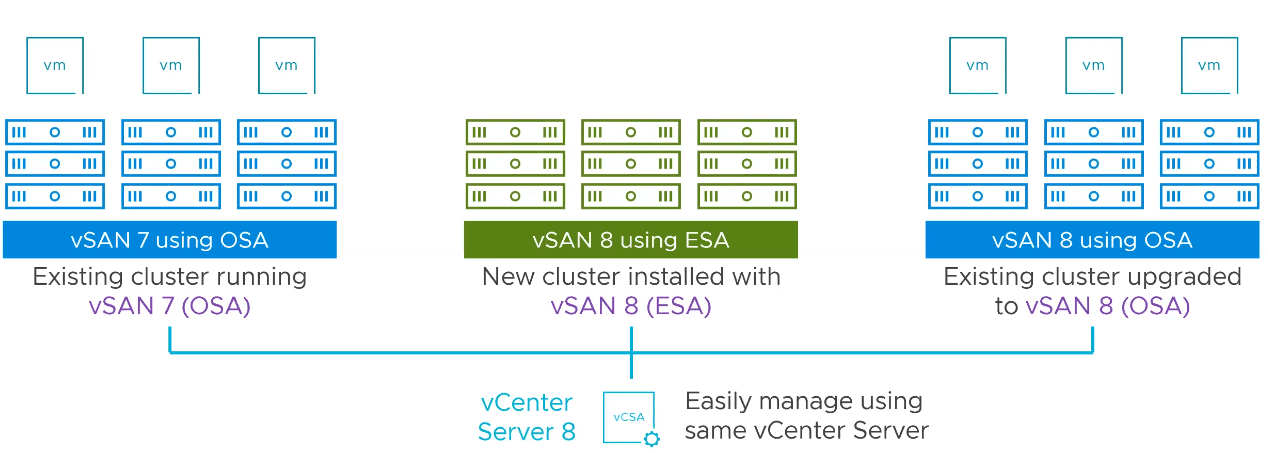
vSAN 8, utilizing the vSAN Express Storage Architecture (ESA), makes use of NVMe-based TLC flash devices instead of traditional flash devices commonly found in hyper-converged infrastructure (HCI). ESA introduces storage pools, moving away from the conventional disk groups.
vSAN ESA will dynamically adjust its storage layout for RAID configuration based on the number of ESXi hosts available in the cluster. This blog will demonstrate how to scale out a vSAN 8 ESA cluster, thereby increasing the capacity of our vSAN Cluster.
Prerequisites for vSAN8 ESA Cluster Expansion
- vSAN 8 needs certified hardware to run – ESA-ready nodes. Maintaining consistency by acquiring the same make and model of hosts is crucial in distributed systems. This approach helps ensure uniform performance, compatibility, and easier else DRS will distribute load to high-performing newer nodes and CPUs.
- Ensure the host has all the NVMe disks populated
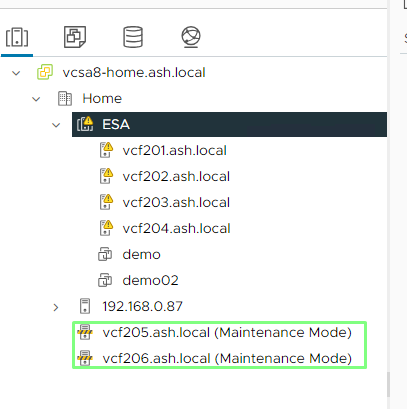
- Ensure new hosts are placed in maintenance mode
Scaling a vSAN ESA Cluster
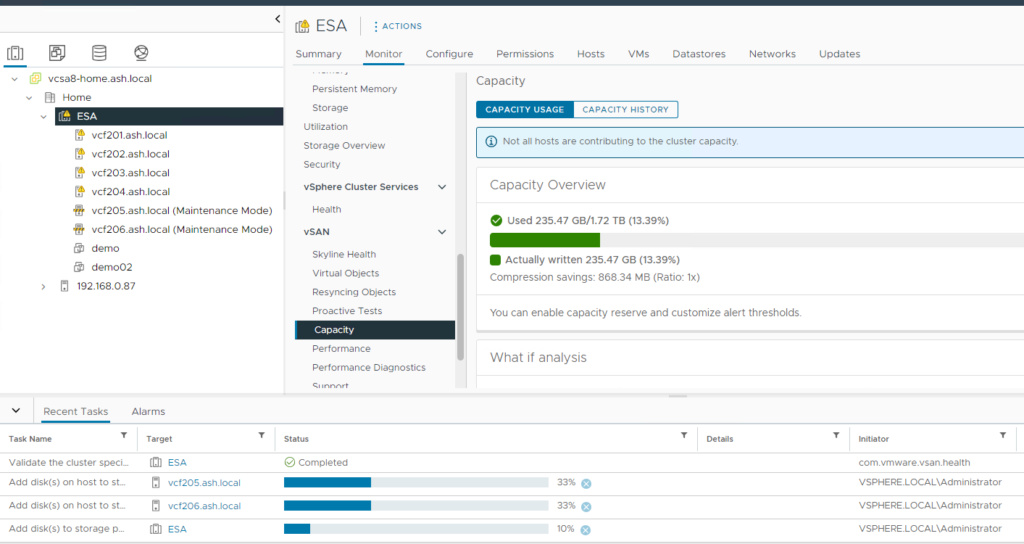
Before the expansion, our cluster had approximately 1.72 TB of data distributed across 4 hosts.

1. Log in to the VMware vSphere client, select Datacenter, and then go to the Menu tab. We plan to add two new hosts to expand our cluster. Both hosts are using the same image as the existing cluster and are currently connected only to the standard switch
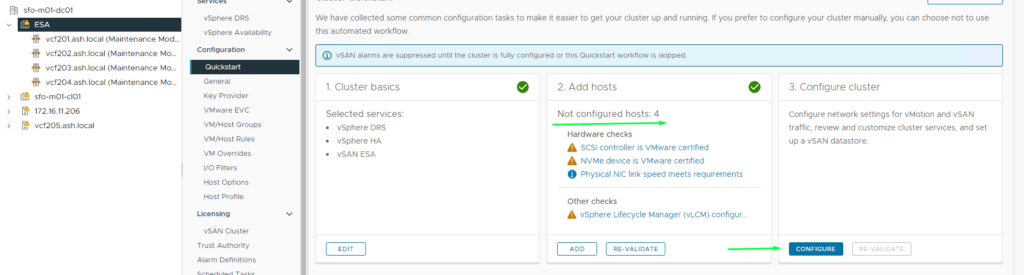
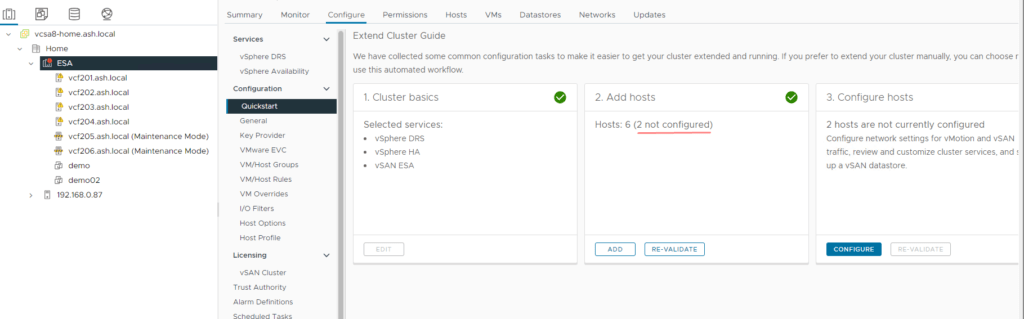
2. To expand a vSAN ESA Cluster, select the Cluster, navigate to the Configure tab, go to vSAN Services, and click Configure > Add hosts
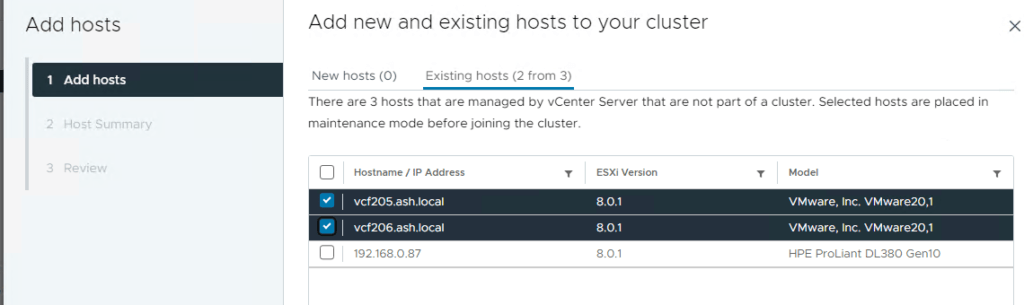
3. Add both hosts

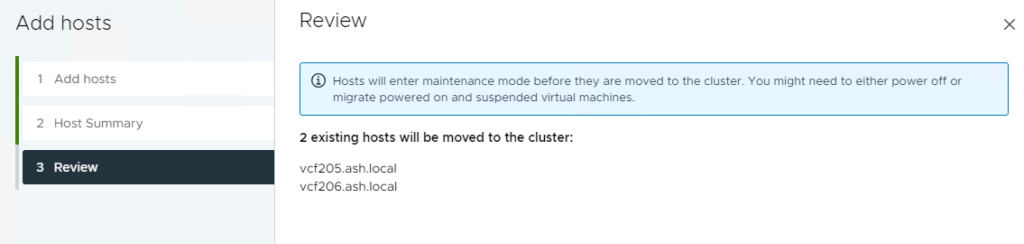
3. Review and click Finish
4. Select the Cluster – Navigate to Configure tab – Click Configure
5. Add the new hosts to our cluster.
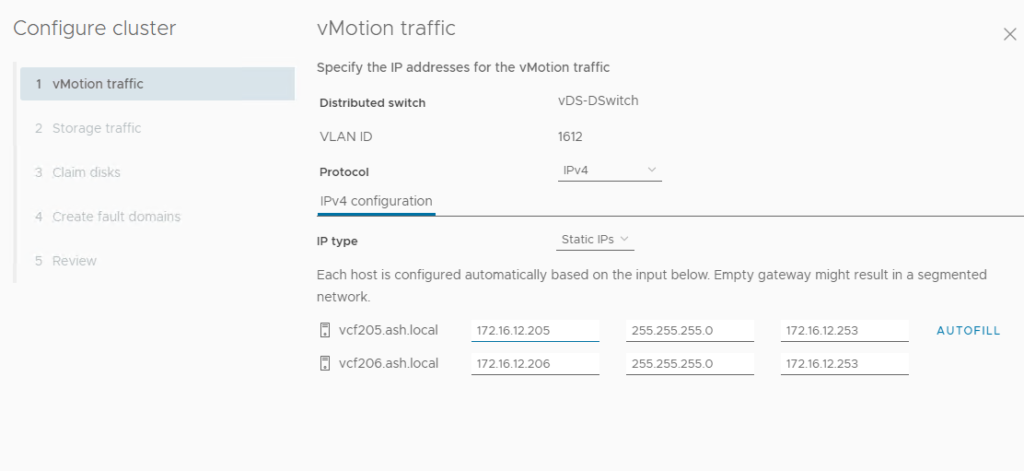
6. Provide details for vMotion vmkernel required for the new hosts on the distributed switch
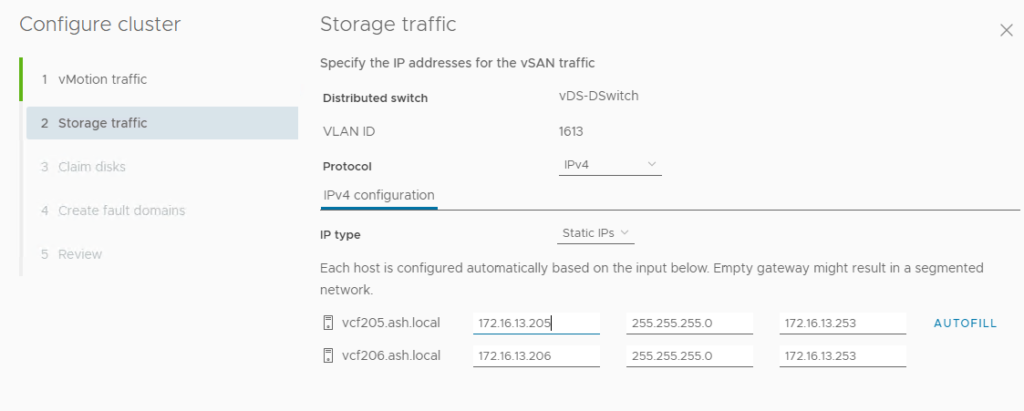
7. Provide details for vSAN vmkernel required for the new hosts on the distributed switch
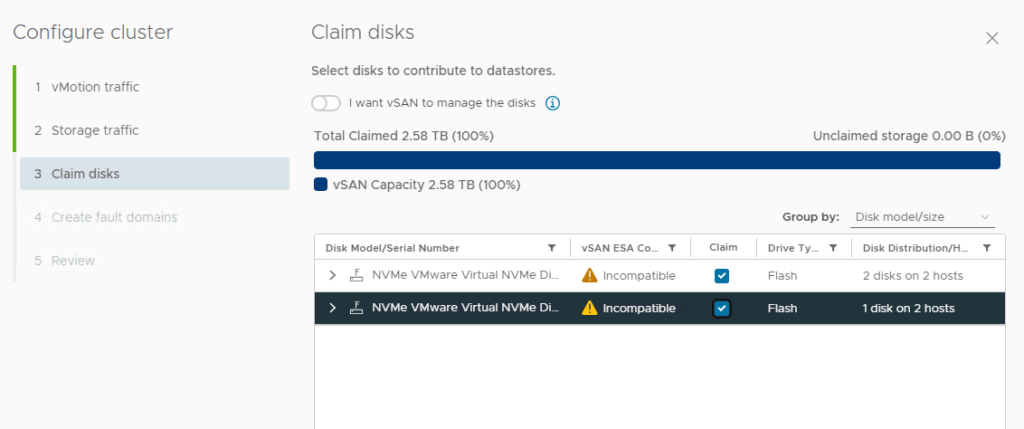
8. Choose to claim disks to be added to the vSAN datastore and click next.
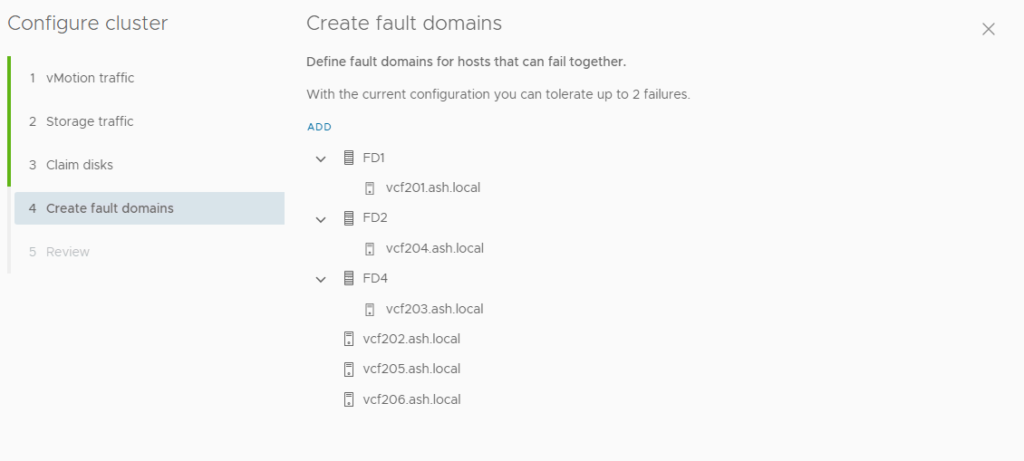
9. Click Next to proceed
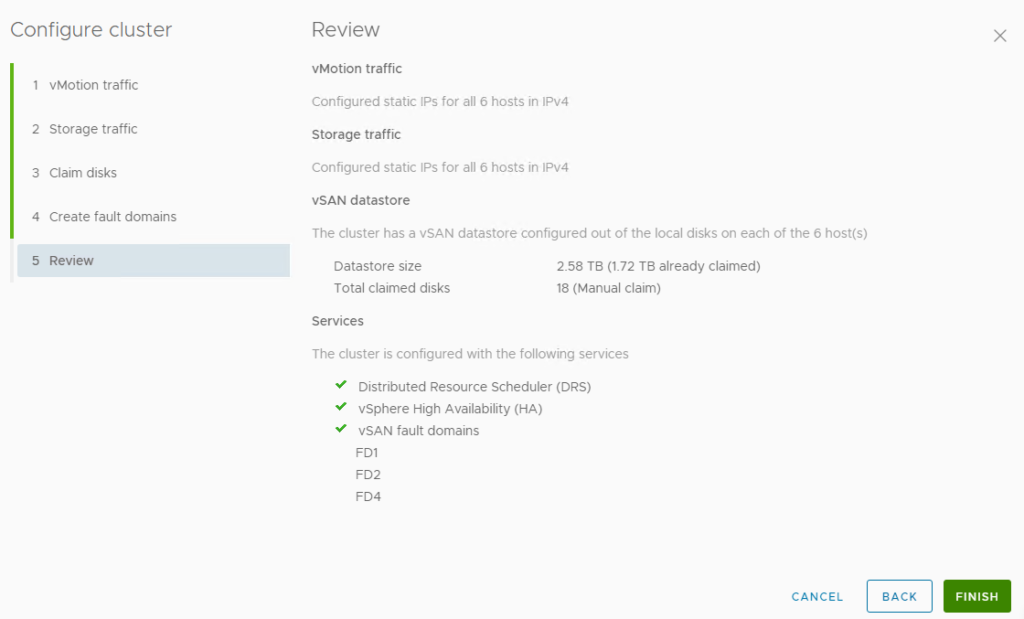
10. Review the vSAN cluster settings and then click finish.
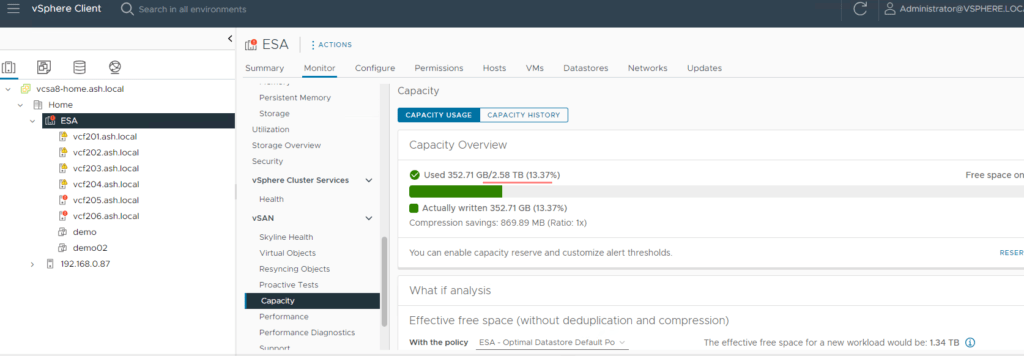
11. vSAN Status can be monitored via the Monitor tab which shows the Capacity used and the Capacity reserved for vSAN Metadata
12. Click on the Configure tab to add the hosts to vSAN services. In the next screen, we will be presented with a window to create a distributed switch but we will be using our distributed switch.
13. Once the vSAN Cluster creation is done, we can see on our host’s side that two disks on the host are participating in the vSAN datastore
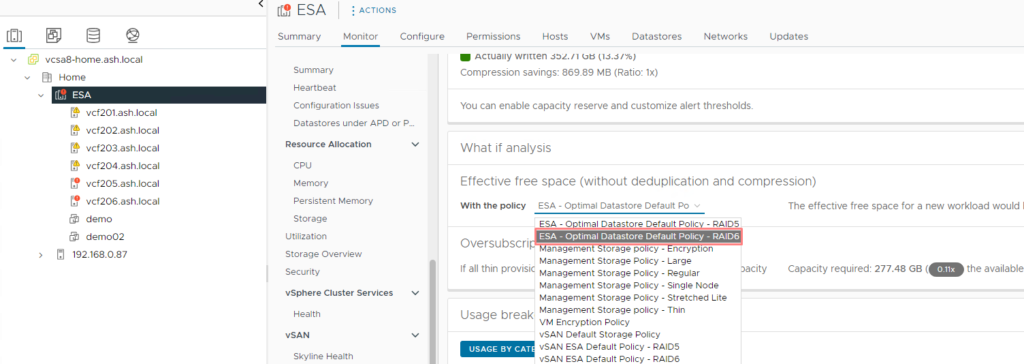
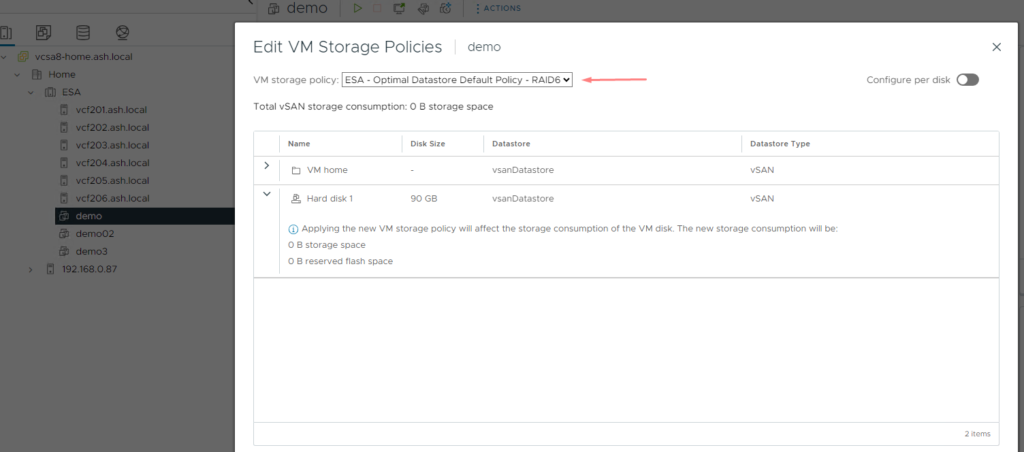
14. The default RAID policy on the ESA is RAID5 and can see both our VMs have the storage policy assigned to it.

14. Adding a new VM is automatically assigned as the RAID 6 protection level as our cluster has now 6 hosts
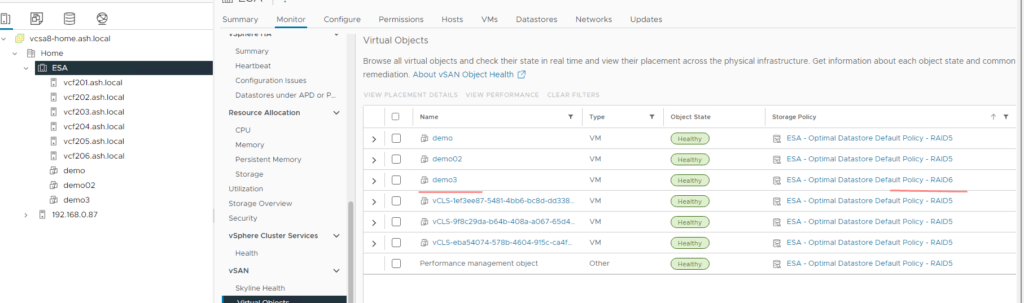
15. If existing VMs need to be changed to RAID6, that needs to be done manually else it stays RAID 5 for 24 hours. After 24 hours, vSAN changes the objects to RAID6