Introduction:
Release Notes
Check out the release notes of the vCF on the VMware site https://docs.vmware.com/en/VMware-Cloud-Foundation/4.2/rn/VMware-Cloud-Foundation-42-Release-Notes.html
Cloud Foundation Bill of Materials (BOM)

Network Requirements
Jumbo frames (MTU 9000) are recommended on all VLANs or a minimum of 1600 MTU is required for NSX-T to function
These are the portgroups we will be setting up for the vCF deployment

Getting Started with vCF Install
A nested vCloud Foundation deployment requires multiple of virtual networks to be in place before we can start the deployment.
AD & DNS Requirements: In our case, DC is connected to 1611 VLAN on VyOS. These DNS records should be in place before we start with the installation.
We first need to ensure all these dns enteries are in place correctly

ESXi Configuration
The correct version of ESXi image is located in /mnt/iso/sddc-foundation-bundle-5.0.0.0-21822418/. Copy the file to your local system and deploy the ESXi hosts from it.

Pre-installed ESXi Configuration.
- A minimum of 4 physical servers with preinstalled VMware 8.0U1a hypervisor is required. In our case to deploy VCF.
- If the deployment on Nested ESXI, ensure nested deployment is done correctly.
- Hardware virtualization must be enabled on the base host
- Generate host certificates correctly
- Static IP Address assigned to the Management interface (vmk0)
- All ESXi must have ‘VM network’ and ‘Management network’ VLAN id 1611 port group configured.
- VM Network port group configured with the VLAN 1611 as the Management Network
- NTP server address should be in place on all ESXi and set to sync to Active Directory
- SSH & NTP and activity directory service to be enabled
- All additional disks are to be present on an ESXi for VSAN configuration. Follow the 10% cache requirement for the capacity tier. An example has been shown below.
- Ensure the cloud builder appliance NTP sync works correctly.
Pre-installed ESXi Configuration: vSAN Storage Configuration– SSD
| Traffic | vDS | Size | Mode |
| HDD1 | ESXi OS installation | 8GB | Thick – All Flash |
| HDD2 | VSAN Cache Tier | 100GB | Thin – All Flash |
| HDD3 | VSAN Cache Tier | 250GB | Thin – All Flash |
| HDD3 | VSAN Cache Tier | 250GB | Thin – All Flash |
Cloud Builder:
When deploying VMware Cloud Foundation (VCF), we deploy an appliance (ova) called Cloud Builder to build the vCF environment. This appliance allows us to load the parameter file and automate the deployment of the entire infrastructure, allowing us to go from spreadsheet to full SDDC.
It is one-time use VM and can be powered off after the successful deployment of the VCF management domain.
After deployment, we will use the SDDC manager for managing additional VI domains.
We will be deploying this appliance in VLAN 1611 so that it gets access to DC and all our ESXi servers.
Download and deploy the CB appliance from the VMware portal, deployment is straightforward like any other ova deployment

Log into Cloud Builder VM using ssh and run the below command to verify if the password we added to the excel file is acceptable or not.
echo "VMware1!" | cracklib-checkVerify if the time sync is set correctly

Log into Cloud Builder VM using web UI and click next on this screen.
https://cloudbuilder.ash.local

Verify if all conditions are met and click Next

Download the Deployment Parameter Workbook on this page.

Deployment Parameter Workbook:
Download the excel file and be careful while filling this workbook, as it provides all input parameters for our VCF deployment.
Prerequisite Checklist: Cross check your environment

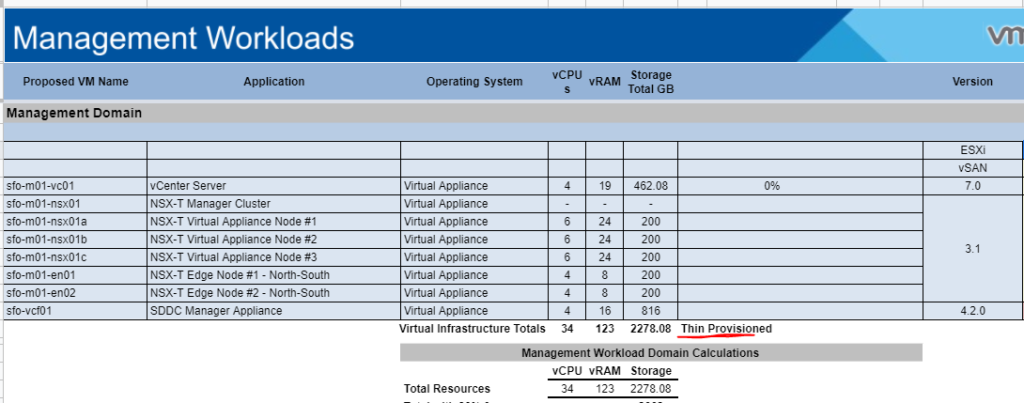
Management Workloads: Fill all the license info here such as vSAN,vCenter, NSX.

Users and Groups: . Add complex passwords as shown

Hosts and Networks: Edit network information
In vCF 4.2, ensure Configure NSXT-T Overlay is set to use Static Pool as highlighted below. We will be adding DHCP to this vlan later

Deploy Parameters: Validate the necessary info.

After you complete this sheet, it needs to be uploaded to the cloud builder on this page.
Please note – Cloud Builder excel sheet needs to be filled in carefully, if there are any errors it will show in red.

Now we are ready to begin configuration.

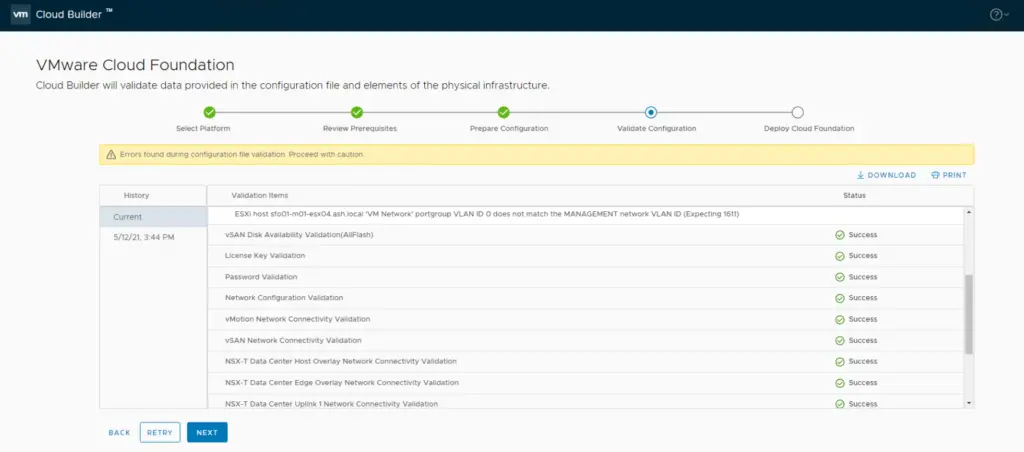
Status should show ‘Success’ for all validation items – Correct errors as you go

Click Next to Deploy SDDC.

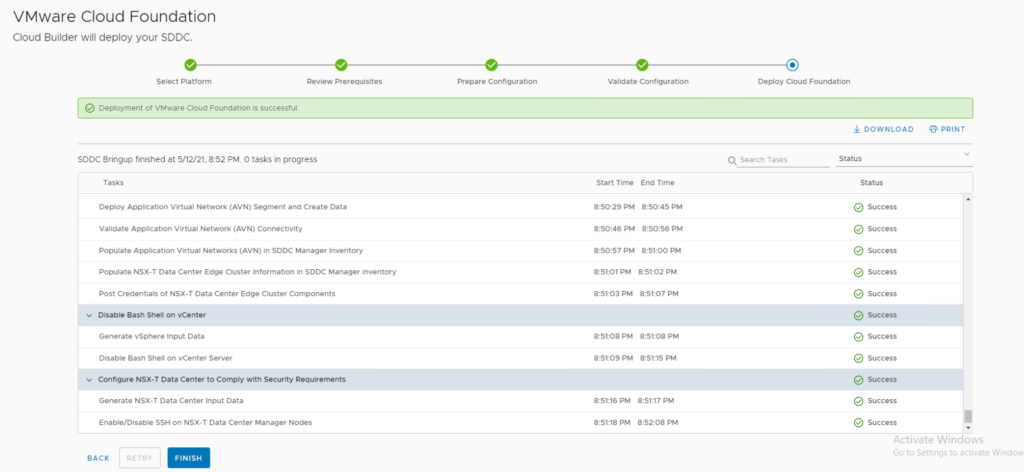
All SDDC components gets installed on nested ESXi and you see this message.

SDDC Deployment Complete.

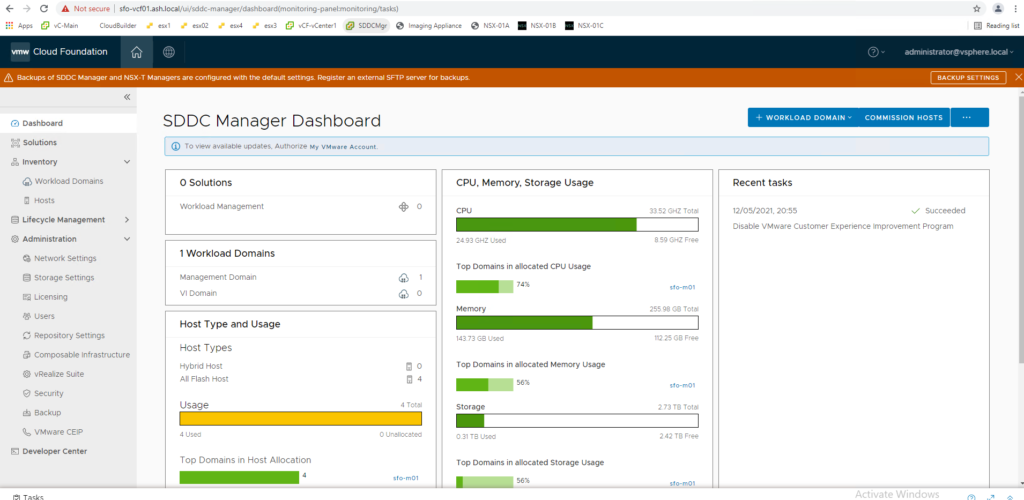
Check the SDDC Manager and vCenter.


vCF Build Logs
The location of the log file is ‘/opt/vmware/bringup/logs/’ in cloud builder VM . This file will give you a live update of the deployment and any errors if any
admin@cloudbuilder [ /opt/vmware/bringup/logs ]$ tail -f vcf-bringup.log


