Azure SQL Database is a fully managed cloud-based relational database service with built-in high availability. In the on-prem-based setup, the database admins are responsible for installing and configuring the database and the VM is managed by the vCenter but on the PAAS setup, Azure takes care of it all including the backups.
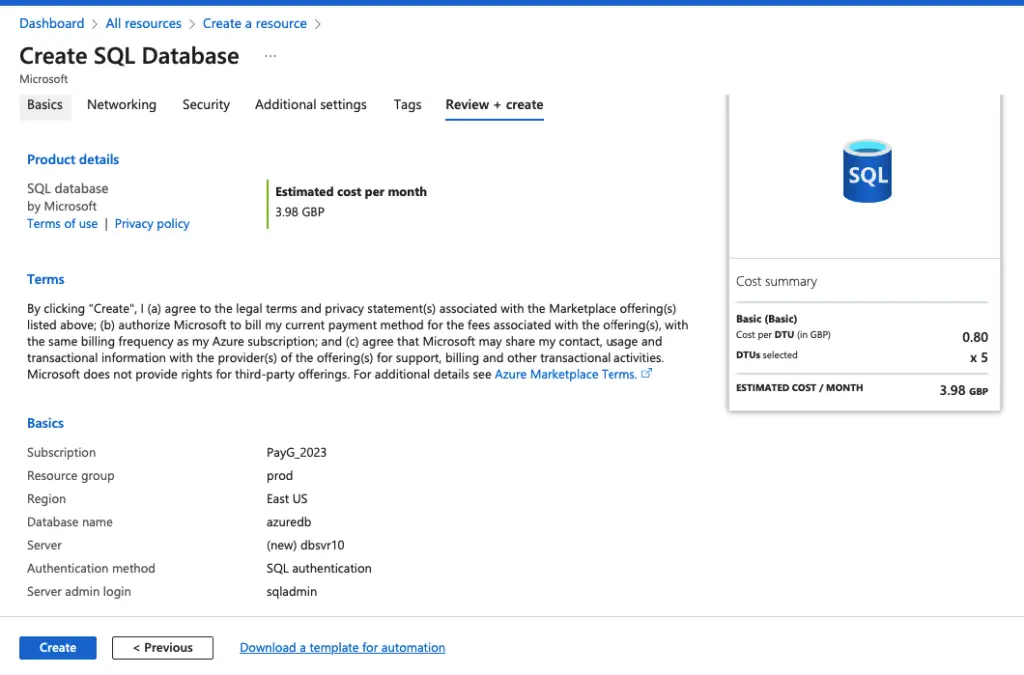
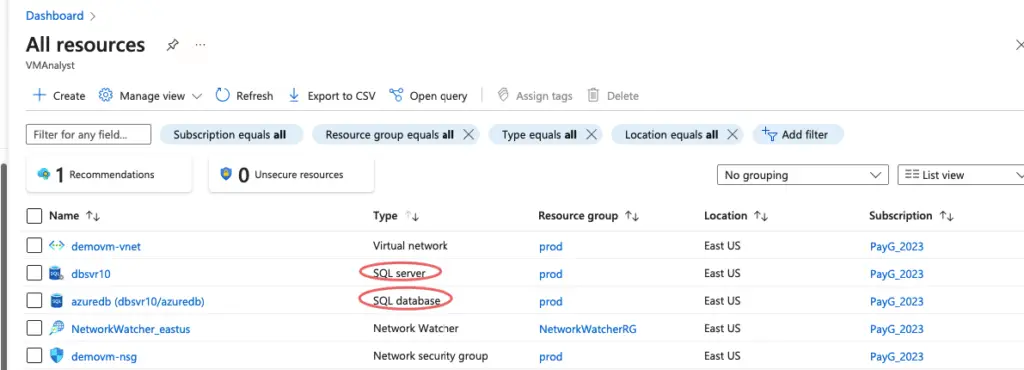
The deployment creates two resources – one a SQL database and the other one, a DB server.
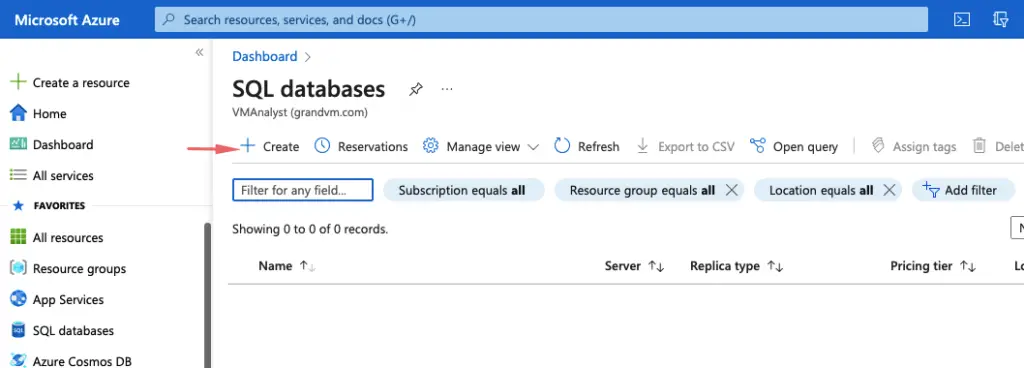
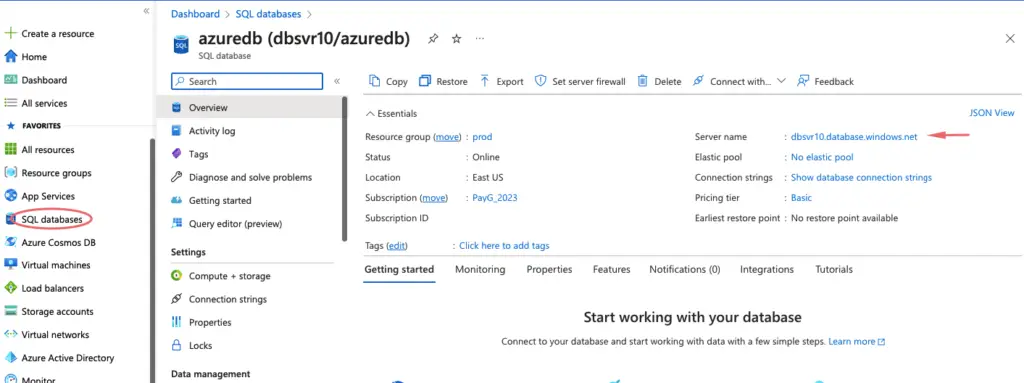
On Azure Portal, search for SQL databases.

Click on SQL Database Symbol > Click on + Add button to create a new database
Provide the Database name and select the resource group.

Click on Server to give details of the server and choose SQL server authentication. Give the SQL server user/password we require.

Under Workload environment we will choose Development

Under Compute needed for Database environment, select from the pricing tier based on the needs of your workload.
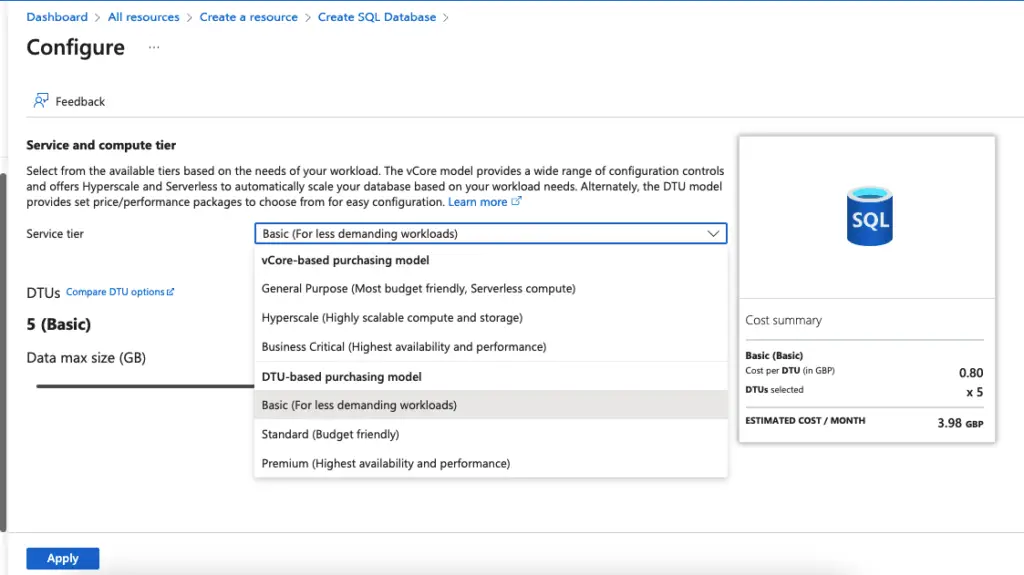
Click on Next to continue

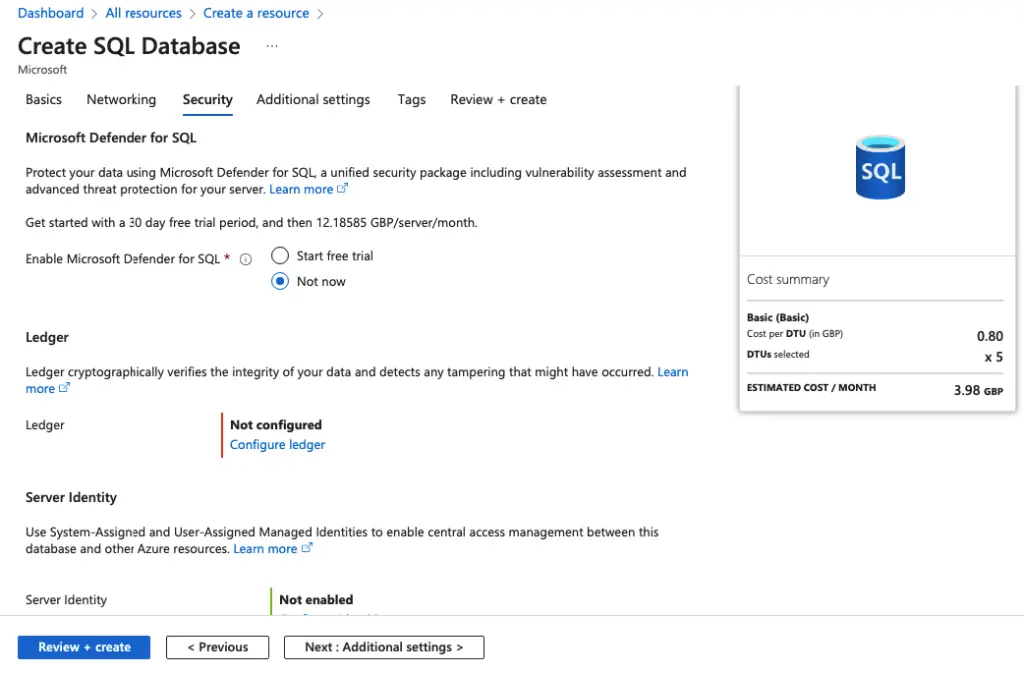
Under the Networking tab, choose the Public endpoint and choose to add our laptop IP address. This setting enables us to connect to the database from the outside world.

Leave everything else at default
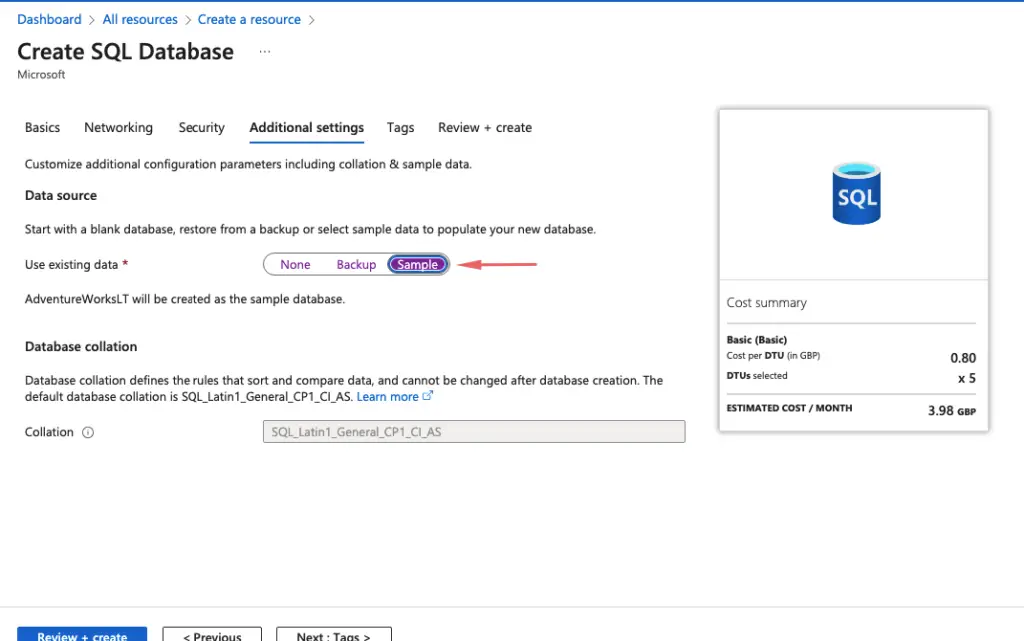
In this example, we will just pick a sample database
Finally, Click Review and Create
The operation creates two resources, one a SQL database ( azure-db ) and the other one a DB server
Access the database via the server name
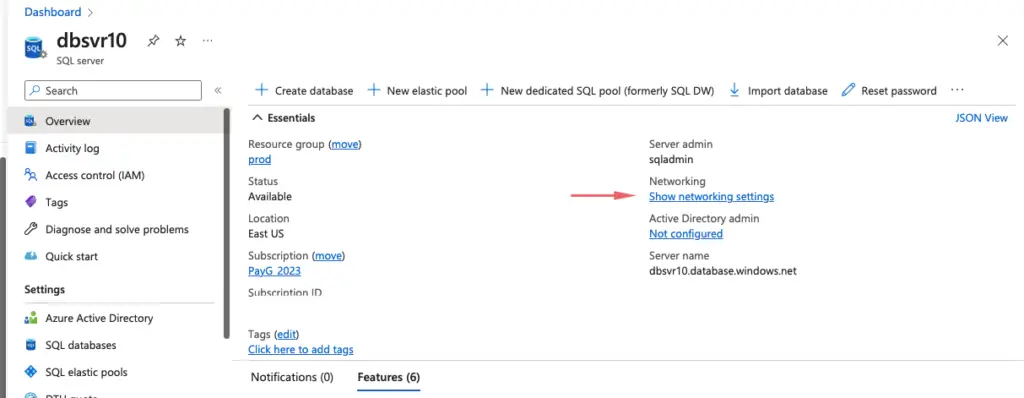
Configure Azure SQL Server firewall
Azure SQL Database uses firewall rules to allow connections to your servers and databases if you want to connect to the Azure database from our local machine.
Under firewall rules, add the local IP address of the laptop
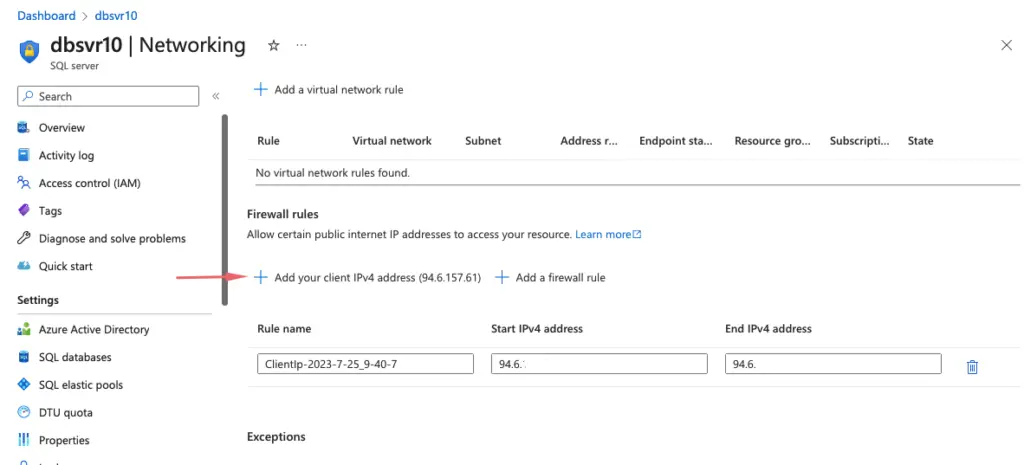
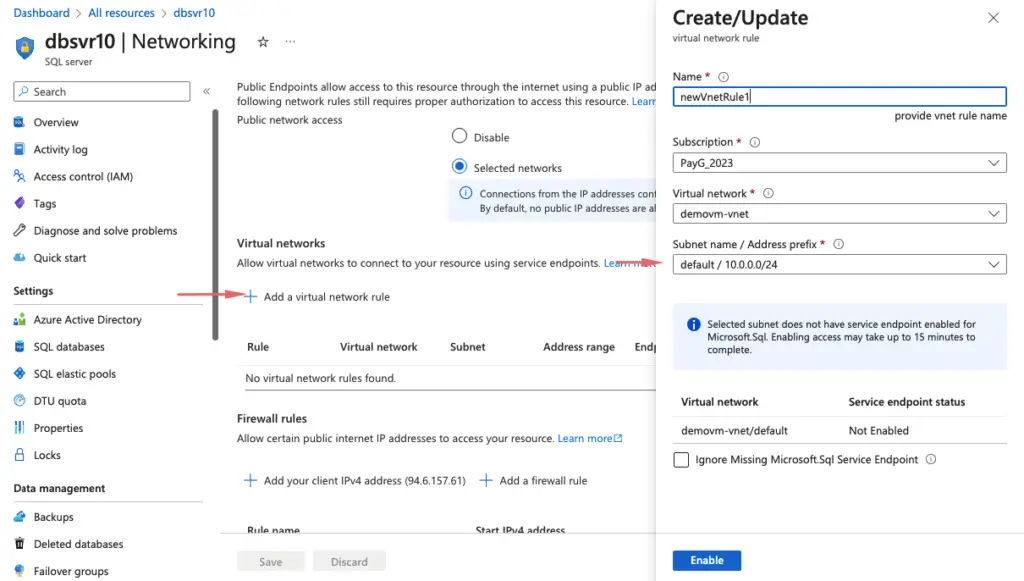
If we wish to connect to the database from within our Azure subnets, it can be set here under endpoints
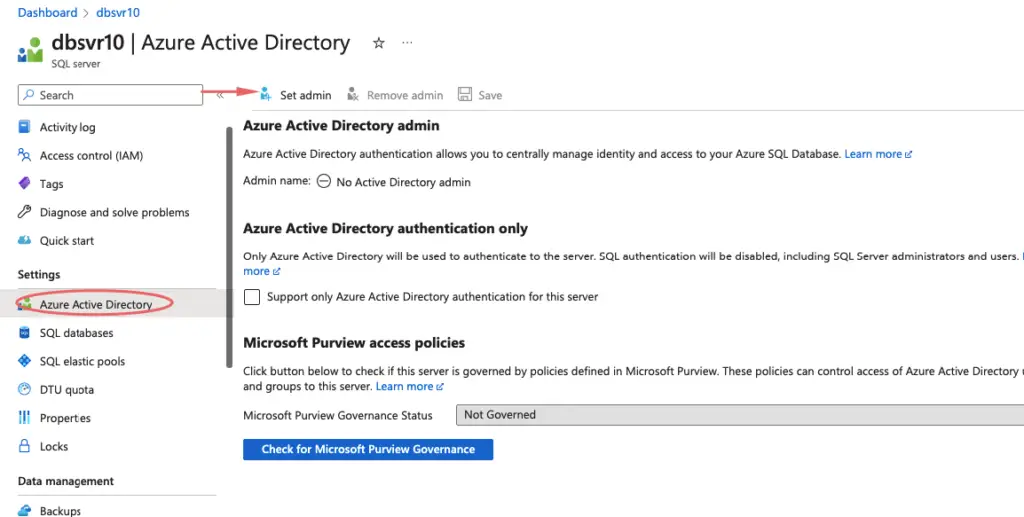
Define an AD admin in Database
Right now we are using SQL-based authentication to login into our Azure database but If we wish to have users in AD authenticate to the Azure Database, we can do that via setting an administrator on the DB.
I’ll add my test user here for Windows-based authentication.
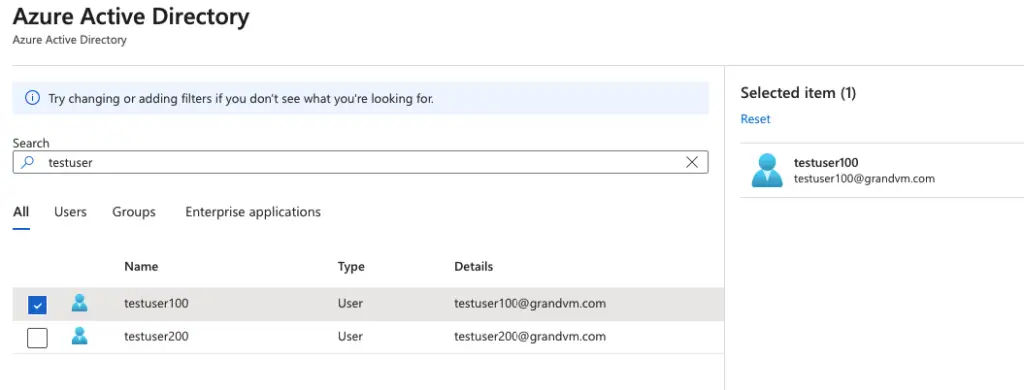
Our tester is now an admin on the SQL DB so lets test access

From SQL mgmt studio, choose authentication type as Universal with MFA

We have successfully connected to our Azure AD DB via Windows-based authentication.

Granting Access to other users
In the previous section, we added the admin user to connect to the database. To enable other users to connect and work on the database, such as reading data, you need to grant additional permissions.
Therefore, to grant our newly created contained user access, click on the database and run the query to assign the user to Database Roles or give the user access to specific database permissions.
–Database Role Permissions
ALTER ROLE db_datareader ADD MEMBER [testuser01@grandvm.com];
ALTER ROLE db_datawriter ADD MEMBER [testuser01@sqlity.com];
ALTER ROLE db_ddladmin ADD MEMBER [testuser01@sqlity.com];
–Grant Database Permissions
GRANT VIEW DATABASE STATE TO [testuser01@sqlitybi.com]
–Grant Permission to specific objects
GRANT SELECT ON [dbo].[promotion] TO [testuser01@sqlitybi.com]
GRANT EXECUTE ON [dbo].[sp_procedure] TO [testuser01@sqlitybi.com]
GRANT UPDATE ON [dbo].[promotion] TO [testuser01@sqlitybi.com]
Connecting With New Users
As we are using a new user, we need to select a database to connect to by clicking the Additional Connection Parameters and specifying the database button. Otherwise, the user will receive an error because SQL is trying to connect to the Master database.

Transparent Data Encryption – Column Encryption Keys
By default, the database in Azure is encrypted but an extra feature can be set and helps to ensure columns ( eg: credit card, email info) etc cant be read. By default, this is enabled and uses a service-managed key. The user needs to have decrypt capabilities and this can be set under Access-control policy.
Dynamic Masking
The amount of data that can be exposed to a user eg credit card info (just the last 4 digits are exposed), email, address etc can be masked for non-privileged users

