Availability Set (Server Level Availablity )
An Availablity set allows “matching” vm (app, DB etc ) to be spread across multiple hosts or racks in the same DC. ie: available across many hosts in a decreased high availability for your apps.
This would mean if there is a top of rack failure etc, the VM’s on other racks are still available.
Any existing VM cannot be assigned to an availability set. Only when a VM is created, can we attach to an availability set. Existing VM if any will need to be deleted and created for the VM to put it into an availability set.
The two concepts in the Availaliablity set are
- Update Domains
- Fault Domains
Update Domains:-
During a planned maintenance window would Azure might be patching a host bios update etc that has all our VM’s which is why we use Update domains. They will do an update on the first one and then move on to the next. Each Update domain will be done separately to minimize downtime. Update domain 0 first and once done they move to the next one. During this process, we will need to shut or move VM’s on the host to peer hosts. Its recommended to have 5 update domains and this is because, our application should be running on at-least 4 virtual machines during an Azure maintenance period.

Fault domain – means rack awareness. If there was a TOR switch failure on the Fault domain 1 ( Rack 1 ) or a power feed issue on rack 1 just that VM’s on the rack will be affected. The peer racks ie: Fault domain 2 and Fault domain 3 aren’t affected

Availablity set allows spreading vm across multiple hosts in a dc. ie: available across many hosts in a dc

Adding Servers to an Availability set
1 Create an Availability set
2 Create a virtual machine as usual and choose our availability set as the one we created

Adding a new VM to the Availability set.
Follow the same process as above.
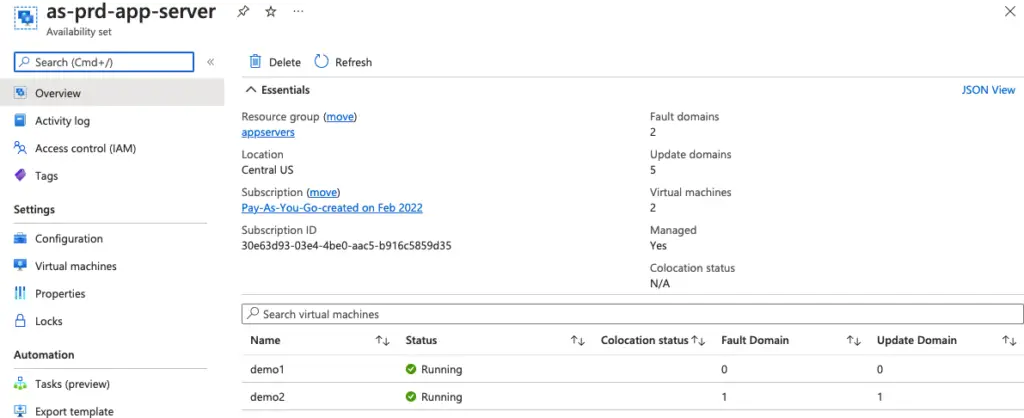
Our Fault and Update Domain will be shown
Resizing Azure Virtual Machines in Availability Set
On our on-premises VMware, we use features such as hot add to increase a VM’s RAM, CPU, and HDD capacity without downtime, and similar to that we can as well increase or decrease the size of `VM ie: from a large spec to smaller or from smaller to larger
Prerequisites
- Shutdown the VM
- We pick a new size from the list of available sizes and then select Resize.
- If you are resizing to a VM onto new hardware (e.g. change in a chipset), then the VM will need to be powered off first before the resize operation can begin.
- If you are resizing VMs onto new hardware which is in an Availability Set, then all the VMs need to be powered off for the operation to begin.
I’ve got two Virtual machines under my availability set running on Standard_D2S_v3 and we will convert them to a DS1_V2

Powerdown both the VM ‘s

Select your desired size and finally hit select.

You will then see the resize has begun and server will shutdown and restart

That’s it and your VM’s are resized


