
In this blog, I’ll cover the main configurations required for NSX‑T with vCenter and above, including the essential steps to ensure seamless vSAN connectivity.
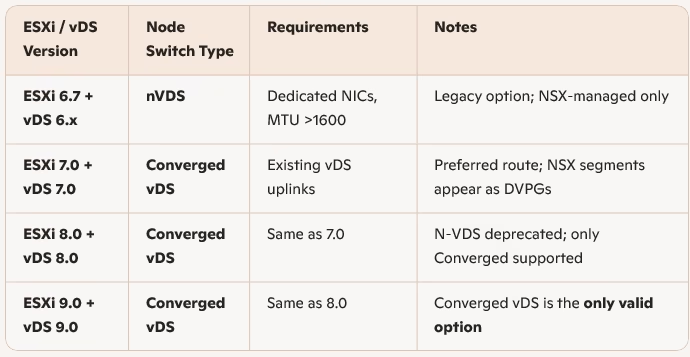
Choosing Node Switch Type by Version
We have four active 10g adapters on this host and we can just continue creating converged vds without taking an uplink as we did before but we will stick to the best practices used in production.
Converged vDS (vSphere 7, 8, 9) Prerequisites
- Standard for all ESXi hosts from vSphere 7 onward.
- MTU > 1700+
- All vnic should be attached to vDS so this uses existing vDS uplinks (no NIC sacrifice).
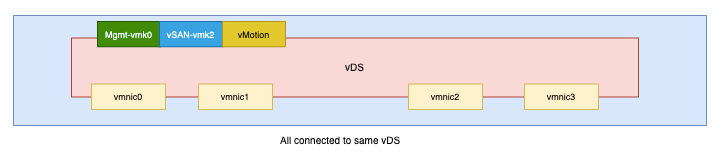
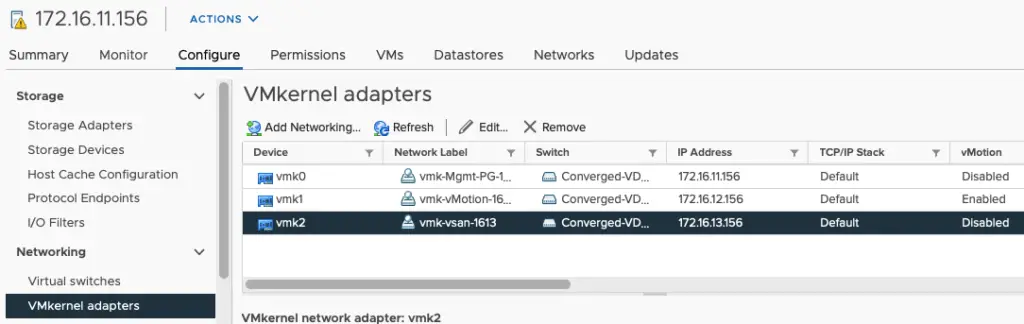
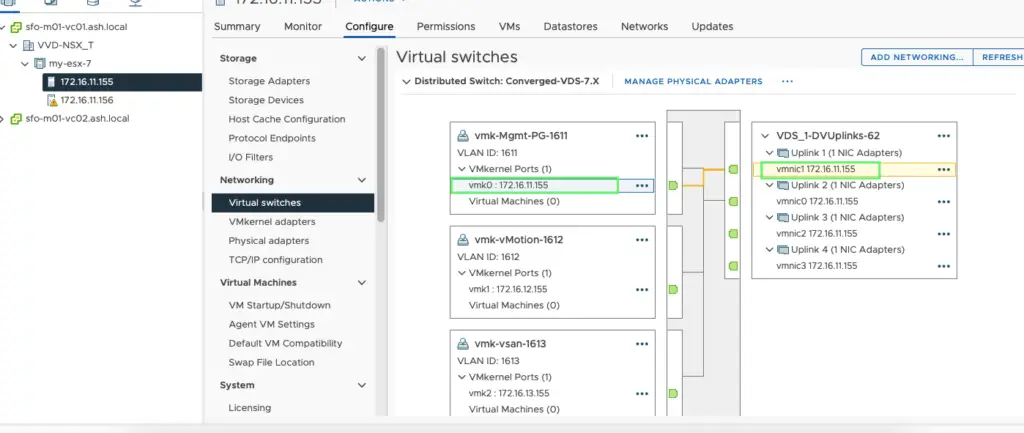
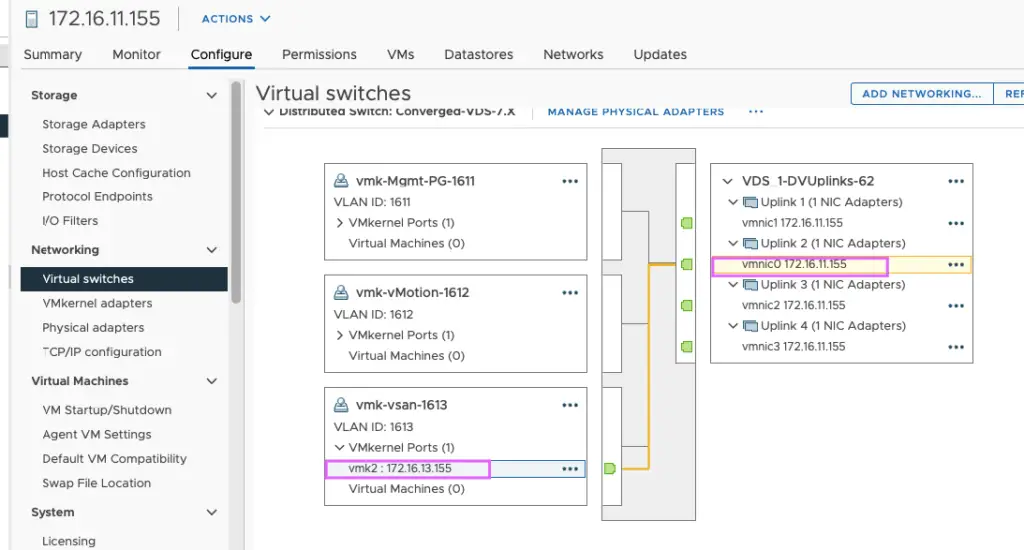
The current config is as below and we will make some changes to this to configure to our used case.

All my uplinks are in use.
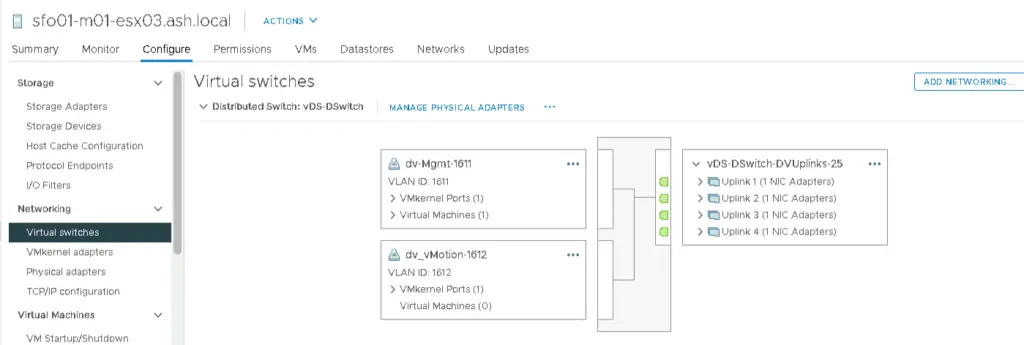
All my vmk adapters are here
We will now put our vmnic 3 and vmnic4 on our existing vmkernel adapters (mgmt,vsan, VMotion) as unused so we can use this later during NSX config
| Adapters | Use | Uplink |
| VMNIC0 | Active – Mgmt+vSAN+vMotion | vmnic0 |
| VMNIC1 | Standby – Mgmt+vSAN+vMotion | vmnic1 |
| VMNIC2 | left for NSX | vmnic2 |
| VMNIC3 | left for NSX | vmnic3 |
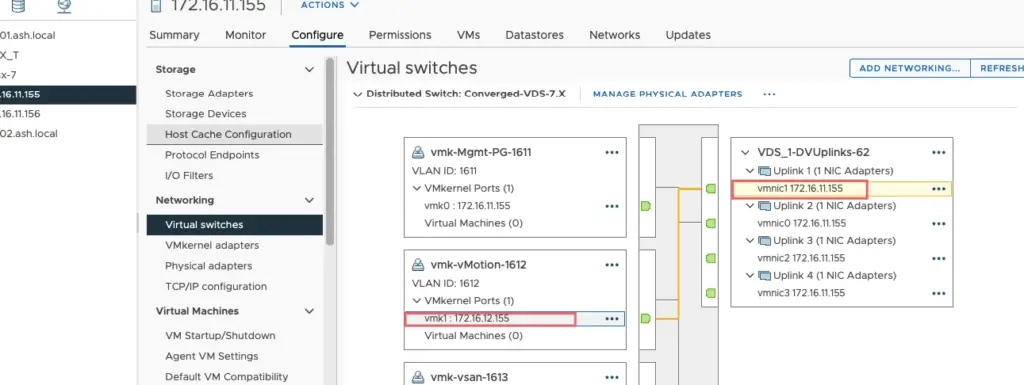
Our configuration for Mgmt vmk will be
Our configuration for vmotion vmk will be

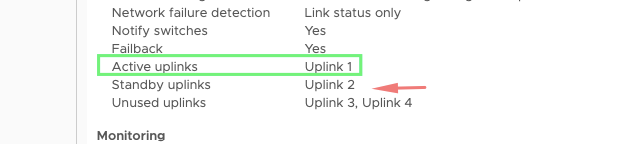
Our configuration for vSAN vmk will be our uplink 2 will be active because we need dedicated bandwidth for vSAN so just a reverse of what’s on mgmt and vSAN vmkernel.

Mgmt Network
vMotion Network
vSAN Network
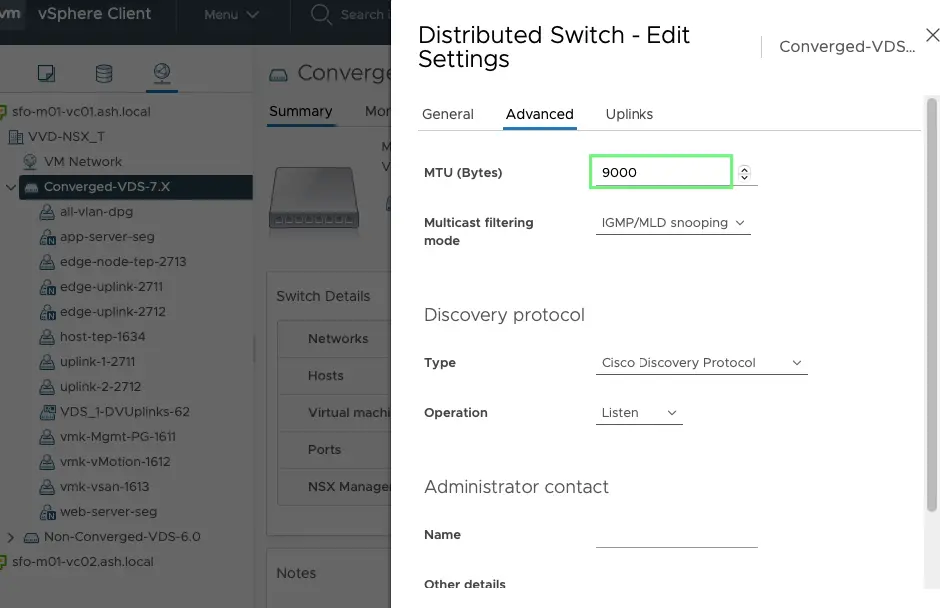
Change the vDS MTU to 9000 as well
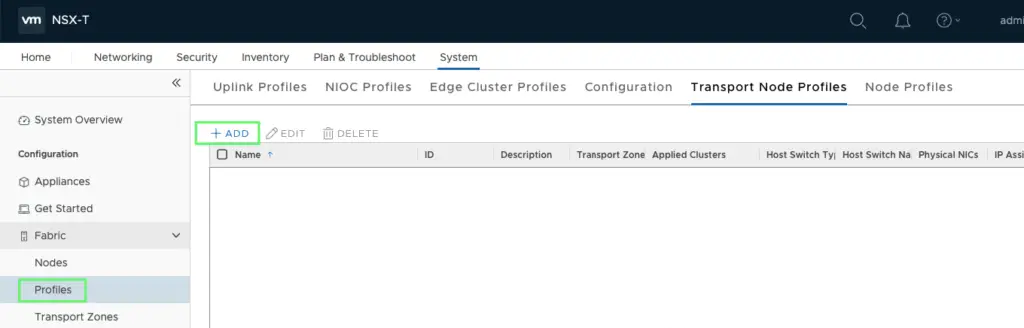
Configuring Transport Node Profile
Go to Fabric> Profiles > Transport Node Profile > Add Profile
Give transport node profile a name - prod-esx-host-transport-node-overlay
VDS Name: select the distributed switch
Transport Zone: prod-overlay-tz01
Uplink Profile: esx-host-uplink-1634. ( this was created previously)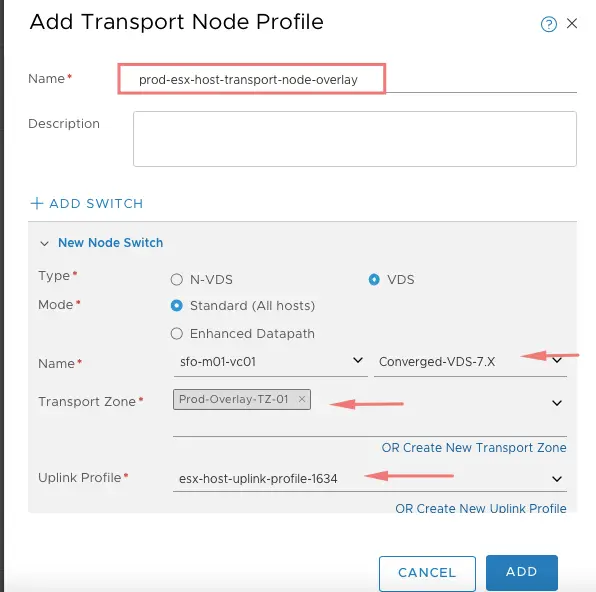
Choose IP Assignment: use ipool as host-tep-ippool and finally associate our Physical NICs: uplink3 and uplink4 we created earlier for NSX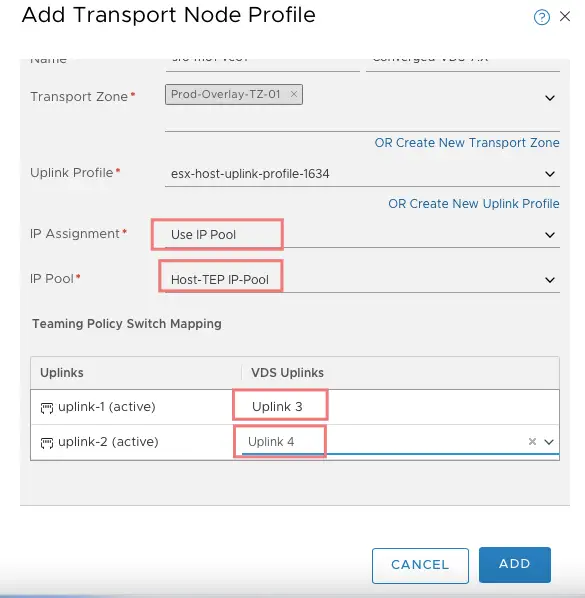
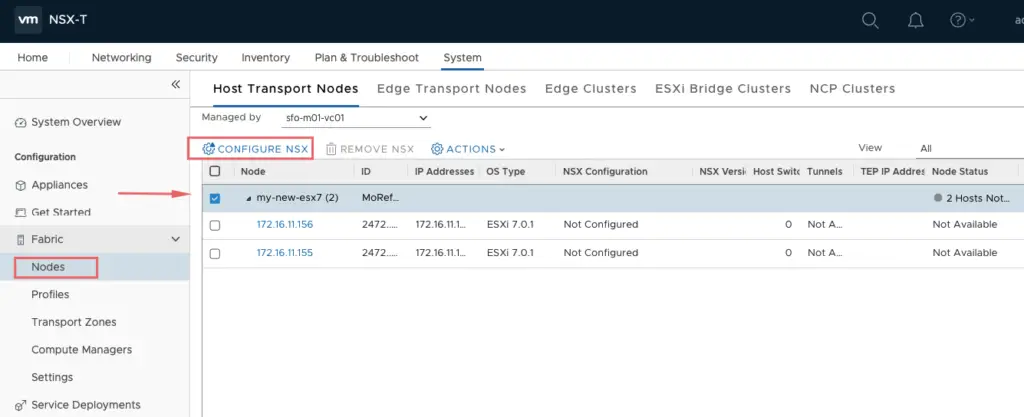
Installing NSX-T on the vSphere cluster
For us to allocate the transport node profile to our vSphere cluster,Go to Fabric> Nodes> Configure NSX
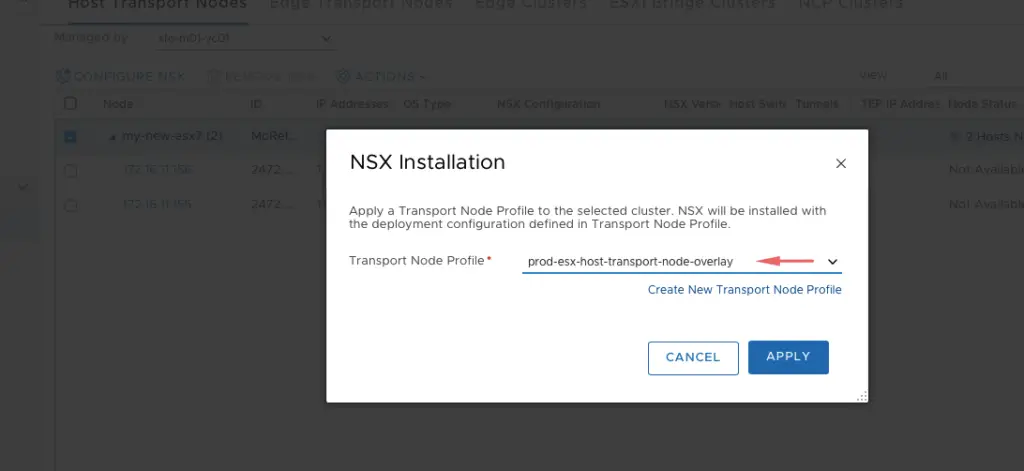
Choose the transport node profile we created earlier and click Apply
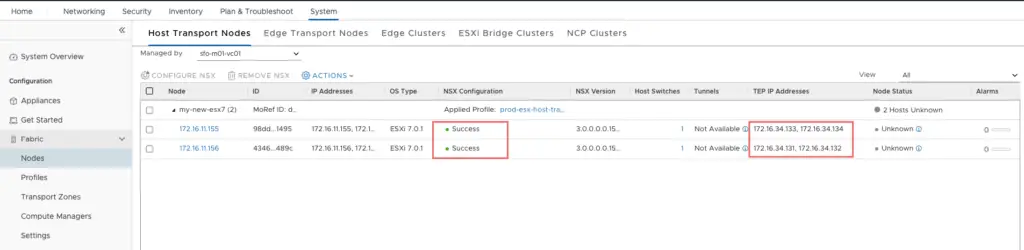
NSX vibs are being pushed to the ESXi host
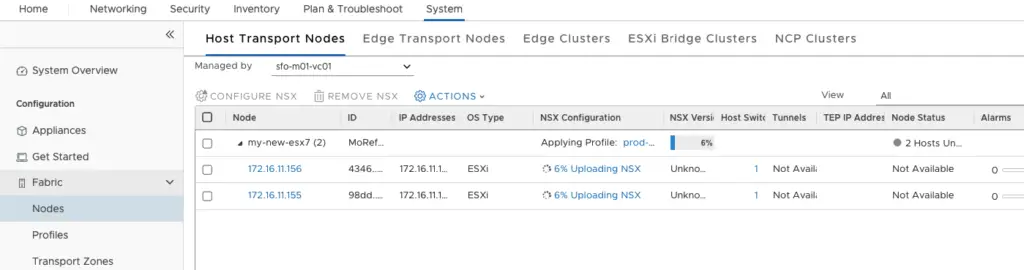
After a few moments, our NSX installation will show a state as success.

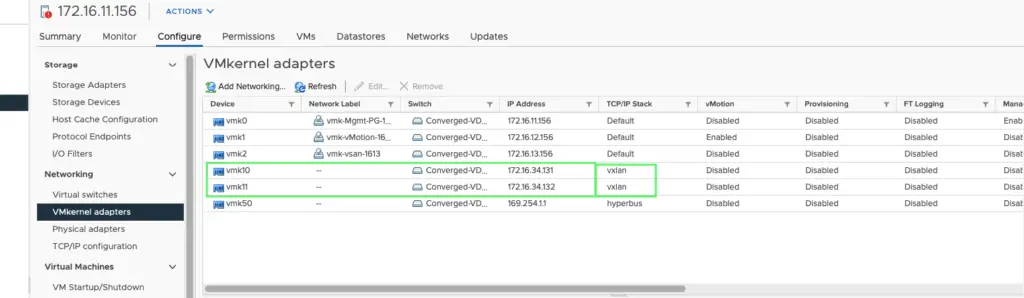
Back on the ESX host, we can now see three more vmk adapters being created
vmk10 and vmk11 which are for our VXLAN and in addition to that vmk50 which is used by NSXT internally for docker communication.
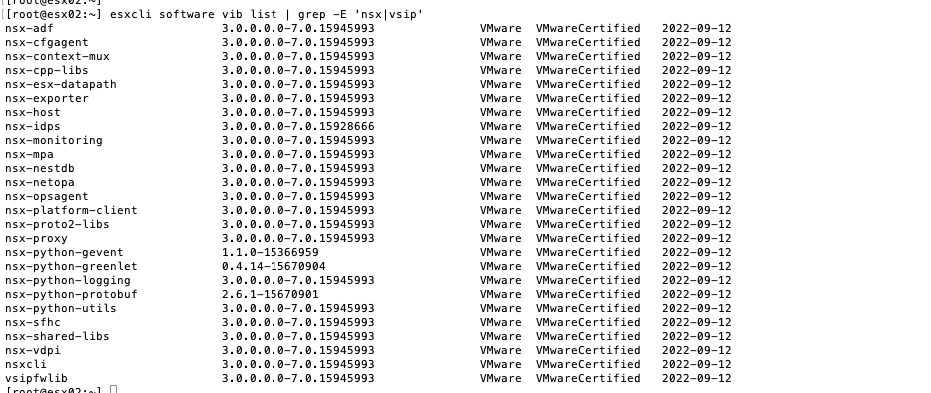
Verify if NSX vibs are installed correctly on host
[root@esx02:~] esxcli network ip interface ipv4 get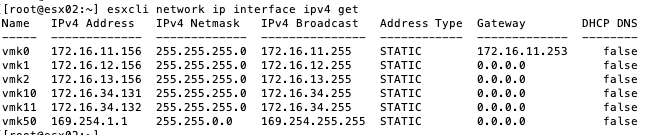
Verify a ping to vmk10 on our peer host to check if its reachable
[root@esx02:~] esxcli network ip interface ipv4 get