

Continuing from our previous lesson where we deployed the App Volume management console, we will now deploy our App Volume agent on our Instant Clone desktop.
We will be following our post Push New Image on Instant Clone Desktop Pool to install a new DEM Flexengine software on our Instant Clone Image.
Step 1. Lets Power ON Instant clone desktop pool golden image we created
Step 2. From our App Volume Software, Click on the X64 installer and Click Next to proceed

Step 3- Accept EULA & Click Next to proceed

Step 5- From the installation menu, we will now select the App Volumes Agent and Click Install to continue

Step 6- The App Volumes agent setup wizard opens so we will click Next to continue

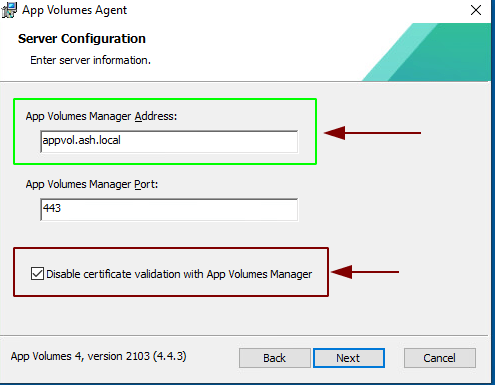
Step 7- We will now need to provide our AppVol server name. Since we aren’t yet utilising certificate validation, we will disable it
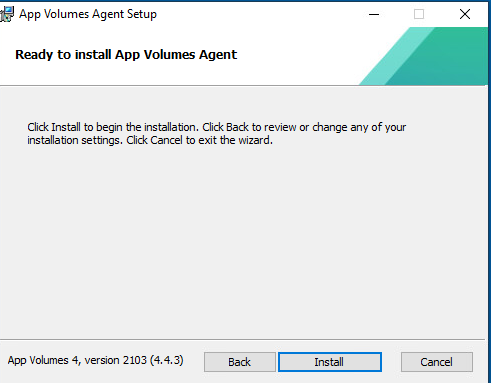
Step 8- Click Install to proceed
Step 9- Click Finish

Step 10- We will now need to reboot this VM
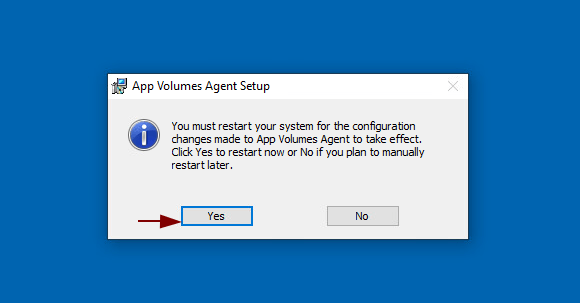
Step 11- We will now need to reboot this VM
Step 12- Validate if our installation is succesful.
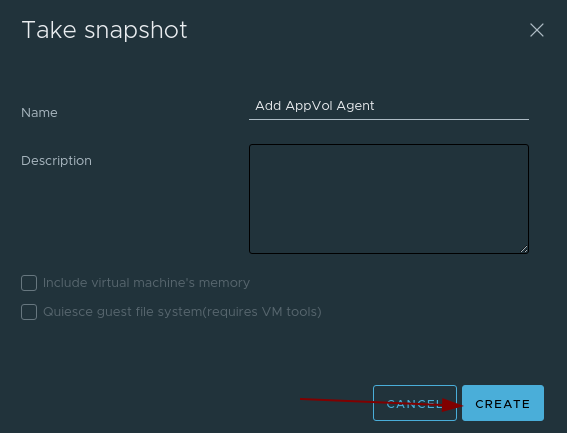
Step 10. Power off the VM

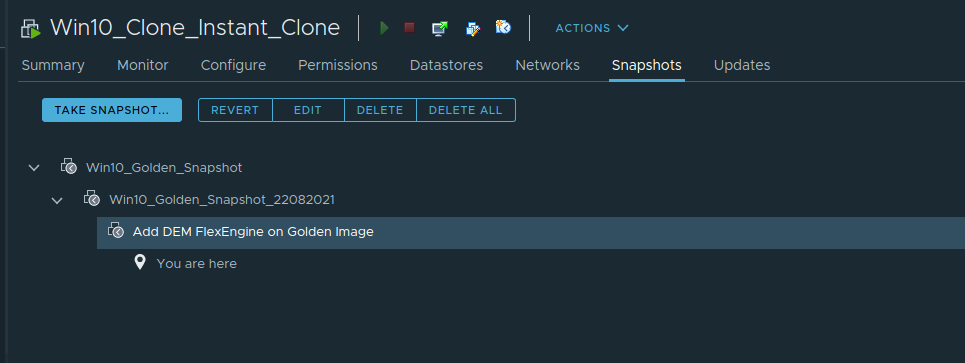
Step 11. Snapshot the VM and give the snapshot a name as for eg: Add AppVol agent
Step 12. Once the snapshot is created, we will now see 3 snapshots in our Golden VM image.

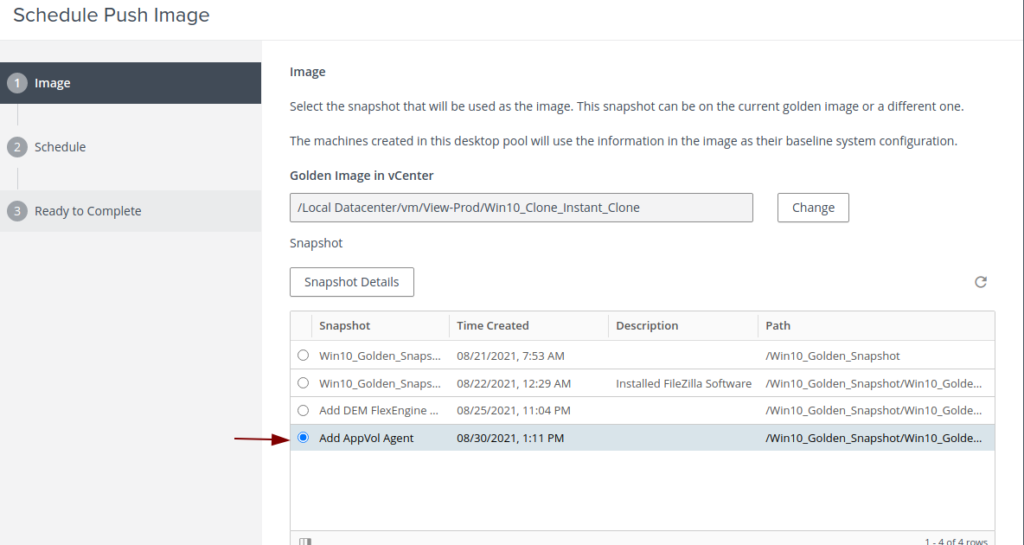
Step 13. Login into our view console and go to Our Instant Clone and Click on Maintain

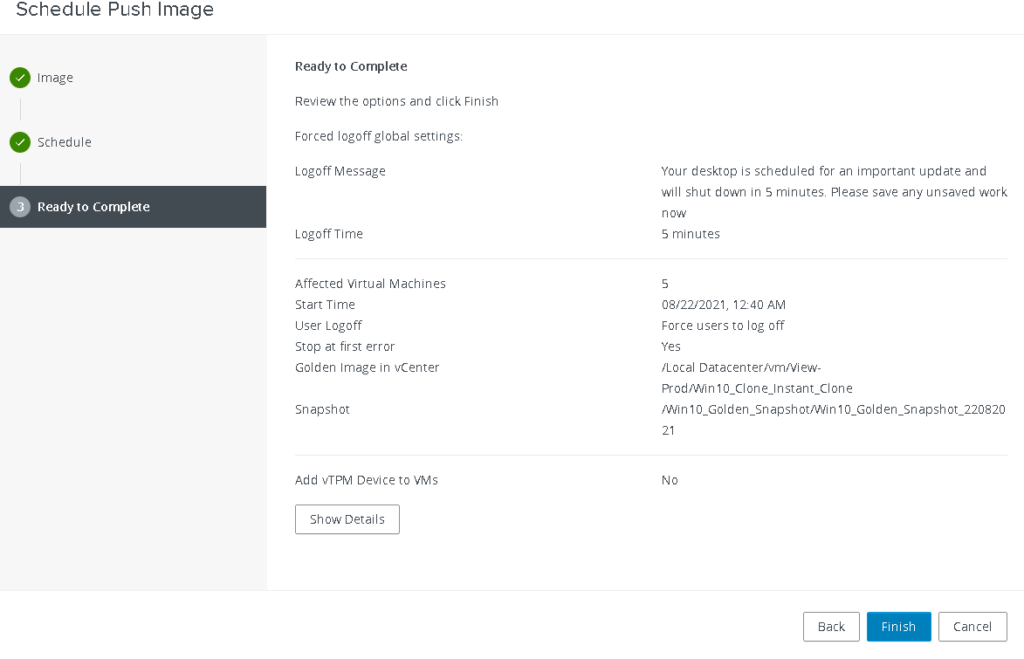
Step 14. Click Schedule to push the Image window, If we wish to change the golden image, we can change from the Change option but here we will select the new snapshot we created and Click Next
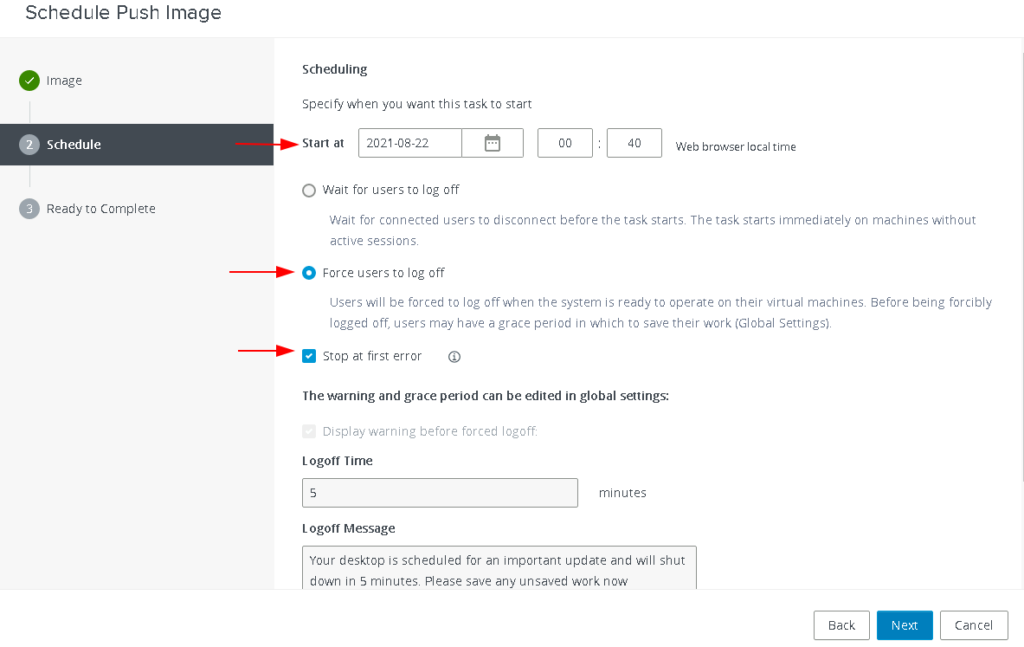
Step 15. All connected VDI users will be disconnected so schedule a time when appropriate
Step 16. Validate all settings and click finish
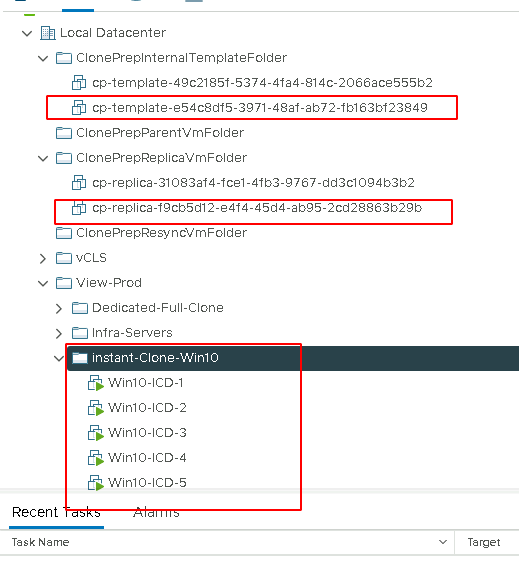
Step 17. We will now start to see changes under the following folder in our vCenter
ClonePrepInternalTemplateFolder
- cp-template-xxxx: This is the template VM that is used to create your Instant Clones. created from your master image.
ClonePrepParentVmFolder
- cp-parent-xxxx: The number of these VMs should match the number of hosts in your cluster.Each ESXi server will have 1 of these powered on and in memory to create the Instant Clone VMs.
ClonePrepReplicaVmFolder
- cp-replica-xxxx: This VM is used to create the cp-parent VMs. It is used to provision additional cp-parent VMs.
ClonePrepResyncVmFolder
- If you want to update/modify the Clones with a new image it will create a VM in here for staging.
A second cp-template and cp-replica VM gets created as shown and in short while we will see al the VDI desktops being reprovisioned with the new image
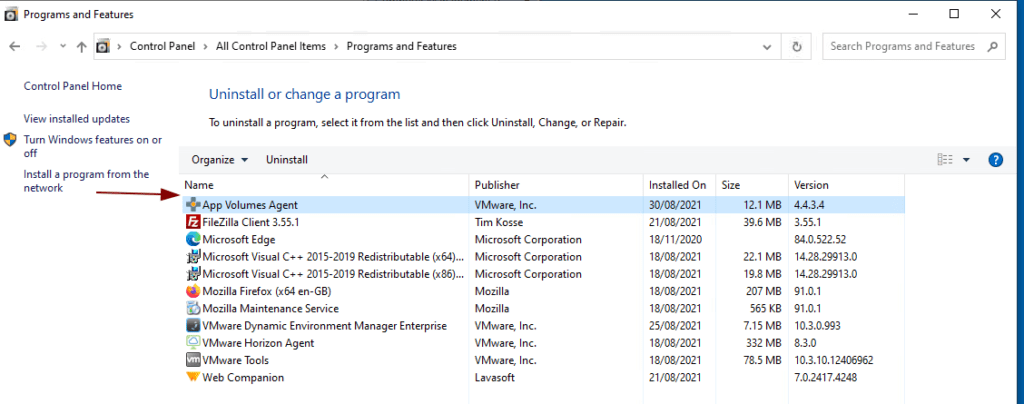
Step 18. Log in back as our vdi desktop user and verify if we can see App Volume Agent installed
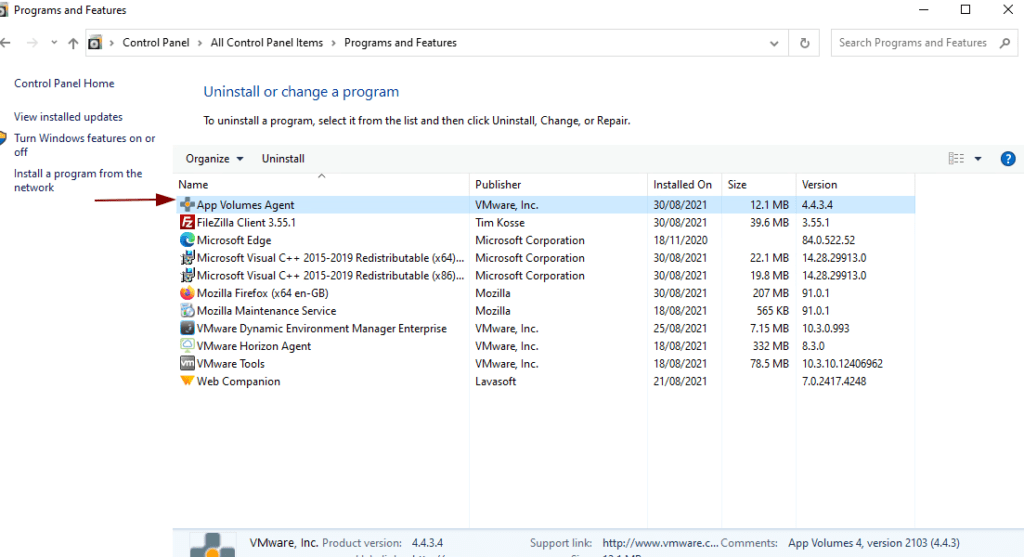
Thus we now pushed a new image to all our VDI desktops in our Instant Clone pool and everything is now refreshed in the Instant Clone desktop pool with our AppVol agent installed on every VM.