

A boot policy is what determines the boot order of an OS. The server could be diskless as in the CISCO blades and it will need to fetch the disk mappings from the san which is also called Boot from SAN.
In the write-up, we will just explore the Cisco UCS blades boot up from a SAN.
Current layout of my SAN.

Steps to be done on the Storage Array
- Zone the ESX host and Storage Array.
- Map a lun of size 50 GB and map it with lun id of 50, just to the esx host and this will serve as our boot lun
Steps to be done on the UCS
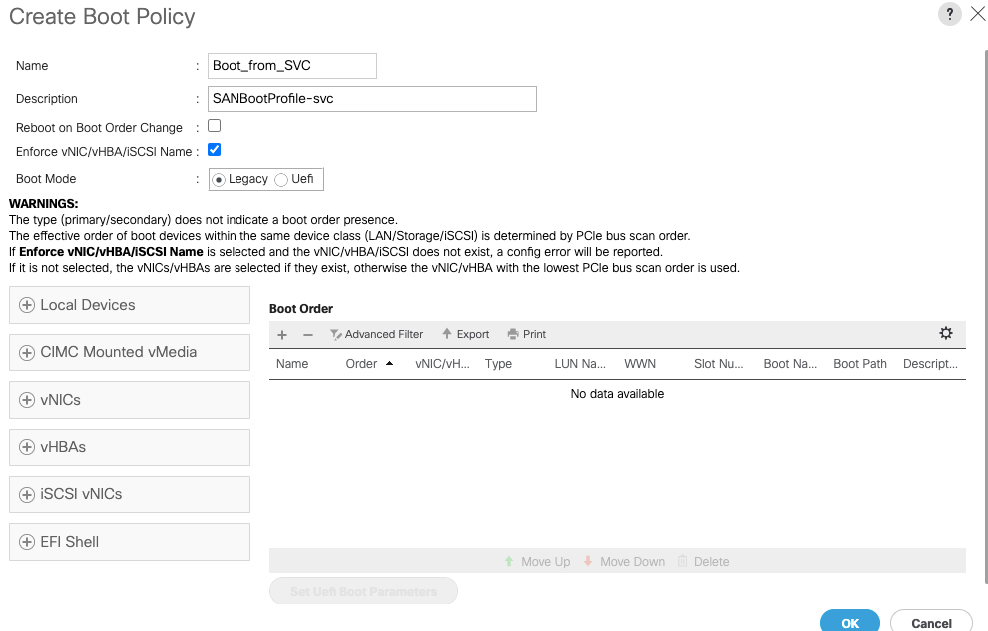
1. Log into Cisco UCS Manager and click on the Servers Tab – Policies – Boot Policies. Right-click boot policies and select Create boot policy.

Give the boot policy a Name and Description as Boot_from_SVC
2. Select the devices that you wish to drag into the Boot order. You can see the order of boot so I will pick my first boot as CD ROM

Our CD image is thus selected and added to boot profile

For us to add SAN Boot, we will now need to attach our vHBA profiles so let’s go to vHBA> Add SAN Boot

Choose the adapter type as primary and vHBA as fc0

Our first vHBA is now added so we will move on to the secondary adapter config

Go to vHBA> Add SAN Boot >Choose the adapter type as secondary and vHBA as fc1

With that done, both our primary and secondary profiles are added and we will now need to attach the boot lun 50 we created previously

Under the vHBA section, choose to Add SAN Boot Target

Choose the option Add San Boot target to SAN primary to link our boot lun to vHBA_fc0

Give the boot lun id and the LUN WWPN number here and click OK.

We will repeat the same for our secondary path fc1 as well

Give the boot lun id and the LUN WWPN number here and click OK.

With that done, we have fully completed the configuration that’s needed so click OK to save the config

Our Boot from SAN policy is ready

Validate if vHBA’s have picked up the correct WWPN number of the boot lun.

We can similarly create a new profile if needed to boot servers locally with their own disk and attach it via service profile as shown below.
